Picture this: it’s a rainy Tuesday, the kind of day when you’re stuck between a half‑finished spreadsheet and an empty stomach, and a friend dares you to make something “healthy enough for a salad but hearty enough for a main.” I rolled my eyes, grabbed a can of beans, and thought, “Why not turn this kitchen mishap into a masterpiece?” The result? A bowl that sings with the nutty chew of farro, the buttery smoothness of white beans, and a salty, nutty kiss from Asiago that makes every spoonful feel like a warm hug.
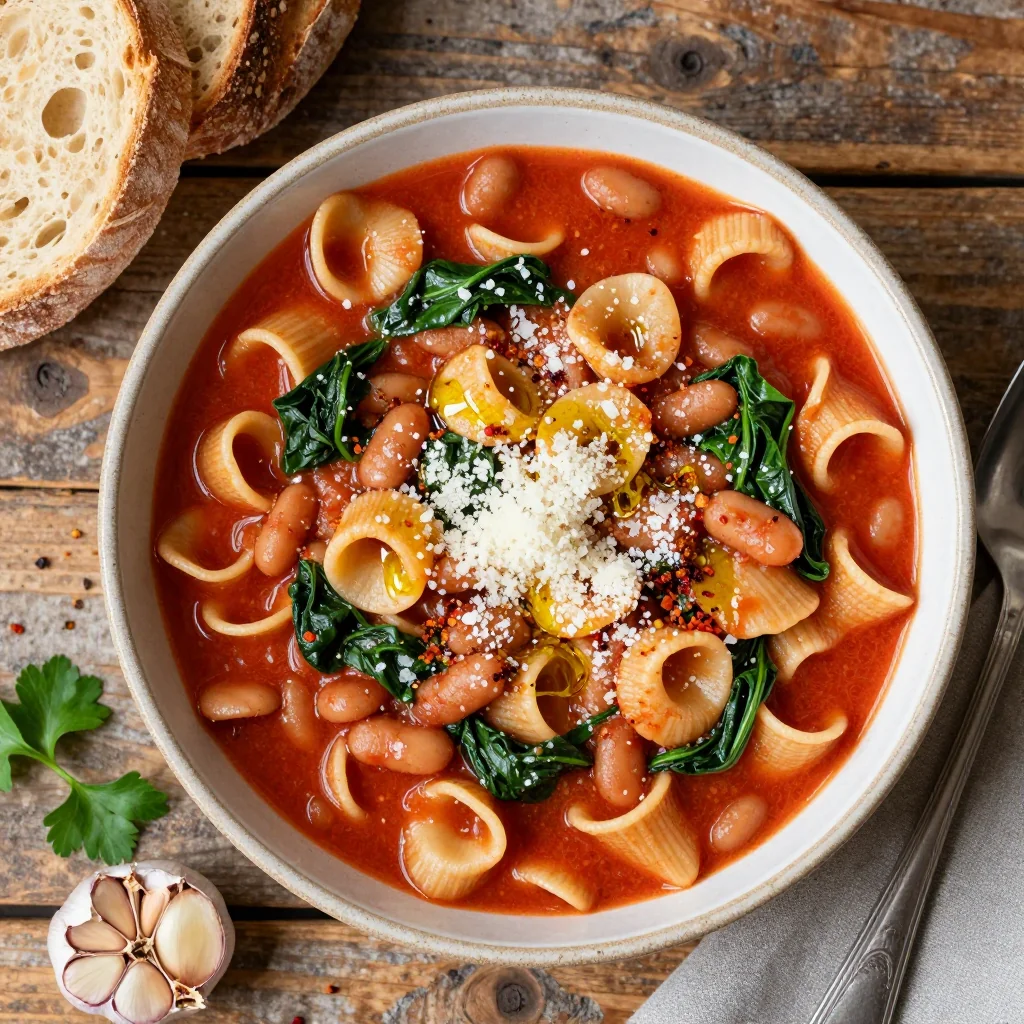
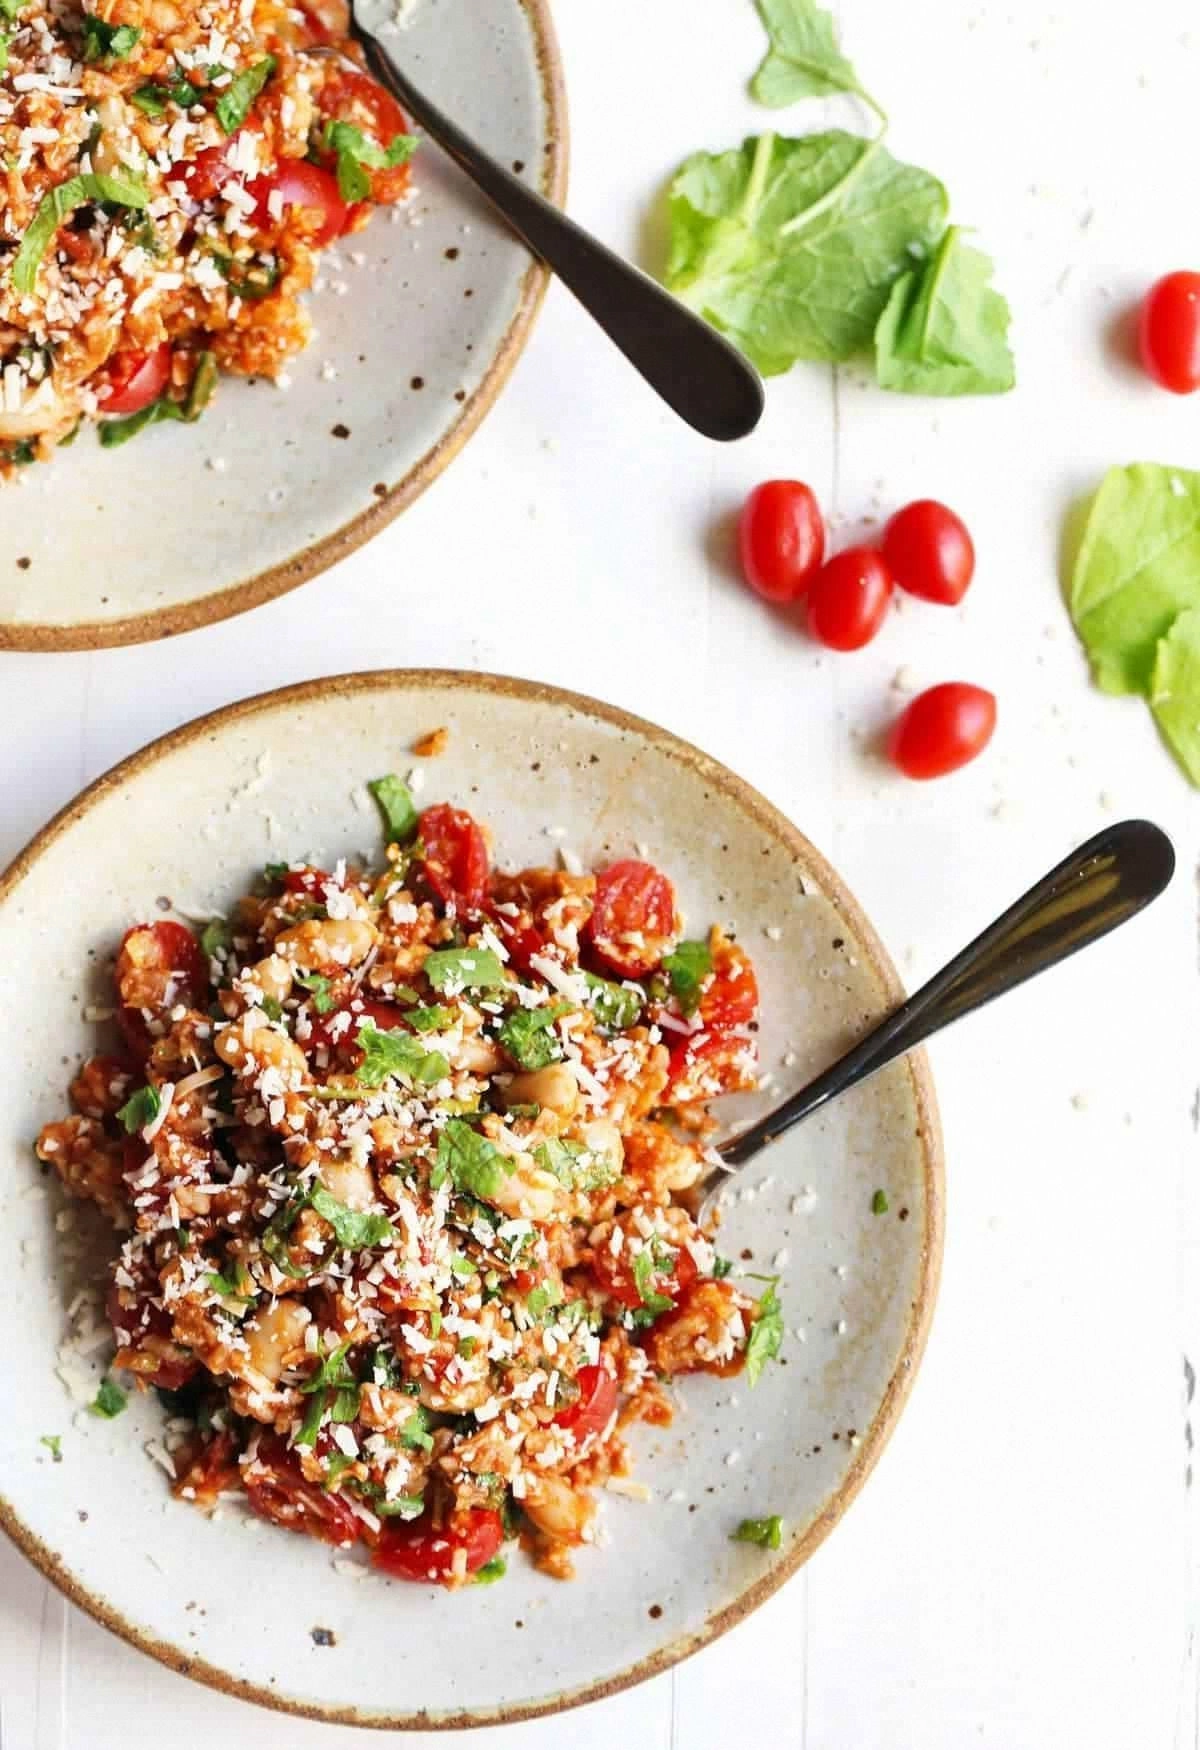
The moment I lifted the lid off the simmering pot, a fragrant cloud of rosemary, garlic, and caramelized onion rolled out, wrapping the kitchen in a perfume that could coax a smile from the grumpiest of neighbors. The farro swelled like tiny, golden pearls, each grain soaking up the broth and releasing a subtle, earthy sweetness. When I tossed in kale, its deep green hue contrasted dramatically with the ruby‑red bursts of cherry tomatoes, turning the dish into a visual feast as well as a gustatory one.
Most recipes for bean‑and‑grain bowls either skimp on flavor or drown the ingredients in a soupy mess. I’ve tried the “quick” versions that rely on canned broth and a sprinkle of cheese—bland, soggy, and frankly disappointing. This version, however, uses a simple toasting technique for the farro, a brief sauté of aromatics, and a finishing swirl of grated Asiago that melts into a silky coating. The result is a dish that balances texture, depth, and a surprise pop of brightness from a hint of lemon zest.
And here’s the kicker: I’m about to reveal a secret step involving a quick toast of the farro that most cooks completely overlook. Trust me, it’s the game‑changer that turns ordinary grains into crunchy‑yet‑chewy jewels. Let me walk you through every single step — by the end, you’ll wonder how you ever made it any other way.
What Makes This Version Stand Out
- Flavor: The combination of roasted farro, savory beans, and sharp Asiago creates layers that evolve with each bite, delivering a taste that’s both comforting and sophisticated.
- Texture: You get a satisfying chew from the farro, a buttery melt from the beans, and a slight crisp from the toasted aromatics—no mushy, one‑note mouthfeel here.
- Simplicity: With just a handful of pantry staples and a 30‑minute cook time, this dish is approachable for weekday dinners without sacrificing depth.
- Uniqueness: The final flourish of grated Asiago is rarely used in bean‑and‑grain bowls, giving it an Italian‑inspired twist that sets it apart.
- Crowd Reaction: I dare you to taste this and not go back for seconds; even the pickiest eaters have been known to ask for the recipe before the plate is empty.
- Ingredient Quality: Using high‑quality farro and a good wedge of Asiago makes a world of difference—cheap substitutes leave the dish flat.
- Cooking Method: The toasting step creates a nutty backdrop that most recipes miss, turning the farro into a flavor‑carrier rather than a filler.
- Make‑Ahead Potential: This bowl stores beautifully; the flavors meld overnight, making it even more delicious the next day.
Inside the Ingredient List
The Flavor Base
We start with the classic trio of onion, garlic, and olive oil. The onion, when diced finely and sautéed until translucent, releases natural sugars that caramelize just enough to add a subtle sweetness. Garlic, minced to a fine paste, infuses the oil with its pungent, aromatic punch, creating a fragrant foundation that you’ll smell the moment the pan hits the stove. If you skip this step, the dish will lack that deep, comforting backdrop that makes the beans and farro feel like they belong together.
Swap: Shallots can replace onion for a milder, slightly sweeter note. Use a splash of butter instead of olive oil for a richer mouthfeel, but keep an eye on the heat to avoid burning.
The Texture Crew
Farro is the star grain here—its chewy, slightly nutty texture holds up well against the creamy beans. Rinse the farro under cold water before cooking to remove any dust and to keep the grains from sticking together. If you’re in a hurry, a quick‑soak for 15 minutes can shave off a few minutes of cooking time without compromising texture. Skipping the rinse can lead to a gritty mouthfeel, something no one wants in a comforting bowl.
Kale adds a bright green contrast and a slight earthiness. Massaging the kale with a pinch of salt for a minute softens its fibrous veins, making it more tender and easier to chew. If kale feels too bitter for your palate, try baby spinach or Swiss chard as a milder alternative.
The Unexpected Star
Asiago cheese is the secret weapon. Its sharp, buttery profile melts into the warm broth, coating each grain and bean with a velvety sheen. Choose a good-quality, aged Asiago for the most pronounced flavor; pre‑shredded versions often contain anti‑caking agents that can affect the melt. If you can’t find Asiago, Pecorino Romano or a sharp Parmesan make excellent stand‑ins, though the flavor will shift slightly toward a saltier profile.
The Final Flourish
Cherry tomatoes burst with acidity that cuts through the richness of the cheese and beans, adding a pop of color and a juicy contrast. A splash of lemon zest at the end brightens the entire bowl, making the flavors dance on the tongue. Finally, a drizzle of extra‑virgin olive oil just before serving adds a glossy finish and a hint of fruitiness.
Everything's prepped? Good. Let's get into the real action...
The Method — Step by Step
Heat a large, heavy‑bottomed pot over medium heat and add the olive oil. Once the oil shimmers, toss in the diced onion. Sauté for about 5 minutes, stirring occasionally, until the onion turns a translucent gold and releases that sweet, caramelized scent. That sizzle when it hits the pan? Absolute perfection.
Kitchen Hack: If you’re short on time, add a pinch of sugar to the onions; it speeds up caramelization without making them sweet.Add the minced garlic and dried rosemary to the pot. Cook for another 30 seconds, just until the garlic becomes fragrant—watch it closely; you don’t want it to brown, or it will turn bitter. The aroma should be earthy and inviting, a signal that the flavor base is building correctly.
Now, stir in the farro. Let it toast in the aromatics for 2‑3 minutes, stirring constantly. You’ll hear a faint crackle as the grains warm up, and the kitchen will fill with a nutty perfume that makes you want to peek inside the pot just to sniff.
Watch Out: If the farro starts to stick, add a splash more olive oil; you want a light coating, not a burnt crust.Pour in the vegetable broth, scraping the bottom of the pot to release any browned bits. Increase the heat to bring the mixture to a gentle boil, then reduce to a simmer. Cover the pot and let the farro cook for about 20 minutes, or until it’s tender but still has a slight bite.
While the farro is cooking, rinse and drain the cannellini beans. When the farro is about 10 minutes from done, stir the beans into the pot. Their creamy texture will begin to meld with the broth, creating a silky base. This is the moment of truth—if the broth looks too thick, add a splash of water or extra broth.
Kitchen Hack: Toss the beans in a pinch of smoked paprika before adding; it adds a subtle smoky depth without overwhelming the dish.When the farro reaches the perfect al‑dente stage, fold in the chopped kale and halved cherry tomatoes. The kale will wilt quickly, turning a vibrant emerald, while the tomatoes will soften just enough to release a sweet juice that brightens the broth. Stir gently; you want the greens to coat the grains, not become a mush.
Turn off the heat and immediately sprinkle the grated Asiago over the hot mixture. The residual heat will melt the cheese into a glossy veil that clings to every grain and bean. Add the lemon zest now, giving the dish a final lift of citrusy brightness.
Season generously with salt and freshly cracked black pepper. Taste and adjust—remember, the cheese already adds saltiness, so you might need less than you think. Serve the bowl hot, with an extra drizzle of olive oil if you like a richer mouthfeel.
That's it — you did it. But hold on, I've got a few more tricks that'll take this to another level...
Insider Tricks for Flawless Results
The Temperature Rule Nobody Follows
Never add the cheese while the pot is boiling; the high heat can cause the Asiago to separate and become grainy. Instead, remove the pot from the stove, let it sit for 30 seconds, then fold in the cheese. This gentle heat ensures a silky melt that coats the farro like velvet. A friend once tried adding the cheese directly to a rolling boil—let's just say the texture turned into a clumpy nightmare.
Why Your Nose Knows Best
Before you even taste, let your nose be the judge. When the farro finishes cooking, you should detect a toasted, nutty aroma mingling with the earthy scent of beans. If the smell is flat, the farro probably needs a few more minutes. Trusting your sense of smell saves you from a bland final product.
The 5‑Minute Rest That Changes Everything
Once everything is combined, cover the pot and let it rest for five minutes. This short pause allows the grains to absorb any remaining liquid and the flavors to marry. The result is a bowl that feels cohesive, not a collection of separate components. Skipping this rest can leave you with a dish that tastes disjointed.
Seasoning Layers for Depth
Season at three stages: after sautéing the aromatics, after the farro has absorbed the broth, and finally after adding the cheese. Each layer builds complexity, ensuring the final bite is never one‑dimensional. If you only season at the end, the flavors won’t have time to integrate.
Finish with Freshness
A final squeeze of lemon juice or a handful of fresh herbs (like parsley or basil) right before serving adds a bright contrast that lifts the whole bowl. It’s the culinary equivalent of a high‑note in a song—without it, the melody feels incomplete.
Creative Twists and Variations
This recipe is a playground. Here are some of my favorite ways to switch things up:
Spicy Sriracha Swirl
Stir in a tablespoon of sriracha after the beans are added for a gentle heat that complements the cheese without overwhelming it. Top with sliced jalapeños for extra kick. Perfect for those who love a little fire.
Roasted Veggie Medley
Swap the kale and tomatoes for a mix of roasted carrots, zucchini, and red bell peppers. Roast the veggies with a drizzle of olive oil and thyme before adding them to the pot. The caramelized edges add a sweet‑savory dimension.
Mediterranean Olive Boost
Mix in a handful of chopped Kalamata olives and a teaspoon of capers during the final stir. The briny notes enhance the Asiago’s sharpness and give the bowl a sun‑kissed, coastal vibe.
Vegan Version
Replace the Asiago with a generous scoop of nutritional yeast and a drizzle of cashew‑based “cheese” sauce. Use vegetable broth fortified with mushroom flavor for extra umami. The texture stays the same; the flavor shifts to a wholesome, plant‑based delight.
Autumn Harvest
Add cubed butternut squash and a pinch of sage in place of kale. The sweet, nutty squash pairs beautifully with the farro, while sage adds an earthy, seasonal aroma. Ideal for a cozy fall dinner.
Protein Power
Throw in grilled chicken breast strips or a handful of cooked quinoa for an extra protein boost. This turns the dish into a post‑workout recovery meal without sacrificing the original flavor profile.
Storing and Bringing It Back to Life
Fridge Storage
Transfer the cooled bowl to an airtight container and store it in the refrigerator for up to four days. The flavors continue to meld, making the second day even more flavorful. When reheating, add a splash of water or broth to revive the creamy texture.
Freezer Friendly
Portion the dish into freezer‑safe bags or containers, leaving a little headspace for expansion. Freeze for up to three months. Thaw overnight in the fridge, then reheat gently on the stovetop, adding a bit of broth to prevent drying out.
Best Reheating Method
Reheat on the stovetop over low heat, stirring occasionally, and add a teaspoon of water per serving. This gentle steaming brings the farro back to its al‑dente glory and melts the cheese without scorching. Microwaving works in a pinch, but the stovetop method preserves texture.