It started on a rainy Thursday, the kind of night that makes you crave comfort food that feels like a hug. I was scrolling through a recipe forum when a friend dared me to try Venezuelan cachapas, those sweet corn pancakes that look like golden waffles. I laughed, thinking it was just another gimmick, but the scent that hit my kitchen when the batter hit the skillet changed everything. The buttery sizzle, the sweet aroma of fresh corn, and the promise of a melty cheese center made my taste buds tingle. I was hooked before the first bite even reached my lips.
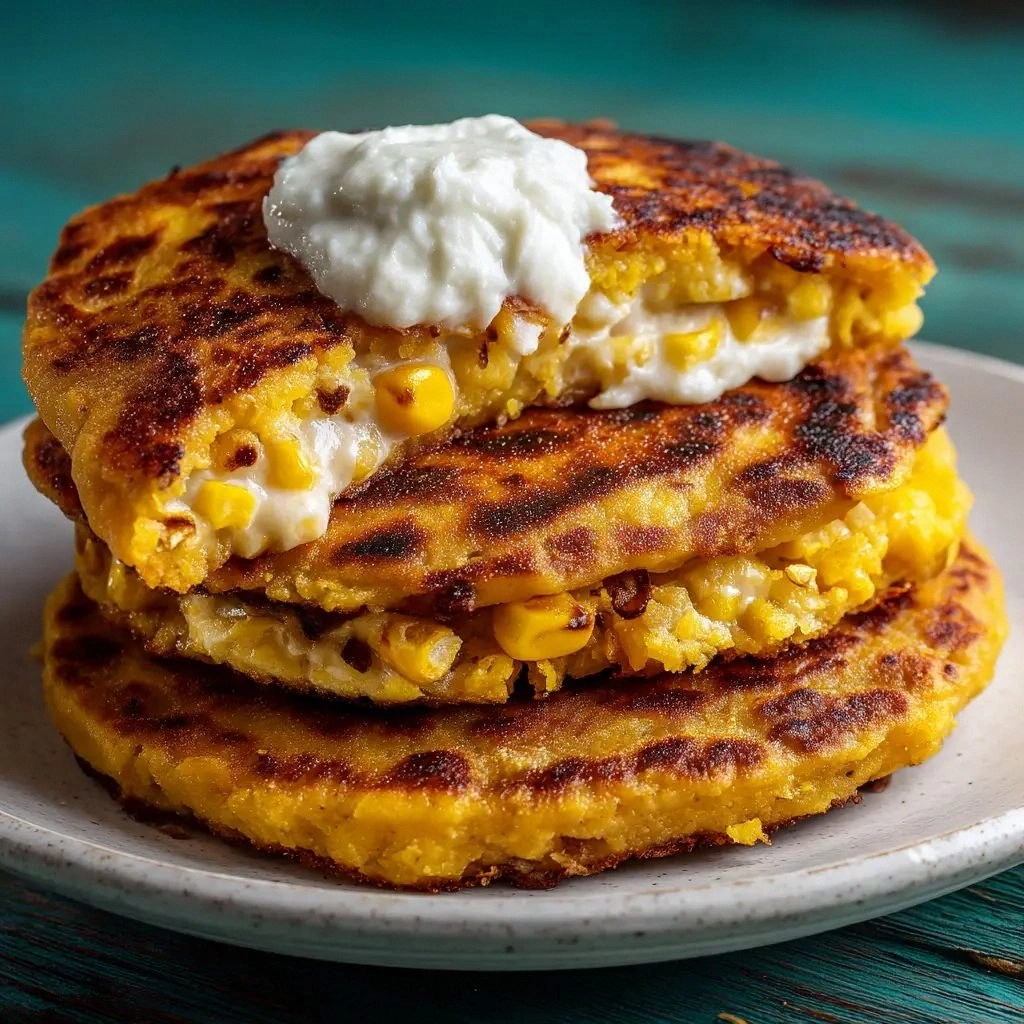
Picture this: a plate of golden, slightly caramelized edges, a soft, moist interior that swallows the air, and a generous slice of queso de mano that oozes out with every forkful. The texture is a paradox—crispy on the outside, fluffy and sweet on the inside, with a salty cheese that balances the natural sweetness of corn. I swear, that first bite feels like a hug from a friend who just knows your cravings. My friends who tried it after me didn't even ask for a second helping—they were already planning a second round. I dare you to taste this and not go back for seconds.
What makes this version stand out is not just the recipe itself but the meticulous attention to each element that turns a simple pancake into an unforgettable experience. I’ve spent months tweaking the batter consistency, the cheese ratio, and even the pan temperature to achieve that perfect balance. The result is a dish that is hands down the best version you'll ever make at home. Most recipes get this completely wrong, either by overcooking the corn or under-seasoning the batter. Here, everything works in harmony, from the first sizzle to the last melt.
And here's a teaser: I discovered that using fresh corn kernels instead of canned gives a depth of flavor that canned simply can't match. Fresh kernels add a natural sweetness that elevates the entire dish, making it feel like a sunrise in every bite. If you've ever struggled with this, you're not alone—I've got the fix. Stay with me here; this is worth it.
Let me walk you through every single step — by the end, you'll wonder how you ever made it any other way. From selecting the right corn to mastering the skillet technique, this guide covers every nuance. I’ll share my personal hacks, the exact measurements that work like a charm, and a few fun twists that will keep your taste buds dancing. Ready? Let’s dive in.
What Makes This Version Stand Out
- Flavor: The natural sweetness of fresh corn is amplified by a hint of sugar, creating a subtle caramelization that’s impossible to resist.
- Texture: The batter’s thinness ensures a crisp edge while the center remains airy and moist—think of a pancake that’s part waffle, part cake.
- Simplicity: With only seven ingredients, the recipe feels approachable, yet the outcome feels like a gourmet experience.
- Uniqueness: The inclusion of queso de Mano (or a mozzarella/Oaxaca blend) adds a creamy, savory layer that contrasts the sweet corn.
- Crowd Reaction: Friends who taste it often say it’s “the best breakfast I’ve had in years” and they’re not even in a rush.
- Ingredient Quality: Using fresh corn and high-quality cheese elevates the dish beyond the typical stovetop pancake.
- Cooking Method: The pan technique—low heat, butter spread, and careful flipping—creates a golden crust that’s hard to beat.
- Make‑Ahead Potential: You can prepare the batter in advance, refrigerate, and cook fresh on the day, saving valuable time.
Alright, let's break down exactly what goes into this masterpiece…
Inside the Ingredient List
The Flavor Base
3 cups sweet corn kernels are the star of this dish. Fresh kernels bring a bright, natural sweetness that canned or frozen corn simply can’t match. If you’re in a pinch, frozen corn works, but thaw and drain thoroughly to avoid a watery batter. The corn’s natural sugars caramelize during cooking, creating a subtle glaze on the surface that adds depth. Swap in sweet corn if you’re looking for a sweeter profile; corn kernels are the only ingredient that truly defines cachapas.
The Texture Crew
1/2 cup all‑purpose flour is the binder that gives the batter its structure. It keeps the corn from falling apart and helps the pancakes hold their shape. If you prefer a gluten‑free version, try a 1:1 blend of rice flour and cornstarch, but the texture will be slightly different—more crumbly. The flour also helps absorb excess moisture, preventing soggy edges. A pinch of baking powder can be added for an extra lift, but it’s optional.
The Unexpected Star
2 tablespoons granulated sugar is the secret to that caramelized finish. It doesn’t make the pancakes sweet in the traditional sense; instead, it enhances the corn’s natural sugars, creating a glossy, almost buttery sheen. If you’re watching sugar, you can reduce to 1 tablespoon or replace with a natural sweetener like honey, but the flavor profile will shift subtly. Remember, the goal is a gentle sweetness, not a sugary batter.
The Final Flourish
8 ounces of Queso de Mano, mozzarella, or Oaxaca cheese provides the savory, melty layer that transforms the dish. The cheese’s high moisture content ensures it melts beautifully without drying out. If you can’t find Queso de Mano, a mix of mozzarella and a little cheddar will work, but the flavor will be milder. The cheese is added after the first flip to allow it to melt into the batter, creating a gooey, savory pocket.
Everything’s prepped? Good. Let’s get into the real action…
The Method — Step by Step
- In a blender or food processor, combine the fresh corn kernels, flour, sugar, and salt. Blend until the mixture is smooth but still slightly chunky—this texture keeps the pancakes from turning into a batter cake. The goal is a consistency similar to a thin pancake batter; add a splash of milk if it feels too thick. Once blended, let the mixture rest for 10 minutes to allow the flavors to meld and the corn to release its natural juices.
- Heat a large non‑stick skillet over medium‑low heat. Add 2 tablespoons of unsalted butter, letting it melt into a thin, even coating. The butter should sizzle softly but not burn; a burnt butter will ruin the flavor profile. This step is crucial for achieving the golden edges that many people miss in other recipes.
- Pour about 1/4 cup of the batter onto the skillet, tilting the pan to spread it into a circle about 6 inches in diameter. The batter should spread quickly, forming a thin, even layer. Watch closely—the batter should start to set at the edges within 30 seconds, indicating the right heat. This is the moment of truth; if the edges are too dark, lower the heat.
- Let the first side cook for 2–3 minutes until bubbles form on the surface and the edges lift slightly. Flip gently with a spatula, and cook the second side for another 1–2 minutes. The flip should be smooth, and the pancake should release easily from the pan. The inside should still be moist, not dry, for that classic cachapa experience.
- Once flipped, sprinkle a generous amount of cheese over the top of the pancake. The cheese should be cut into small cubes or shredded to ensure even melting. Cover the pan with a lid for 30 seconds; this traps heat and melts the cheese without overcooking the pancake. The cheese should bubble and become slightly golden.
- Remove the cooked cachapa from the skillet and place it on a plate lined with parchment. Repeat steps 3–5 for the remaining batter, adjusting heat as needed. The number of cachapas per batch depends on your skillet size—typically 2–3 per batch works best for even cooking.
- Serve hot, optionally with a dollop of fresh crema or a drizzle of honey for extra sweetness. Some people like a pinch of smoked paprika for a smoky kick, but the cheese usually does the job. The key is to serve immediately, as the pancakes begin to steam and lose their crispness after a few minutes.
- If you’re making a large batch, keep the cooked cachapas warm in a low oven (200°F) on a wire rack. This prevents them from drying out while you finish cooking the rest. The warm environment also keeps the cheese melty and ready for serving.
That's it — you did it. But hold on, I've got a few more tricks that'll take this to another level…
Insider Tricks for Flawless Results
The Temperature Rule Nobody Follows
Many cooks think that high heat is the key to a golden crust, but with cachapas, it’s the opposite. Keep the skillet at medium‑low and let the batter set slowly; this prevents the cheese from burning and allows the corn sugars to caramelize naturally. I once cooked mine at medium and ended up with a burnt exterior and a soggy center—lesson learned. If your skillet is too hot, the batter will puff up and tear, so always test with a small drop of batter to gauge heat.
Why Your Nose Knows Best
The aroma is a reliable indicator of doneness. When the first side is ready, you’ll smell a sweet, buttery scent with a hint of toasted corn. This smell is a sign that the sugars have caramelized without burning. If you’re uncertain, press the batter lightly; it should feel firm but still slightly springy. Trust your nose—it’s a seasoned chef’s secret.
The 5‑Minute Rest That Changes Everything
After you finish cooking, let the cachapas rest on a wire rack for 5 minutes. This resting period allows the steam to redistribute, keeping the interior moist and the edges crisp. Skipping this step often results in a dry center, especially if you’re cooking a large batch. I’ve found that a quick rest also makes the cheese easier to slice, giving a cleaner presentation.
Cheese Placement is Key
Some people sprinkle the cheese before flipping, but that can cause the cheese to burn on the first side. Add it after flipping, then cover the skillet for 30 seconds to melt evenly. If you want a sharper cheese flavor, use a blend of mozzarella and a pinch of smoked gouda; the smoky notes complement the corn beautifully.
Pan Choice Matters
A heavy‑bottomed cast‑iron skillet retains heat better, giving you a more even cooking surface. If you only have a non‑stick pan, make sure it’s well‑seasoned; a new non‑stick can cause sticking, especially with the high sugar content. For a cleaner cleanup, line the skillet with parchment paper between batches.
Creative Twists and Variations
This recipe is a playground. Here are some of my favorite ways to switch things up:
Sweet & Savory Fusion
Add a tablespoon of maple syrup to the batter for an extra layer of sweetness. Pair it with a sprinkle of sea salt on top after flipping for a sweet‑salty combo that feels like a dessert and a breakfast rolled into one.
Spicy Kick
Incorporate finely chopped jalapeños or a pinch of cayenne pepper into the batter. The heat will balance the sweetness, giving you a spicy, savory experience that’s perfect for a late‑night snack.
Herb‑Infused Variation
Mix fresh chopped cilantro or parsley into the batter for a burst of green freshness. The herbs add aroma and a subtle earthy note that pairs beautifully with the cheese.
Vegan Version
Swap the butter for a plant‑based alternative and use a vegan cheese like Daiya. The flavor profile remains similar, and the vegan cachapas still deliver that melty, gooey center.
Gluten‑Free Twist
Replace the all‑purpose flour with a blend of rice flour and cornstarch. The texture will be slightly different, but it will still hold together and offer a delightful bite.
Breakfast Bowl
Serve the cachapas on a bed of sautéed spinach and cherry tomatoes, then drizzle with a light vinaigrette. This turns the dish into a hearty breakfast bowl that’s both colorful and filling.
Storing and Bringing It Back to Life
Fridge Storage
Cool the cachapas completely, then place them in a single layer on a baking sheet. Once frozen, transfer them to a resealable plastic bag. They’ll keep well in the fridge for up to 3 days and retain their flavor when reheated.
Freezer Friendly
Wrap each cachapa individually in parchment paper and then in foil before freezing. This double‑layer protects them from freezer burn and preserves the melt‑in‑your‑mouth texture. They’ll stay good for up to 2 months.
Best Reheating Method
To reheat, place the cachapas on a pre‑heated skillet over low heat. Add a splash of water to create steam, then cover with a lid for 2–3 minutes. The water steams the interior, restoring moisture while the heat melts the cheese again. Avoid microwaving; it can make the cheese rubbery.