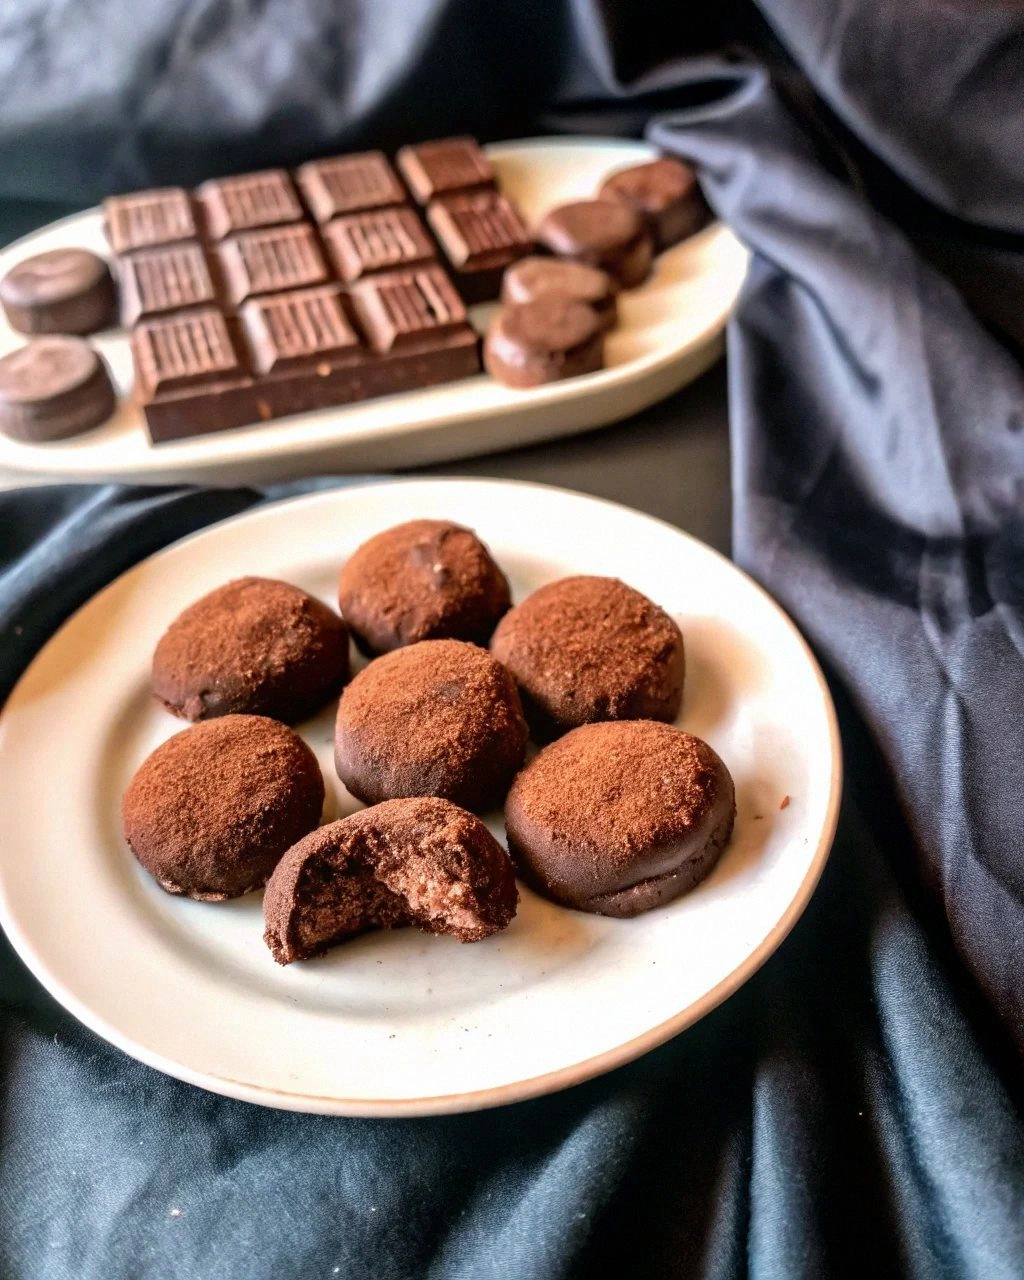
Picture this: it's 11:37 PM on a Tuesday night, and I'm standing in my kitchen wearing mismatched socks, flour in my hair, absolutely demolishing my fourth piece of what might be the most addictive dessert I've ever created. The chewy chocolate mochi gives way like a dream, revealing this silky ganache that basically makes time stop. My roommate walked in, caught me red-handed, and I didn't even apologize because honestly? These little mochi bombs are worth every single calorie and awkward explanation.
I'd been chasing this particular dragon for months after a disastrous attempt at a friend's birthday party where my mochi turned into something resembling rubbery hockey pucks. The memory still haunts me — guests politely chewing, eyes darting around, searching for napkins to discreetly dispose of evidence. But here's the thing about epic failures: they either break you or send you on a obsessive quest for redemption. I chose redemption, and honey, it tastes like chewy chocolate paradise wrapped around a molten chocolate center that would make Willy Wonka weep with joy.
What makes this version different from every other chocolate mochi recipe cluttering the internet? We're not just dumping cocoa powder into sweet rice flour and calling it a day. Oh no, my friend. We're creating layers of chocolate intensity that build like a symphony — the deep, almost bitter notes of dark chocolate in the mochi skin, the creamy milk chocolate ganache center, and that whisper of espresso that makes the whole thing sing. The texture game here is absolutely next-level: that signature mochi chew but with a softness that makes you wonder if clouds somehow got chocolate-washed and decided to live in your mouth.
And here's the kicker — these gorgeous little parcels of joy are actually easier to make than that banana bread you've been stress-baking since 2020. No fancy equipment, no impossible-to-find ingredients, just pure chocolate magic that comes together faster than you can binge-watch two episodes of your latest obsession. Let me walk you through every single step — by the end, you'll wonder how you ever made it any other way.
What Makes This Version Stand Out
Before we dive into the nitty-gritty, let me hit you with exactly why these chocolate mochi will ruin all other desserts for you. I'm not being dramatic — I've received angry texts from friends who claimed they couldn't enjoy regular chocolate anymore after tasting these.
- Texture Revolution: Most mochi recipes give you that pleasant chew, but we're taking it to cloud-level softness while maintaining that satisfying pull. The secret lies in the steam-to-microwave ratio that creates tiny air pockets, making each bite feel like eating a chocolate-scented pillow.
- Ganache Game-Changer: Instead of a basic chocolate filling, we're making a two-tone ganache that stays liquid at room temperature but doesn't leak through the mochi skin. It's like having a chocolate lava cake, but portable and way more sophisticated.
- Flavor Layering: We're not just adding cocoa powder — we're building chocolate complexity with three different forms: Dutch-processed cocoa for depth, melted dark chocolate for richness, and a touch of espresso powder to amplify everything without making it taste like coffee.
- Foolproof Technique: No more guessing if your mochi is cooked properly. My finger-indentation test (more on this later) ensures perfect texture every single time, whether you're a seasoned baker or someone who usually burns water.
- Make-Ahead Magic: These actually improve after an overnight rest in the fridge — the flavors meld and intensify. Make a double batch on Sunday, and you'll have dessert sorted for the entire week (if they last that long).
- Crowd Psychology: There's something about bite-sized chocolate parcels that makes people lose their minds. I've watched the most disciplined health nuts inhale three without blinking, then ask if there's more hidden somewhere.
Alright, let's break down exactly what goes into this masterpiece...
Inside the Ingredient List
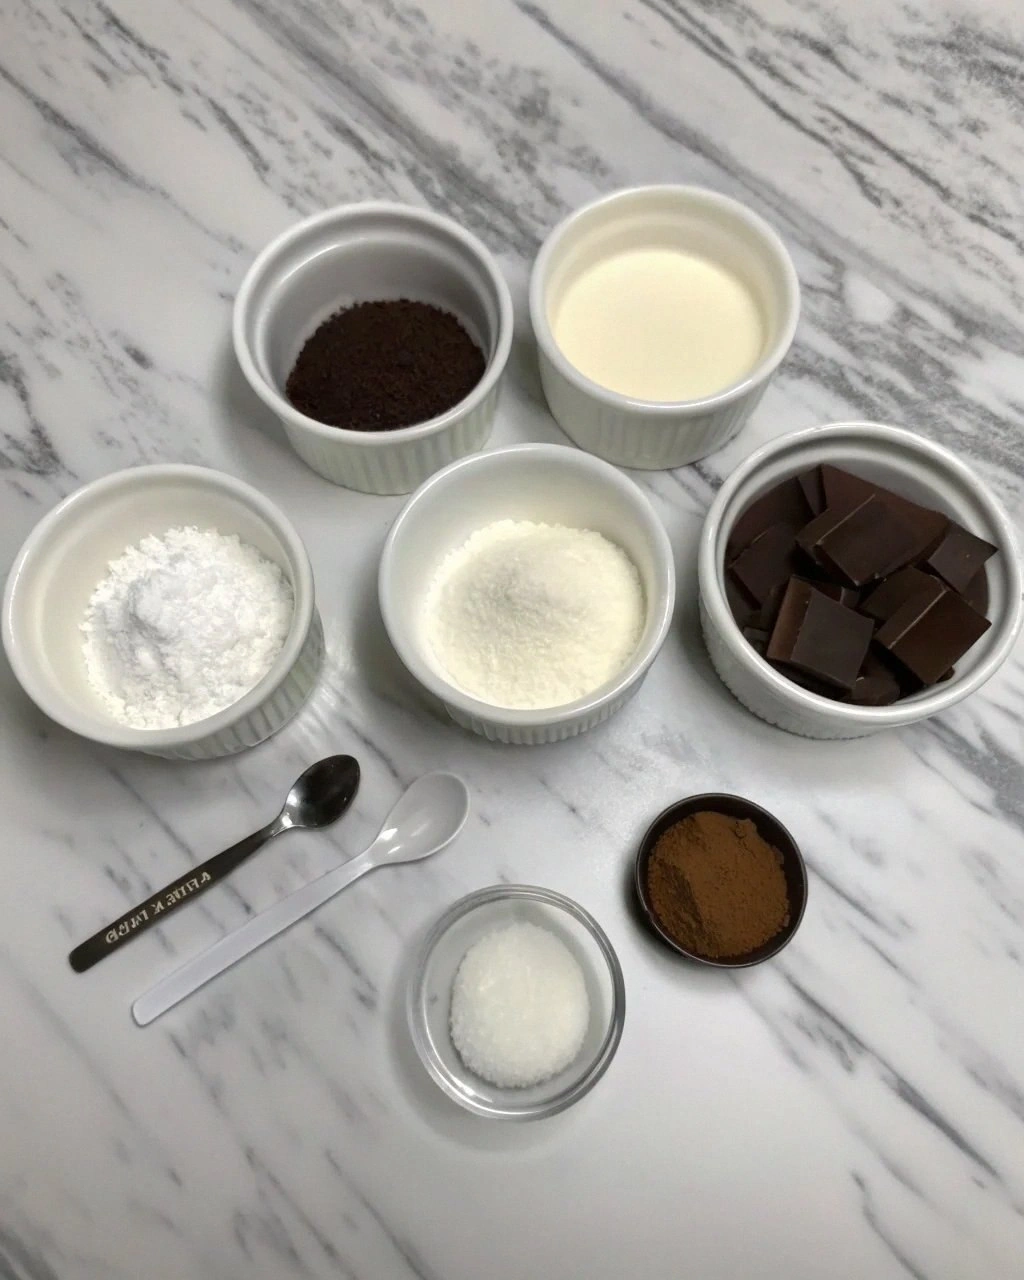
Here's where we separate the chocolate mochi enthusiasts from the chocolate mochi OBSESSIVES. Every ingredient pulls double duty in this recipe, creating layers of flavor and texture that'll make your taste buds do a happy dance.
The Flavor Foundation
The chocolate component isn't just about making things taste like cocoa — we're building a complex flavor profile that hits different parts of your palate. The Dutch-processed cocoa brings that deep, almost smoky chocolate essence that makes you think of European bakeries at dawn. Combined with the 70% dark chocolate, it creates this incredible depth that whispers rather than shouts. And that quarter-teaspoon of espresso powder? It's not enough to make things taste like coffee — think of it as chocolate's personal trainer, helping it reach its full potential.
Glutinous rice flour is your ticket to that signature chew, but here's what most recipes miss — the brand matters. I learned this the hard way after grabbing whatever was cheapest at the Asian market and ending up with mochi that had the texture of those stress balls from the dollar store. Mochiko (sweet rice flour) gives you that perfect balance of stretch and tenderness, while off-brands can leave you with something that bounces off the counter when dropped.
The Texture Crew
Sugar isn't just sweetness here — it's a texture agent that keeps your mochi pliable even after refrigeration. I've experimented with everything from coconut sugar to honey, but good old granulated sugar creates that perfect crystalline structure that prevents the dreaded mochi hardening. The cornstarch slurry might seem optional, but trust me — it's what gives your mochi skin that slightly translucent, pearl-like appearance that makes people think you're some kind of pastry wizard.
Coconut milk brings richness without heaviness, plus it adds this subtle tropical note that makes the chocolate taste more chocolatey somehow. Science backs this up — the fat molecules in coconut milk bind differently with cocoa butter, creating a smoother mouthfeel than dairy ever could. If you're not into coconut, full-fat oat milk works too, but you'll lose that whisper of island paradise.
The Secret Weapons
Here's where we get a little controversial — a tablespoon of black cocoa powder takes these from great to absolutely legendary. Black cocoa is what gives Oreos their distinctive flavor, and when combined with regular cocoa, it creates this incredible complexity that has people asking "what IS that amazing flavor?" It's like chocolate turned up to eleven while somehow becoming more sophisticated.
The ganache filling uses both milk and dark chocolate because life's too short for one-dimensional desserts. The milk chocolate brings that nostalgic, candy-bar sweetness while the dark chocolate keeps things grounded and prevents the whole affair from becoming cloying. Add a pinch of flaky sea salt, and suddenly you've got this sophisticated sweet-salty thing happening that makes it impossible to eat just one.
Everything's prepped? Good. Let's get into the real action...
The Method — Step by Step
Okay, ready for the game-changer? We're making the ganache first because it needs time to set up properly. Start by chopping your chocolate — and I mean really chopping it, not just breaking it into sad little chunks. You want pieces no bigger than chocolate chips so they melt evenly. Heat your coconut milk until it's just steaming (don't let it boil or you'll have a grainy mess), then pour it over the chocolate and let it sit undisturbed for exactly two minutes. This is crucial — walk away, check Instagram, contemplate your life choices, but don't touch that bowl.
When you come back, whisk from the center out in slow, steady circles. The chocolate should melt into this gorgeous, glossy liquid that coats your whisk like velvet. If you've got stubborn bits that won't melt, microwave the whole thing for ten seconds and whisk again. Add your butter and whisk until it disappears — this gives your ganache that restaurant-quality shine. Pour it into a shallow container, press plastic wrap directly onto the surface (no air bubbles allowed), and chill while we make the mochi.
Now for the mochi magic — whisk together your glutinous rice flour, cocoa powder, sugar, and salt in a large microwave-safe bowl. In a separate container, whisk coconut milk, water, and vanilla until combined. Pour the wet into the dry and whisk until you have a smooth, lump-free batter that looks like thick chocolate pudding. Here's where most people mess up — they stop whisking too soon and end up with flour bombs in their finished mochi. Keep whisking for a full minute past when you think you're done.
Cover the bowl with plastic wrap (poke a few steam holes), and microwave on high for two minutes. Remove and stir with a rubber spatula — the edges will be more set than the center, which is exactly what we want. Cover again and microwave for another minute. The mixture should be thick and slightly translucent, pulling away from the sides of the bowl in stretchy sheets. If it's still liquidy in the center, continue microwaving in 30-second bursts, stirring between each.
While the mochi's still hot, dust your work surface generously with cornstarch. Turn out the mochi (it'll be hot, but work quickly — hot mochi is pliable mochi) and dust the top with more cornstarch. Roll it into a rectangle about 1/4-inch thick, adding cornstarch as needed to prevent sticking. Don't stress about perfect edges — we're cutting circles anyway, and rustic means homemade with love.
Using a biscuit cutter or glass (about 3 inches diameter), cut circles as close together as possible. Gather the scraps, reroll, and cut again — you should get 12-15 circles from one batch. Keep the circles covered with plastic wrap while you work so they don't dry out.
Check your ganache — it should be thick but still spoonable. If it's too firm, microwave for five seconds and stir. Working with one mochi circle at a time (keep the rest covered), place a teaspoon of ganache in the center. Bring the edges up and pinch to seal, then roll gently between your palms to form a ball. Place seam-side down on a cornstarch-dusted plate. Repeat until all mochi are filled.
That's it — you did it. But hold on, I've got a few more tricks that'll take this to another level...
Insider Tricks for Flawless Results
After making approximately forty-seven batches (don't judge — recipe testing is serious business), I've discovered some game-changing techniques that separate the pretty-good mochi from the absolutely-transcendent ones that people text you about at midnight.
The Temperature Sweet Spot
Here's what nobody tells you — mochi has a Goldilocks zone when it comes to temperature. Too hot and it'll tear when you try to wrap it. Too cold and it becomes stubborn and uncooperative, cracking like a bad facelift. The magic happens when it's just warm enough to be pliable but cool enough to handle. I stick my finger in the center after microwaving — if I can hold it there for three seconds without yanking it away, we're in business.
Your ganache needs to be chilled but not rock-solid. Think peanut butter consistency — spreadable but not runny. If you can scoop it with a spoon and it holds its shape for a few seconds before slowly relaxing, you've nailed it. Too soft and it'll leak through the mochi. Too firm and you'll get chocolate chunks instead of that molten center we're after.
The Cornstarch Dance
Most recipes treat cornstarch like an afterthought, but it's actually your secret weapon for that professional finish. You want enough to prevent sticking, but not so much that your mochi taste like baby powder. The trick is to dust your hands, not just your work surface. Rub a small amount between your palms like hand sanitizer — it creates an invisible barrier that prevents the mochi from welding itself to your skin.
When rolling your mochi balls, use a gentle cupping motion rather than rolling like you're making cookie dough. Think of cradling a baby bird — firm enough that it won't escape, gentle enough that you won't squish it. This keeps the ganache centered and prevents blowouts.
The Overnight Transformation
I know it's torture, but these actually improve after 24 hours in the fridge. Something magical happens — the chocolate flavors meld and deepen, the mochi develops this incredible silky texture, and the whole thing becomes more cohesive. It's like the difference between a group of talented musicians and a tight band that's been playing together for years.
Storage is crucial here. Don't just throw them in a container and hope for the best. Place them in a single layer on parchment paper, cover loosely with plastic wrap (poke a few holes for breathing), and let them chill out. The cornstarch will absorb any excess moisture, keeping the exterior perfectly dry while the interior stays luscious.
Creative Twists and Variations
This recipe is a playground. Here are some of my favorite ways to switch things up:
The White Chocolate Raspberry Rebel
Swap the dark chocolate ganache for white chocolate infused with freeze-dried raspberry powder. The tartness cuts through the sweetness, creating this incredible balance that makes people close their eyes when they bite into it. Add a tiny pinch of cardamom to the mochi dough — not enough to identify, just enough to make people ask "what IS that amazing flavor?"
The Matcha Madness
Replace half the cocoa powder with high-quality matcha powder for a earthy-chocolate combo that tastes like sophisticated Japanese candy. Fill with dark chocolate ganache spiked with yuzu juice — the citrus brightens everything and prevents the matcha from tasting like grass clippings.
The Salted Caramel Situation
Keep the chocolate mochi exactly as written, but fill with homemade salted caramel instead of ganache. The key is cooking your caramel to exactly 245°F — any less and it'll be too runny, any more and you'll break teeth. Sprinkle the tops with gold salt flakes because you're fancy like that.
The Peanut Butter Cup Dream
Add two tablespoons of peanut butter powder to your mochi dough, then fill with a mixture of milk chocolate ganache and smooth peanut butter (2:1 ratio). It's like eating the world's most sophisticated peanut butter cup, but with that incredible chewy texture that regular candy could never achieve.
The Tropical Getaway
Replace the water in the mochi with coconut water, add a tablespoon of rum to the ganache, and roll the finished mochi in toasted coconut flakes. Suddenly you're on a beach somewhere, even if you're actually standing in your tiny apartment kitchen with that one flickering fluorescent light.
The Spicy Mayan Mystery
Add 1/4 teaspoon of cayenne and 1/2 teaspoon of cinnamon to your mochi dough, and a pinch of chili flakes to your ganache. The heat builds slowly, hitting you at the back of your throat after you swallow, making you reach for another one to cool down the fire. It's addictive in the most dangerous way.
Storing and Bringing It Back to Life
Fridge Storage
These beauties will keep for up to five days in the refrigerator, though honestly, they've never lasted more than three in my house. The key is storing them in a container with a tight-fitting lid, but here's the trick — add a small piece of bread or a paper towel to absorb excess moisture. Replace it daily if you're storing them longer than 48 hours. They'll develop a slightly firmer texture as they chill, but that's actually perfect for that incredible contrast between the chewy exterior and molten center.
Freezer Friendly
These freeze beautifully for up to two months, making them dangerous to have on hand. Flash-freeze them first on a baking sheet for two hours, then transfer to a freezer bag with parchment paper between layers. When the chocolate craving hits (which, let's be honest, is always), microwave a frozen mochi for 15-20 seconds. The outside gets warm and chewy while the center stays perfectly cool and creamy — it's like having a chocolate truffle and fresh mochi at the same time.
Best Reheating Method
If your mochi have been in the fridge and you want that fresh-from-the-kitchen experience, place them on a microwave-safe plate with a damp paper towel over the top. Microwave for exactly 8 seconds — no more, no less. The steam from the paper towel rehydrates the mochi without making it soggy. Let them sit for 30 seconds before eating — this allows the ganache to return to that perfect molten state without burning your tongue into next week.