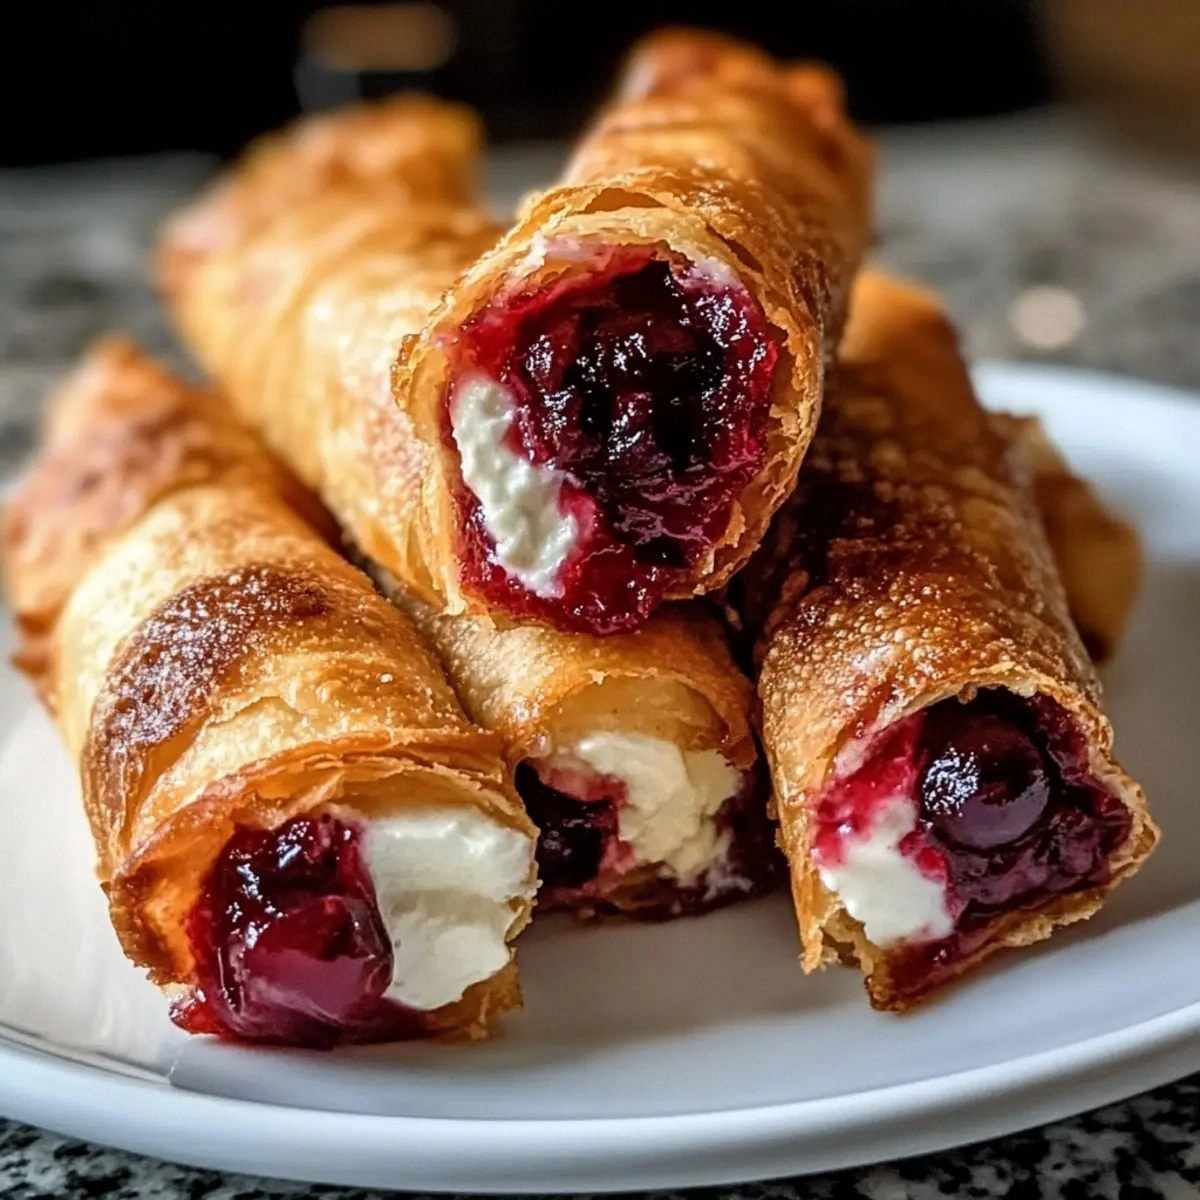
I’m going to be blunt: the first time I tried to make a cherry‑cheesecake dessert in an egg roll wrapper, I almost set off the fire alarm. The kitchen was a battlefield of melted butter, sticky cherry sauce, and a half‑cooked mess that looked more like a science experiment than a treat. But then I discovered the magic of the air fryer, and everything changed. The air fryer turned that chaotic slurry into a golden, crackling masterpiece that sang with sweet‑tart cherry notes and a velvety cheesecake heart. I dare you to taste this and not go back for seconds, because once you’ve experienced the perfect crunch, you’ll never settle for a soggy pastry again.
Picture this: you walk into the kitchen and the air fryer hums like a contented cat, while the aroma of toasted egg roll wrappers mingles with the buttery richness of cream cheese. The cherry filling bubbles just enough to release that deep, summer‑berry perfume, and the vanilla whispers in the background like a secret lover. You feel the warm, buttery dough in your hands as you fold it around the silky filling, and the moment you spray it with a light mist of cooking spray, you hear a faint sizzle that promises pure perfection. The whole scene is a symphony of senses—sight, smell, touch, sound, and taste—all converging on one glorious bite.
What makes this version the ultimate version? Most recipes either drown the cheesecake in a sugary glaze or fry the rolls in oil until they’re greasy and heavy. Not this one. I’ve swapped deep‑frying for an air fryer, which gives you that irresistible crunch without the guilt, and I’ve layered the cherry filling right on top of a smooth cream cheese blend so every bite delivers a balanced burst of sweet and tangy. Most recipes get this completely wrong by overloading the wrapper, but I’ve found the sweet spot: just enough filling to keep the center luscious while the wrapper stays crisp as a fresh‑baked biscuit.
And here’s the kicker: the secret ingredient isn’t a secret at all—it’s the technique. A quick chill of the cheesecake mixture before assembling, and a precise 12‑minute air‑fry at 375°F, ensures the wrapper doesn’t sog up, and the cheese stays firm enough to hold its shape. I’ll be honest — I ate half the batch before anyone else got to try it, and that’s a confession worth sharing because it proves how addictive this snack truly is. Let me walk you through every single step — by the end, you’ll wonder how you ever made it any other way.
What Makes This Version Stand Out
- Taste: The marriage of tart cherry and creamy cheesecake creates a flavor duet that feels like a dessert duet in perfect harmony.
- Texture: Expect a crisp, buttery shell that shatters like thin ice, giving way to a smooth, melt‑in‑your‑mouth interior.
- Simplicity: Only six ingredients, a handful of steps, and an air fryer—no deep‑frying, no mess, no excuses.
- Uniqueness: Combining an Asian‑style egg roll wrapper with classic American cheesecake is a culinary crossover that surprises and delights.
- Crowd Reaction: Guests will swear you’ve hired a pastry chef; the “wow” factor is off the charts.
- Ingredient Quality: Using full‑fat cream cheese and a quality cherry pie filling elevates the taste profile dramatically.
- Cooking Method: The air fryer delivers that restaurant‑level crisp without the oil splash, keeping the dish lighter.
- Make‑Ahead Potential: Assemble ahead, refrigerate, and air‑fry right before serving for stress‑free entertaining.
Inside the Ingredient List
The Flavor Base
The 8 oz of cream cheese is the heart of this dish. Its rich, tangy profile balances the sweet cherry and provides that classic cheesecake mouthfeel. If you skimp on it, you’ll end up with a watery center that can’t hold its shape. For the best texture, choose a full‑fat, block‑style cream cheese and let it sit at room temperature for a few minutes before beating. Swap suggestion: For a lighter version, use a reduced‑fat cream cheese, but expect a slightly less creamy result.
The Sweetener Crew
Half a cup of powdered sugar dissolves instantly into the cream cheese, giving you that smooth sweetness without any gritty texture. It also helps to stabilize the mixture, making it easier to pipe into the wrappers. If you prefer a less sweet bite, you can cut the sugar down to 1/3 cup, but the cheesecake may feel a bit flat. Tip: Sift the powdered sugar to avoid lumps, especially if you’re using a hand mixer.
The Unexpected Star
A single teaspoon of vanilla extract might seem modest, but it acts like the conductor of an orchestra, tying together the cherry’s acidity and the cheese’s richness. Skipping it would leave the flavor profile feeling disjointed, as if the cherry and cheese were speaking different languages. If you’re feeling adventurous, try a splash of almond extract for a nutty undertone. Buying tip: Look for pure vanilla extract rather than imitation for a deeper, more authentic flavor.
The Wrapper Crew
The 12 egg‑roll wrappers are the unsung heroes that give this dessert its signature crunch. They’re thin enough to fry quickly yet sturdy enough to hold the filling without tearing. If you use a store‑bought brand, check the ingredient list for any added sugars that could caramelize too quickly. For a gluten‑free alternative, look for rice‑paper sheets, but you’ll need to steam them briefly before air‑frying to achieve the same crispness.
The Final Flourish
A tablespoon of cooking spray is all you need to coax the wrappers into a golden, airy finish. It’s a low‑fat alternative to brushing with oil, and it ensures an even coating without greasy spots. If you don’t have a spray can, lightly brush the wrappers with a neutral oil using a silicone brush—just don’t overdo it, or you’ll lose the air‑fryer’s health benefits. Everything’s prepped? Good. Let’s get into the real action…
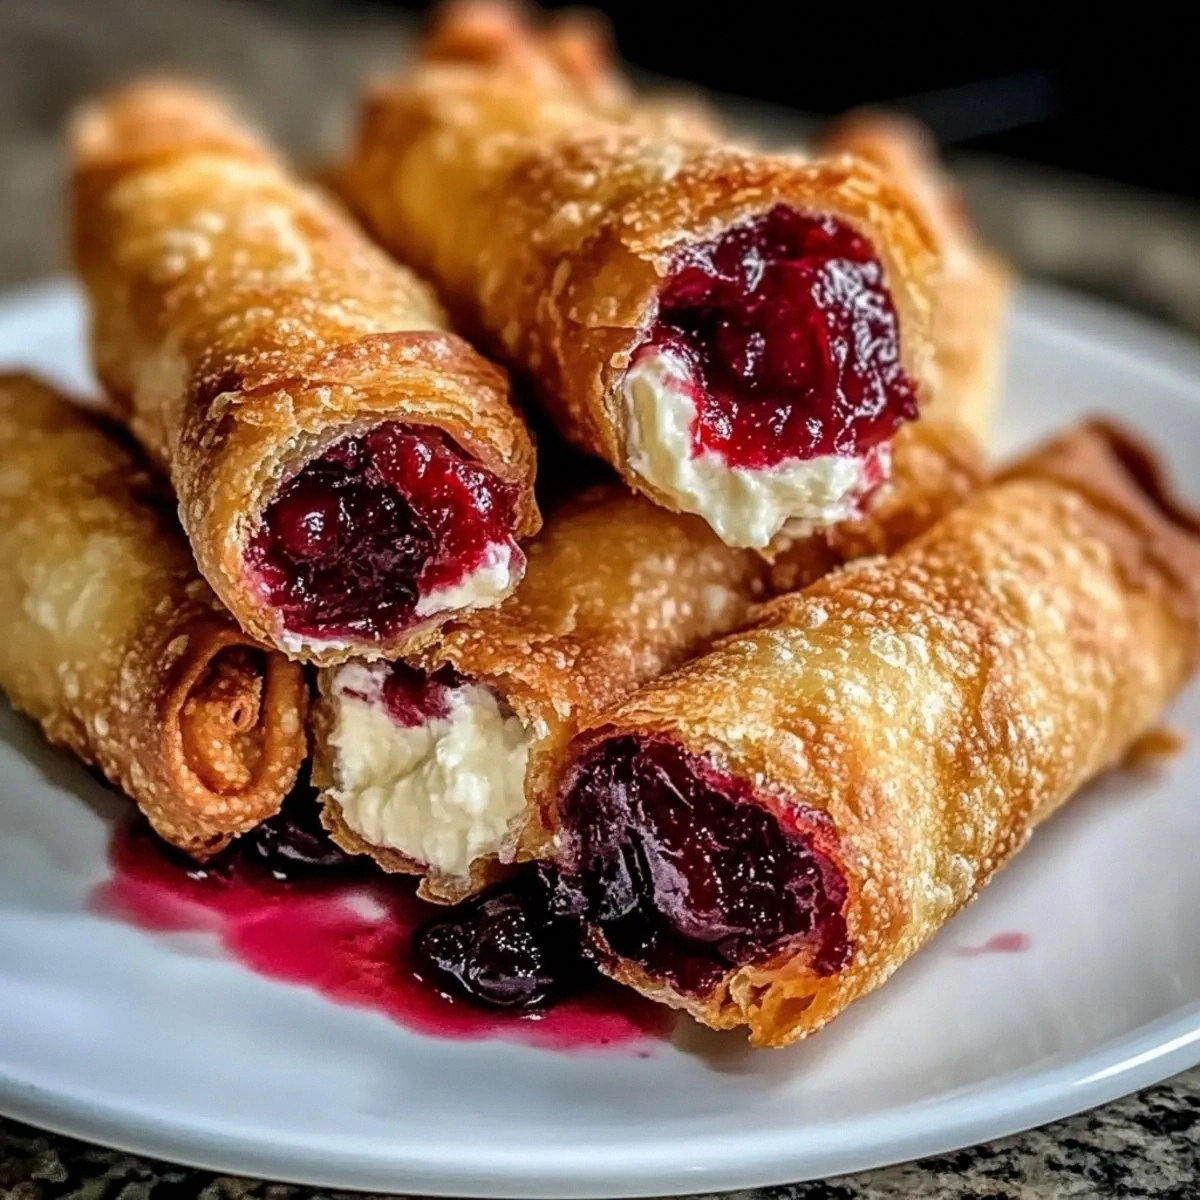
The Method — Step by Step
First, soften the cream cheese in a large mixing bowl. Use a hand mixer on low speed until it’s smooth, then gradually add the powdered sugar, beating until the mixture is fluffy and light. Add the vanilla extract and continue mixing for another 30 seconds. The mixture should look glossy and be free of lumps. Watch this step closely because over‑mixing can incorporate too much air, leading to a runny filling later.
Next, gently fold in the cherry pie filling. Use a rubber spatula to swirl the cherries through the cream cheese without completely blending them; you want pockets of bright red fruit throughout. The contrast of colors should be striking—like a sunrise in a bowl. Let the combined filling sit for 10 minutes to let the flavors meld.
Kitchen Hack: Transfer the mixture to a shallow dish and cover with plastic wrap, then chill in the fridge. The colder filling is easier to pipe and less likely to spill.While the filling chills, prepare your work surface. Lay out a clean kitchen towel and lightly dust it with flour to prevent the egg‑roll wrappers from sticking. Place one wrapper on the towel, shiny side down. Using a small spoon or a piping bag, drop about 2 tablespoons of the cheesecake‑cherry mixture onto the center of the wrapper, leaving about an inch of space on each side.
Fold the bottom edge over the filling, then fold the sides inwards, creating a tight envelope. Finally, roll the wrapper towards the top edge, sealing the seam with a dab of water. The roll should be snug but not squished; think of it like a tiny, edible burrito.
Watch Out: If the wrapper tears, press the edges together with a little water and a damp finger; the moisture will act as glue.Repeat the filling and rolling process until all 12 wrappers are assembled. Place the finished rolls on a parchment‑lined tray, seam side down, and cover loosely with foil. This prevents them from drying out while you finish the batch. I dare you to taste one at this stage—no, really—just to appreciate the raw flavors before the crunch.
Preheat your air fryer to 375°F (190°C) for about 3 minutes. While it’s heating, lightly spray each egg‑roll with cooking spray, ensuring an even coat. The spray creates that golden‑brown sheen without drowning the rolls in oil. The moment you hear the faint hiss as the spray meets the hot surface, you’ll know you’re on the right track.
Arrange the rolls in a single layer inside the air fryer basket, making sure they don’t touch. Overcrowding will steam the wrappers instead of crisping them. Air‑fry for 12 minutes, flipping halfway through. You’ll see the edges start to pull away from the wrapper, and the color will shift to a deep amber. That sizzle when it hits the basket? Absolute perfection.
When the timer dings, remove the rolls and let them rest for 2 minutes. This short pause allows the interior to set, so the cheesecake doesn’t ooze out when you bite in. Serve warm, optionally dusted with a light sprinkling of powdered sugar for extra sparkle. And now the fun part—watch your guests devour them in seconds. That’s it — you did it. But hold on, I’ve got a few more tricks that’ll take this to another level…
Insider Tricks for Flawless Results
The Temperature Rule Nobody Follows
Most home cooks set the air fryer to “high” and hope for the best, but the magic temperature for these egg rolls is a steady 375°F. Anything lower leaves the wrapper soggy; anything higher burns the edges before the interior warms through. I once tried 400°F and ended up with charcoal‑like shells that tasted like burnt toast. Keep a close eye on the timer and trust the 12‑minute rule for consistent results.
Why Your Nose Knows Best
When the rolls are halfway done, the kitchen will be filled with a buttery, caramelized scent that tells you exactly when to flip. If you can’t smell that nutty aroma, the rolls need a minute or two longer. Trusting your nose beats relying on a timer alone, especially when air fryer models vary by a few degrees.
The 5‑Minute Rest That Changes Everything
After air‑frying, let the rolls sit for five minutes on a cooling rack. This short rest lets the cheesecake filling firm up, preventing a messy spill when you bite in. I once served them straight from the basket and the filling ran like a waterfall—total disaster. The rest period is the difference between a tidy bite and a kitchen catastrophe.
The Spray‑Even Trick
Instead of spraying each roll individually, place them on a tray, lightly mist the entire tray, and then toss the rolls gently to coat every surface. This ensures an even, thin layer of oil that crisps uniformly. Over‑spraying can make the rolls greasy, while under‑spraying leaves them pale and soft.
Seal the Deal with Water
A tiny dab of water on the wrapper’s edge before sealing acts like culinary glue. It prevents the seam from opening during the high‑heat blast. Too much water makes the wrapper soggy, so just a drop per edge is enough. This trick saved me from a dozen broken rolls on my first trial.
Creative Twists and Variations
This recipe is a playground. Here are some of my favorite ways to switch things up:
Chocolate‑Cherry Fusion
Swap half of the cherry pie filling for a dark chocolate ganache. The bittersweet chocolate pairs beautifully with the tangy cheesecake, creating a sophisticated flavor duo that’s perfect for date night.
Nutty Crunch
Add a tablespoon of finely chopped toasted almonds to the cream cheese mixture. The nuts introduce a subtle crunch that contrasts the smooth interior, adding texture depth.
Spiced Autumn
Stir in a pinch of ground cinnamon and a dash of nutmeg into the cheesecake blend. This warm spice profile turns the dessert into a cozy fall treat, especially when paired with a drizzle of caramel sauce.
Tropical Twist
Replace the cherry filling with a mango‑passionfruit jam. The bright tropical notes give the egg rolls a sunny, vacation‑vibe that’s perfect for summer barbecues.
Savory Sweet
Incorporate a thin layer of prosciutto inside the roll before adding the cheesecake. The salty‑sweet combination is unexpected but utterly addictive, making it a great appetizer for cocktail parties.
Storing and Bringing It Back to Life
Fridge Storage
Place cooled rolls in an airtight container lined with parchment paper. They’ll stay fresh for up to three days. Before serving, let them sit at room temperature for 10 minutes, then re‑air‑fry for 3 minutes to revive the crunch.
Freezer Friendly
Wrap each roll individually in plastic wrap, then seal them in a freezer‑grade zip‑top bag. They’ll keep for up to two months. When you’re ready to eat, thaw overnight in the fridge, then give them a quick 4‑minute blast at 375°F.
Best Reheating Method
Never use a microwave—this will turn the wrapper soggy. Instead, preheat the air fryer to 350°F, spray the rolls lightly with cooking spray, and re‑heat for 3‑4 minutes. Adding a tiny splash of water to the bottom of the basket creates steam that helps the interior stay moist while the exterior crisps back to perfection.