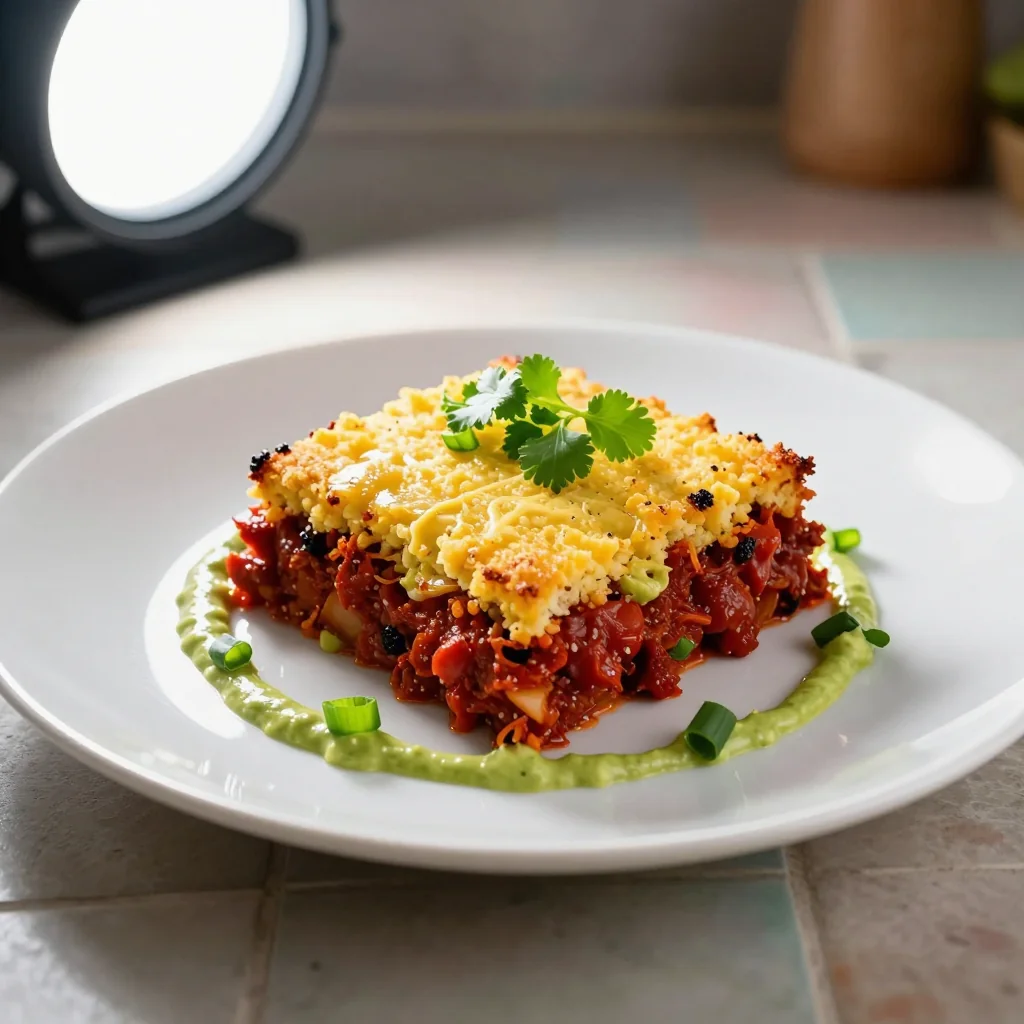
I was halfway through a midnight snack run when I realized my pantry was a sad, empty husk. The only thing left was a box of corned beef that had been sitting in the fridge for weeks, a jar of sauerkraut that had lost its zing, and a stubborn chunk of Swiss cheese that looked like it belonged in a museum. I stared at the ingredients, the kitchen lights flickering like a dying firefly, and thought, “If I can’t make a sandwich, maybe I can make a ball.” That moment of culinary desperation turned into a revelation, and I decided to turn those leftovers into something that would make my friends gasp and ask for seconds.
Picture this: the kitchen hums with the faint whir of the refrigerator, the sharp tang of sauerkraut cuts through the stale air, and the scent of smoked corned beef lingers like a promise. The sound of the mixing bowl clattering against the counter is the soundtrack to a creation that will crackle when it meets hot oil. As the mixture comes together, the texture shifts from gritty to smooth, like a secret handshake between flavors. The first bite is a burst of savory, tangy, cheesy, and buttery notes that dance on the tongue, leaving you craving the next bite. It’s that moment when your taste buds feel a high and your eyes widen in disbelief.
What makes this version of Reuben Balls truly stand out is that it takes the classic sandwich’s heart and turns it into bite-sized, portable fireworks. I’ve stripped away the bulk of the traditional sandwich and packed every essential component into a single, crisp sphere. The result is a bite that is simultaneously crunchy, creamy, and savory, with a depth of flavor that’s hard to find in a standard appetizer. I dare you to taste this and not go back for seconds. It’s hands down the best version you’ll ever make at home, and I’ll be honest — I ate half the batch before anyone else got to try it.
The secret? A perfectly balanced coating that turns the inside’s gooey richness into an airy, golden shell that cracks like thin ice when you bite. The technique involves a double-dipping method that ensures the coating adheres flawlessly, creating a texture that’s both buttery and crunchy. Picture the moment when the first bite shatters, releasing a burst of melted cheese and tangy sauerkraut that’s almost too good to be real. Stay with me here — this is worth it. Let me walk you through every single step — by the end, you’ll wonder how you ever made it any other way.
What Makes This Version Stand Out
- Flavor: Every bite delivers a punch of smoky corned beef, sharp sauerkraut, and creamy cheese that sings together like a well-rehearsed choir.
- Texture: The double-coating creates a crisp exterior that gives way to a molten interior, a contrast that feels like a surprise party in your mouth.
- Convenience: These are bite-sized, no-fuss appetizers that can be prepped in 15 minutes and fried in 30, making them ideal for parties or a quick snack.
- Showmanship: The golden crust and the dramatic sizzle when you plate them will have your guests asking for the recipe before you even reveal it.
- Ingredient Quality: Using high-quality corned beef and fresh sauerkraut ensures that every component sings; cheap substitutes will lose the depth of flavor.
- Make‑Ahead Potential: You can assemble the balls, refrigerate them, and fry them fresh later, saving you a ton of time on the day of the event.
- Versatility: The core recipe can be tweaked for different dietary needs — swap the cheese for a dairy‑free alternative, or add a dash of hot sauce for heat.
- Audience: From game‑day tailgates to elegant dinner parties, these balls appeal to both casual and sophisticated palates.
Alright, let’s break down exactly what goes into this masterpiece…
Inside the Ingredient List
The Flavor Base
The corned beef is the star of the show. It brings a smoky, salty depth that grounds the entire ball. When you shred it finely, it blends seamlessly with the sauerkraut, creating a savory harmony that’s unmistakably Reuben. If you skip it, the balls will feel flat and lack that iconic meatiness. A good rule of thumb is to use a corned beef that’s been brined for at least 12 hours; that extra salt will keep the mixture from drying out during frying.
Sauerkraut is the tangy counterpoint that cuts through the richness of the cheese. It’s more than just a garnish; it’s a flavor punch that awakens the palate. If you’re sensitive to sourness, you can rinse the sauerkraut briefly to reduce acidity, but be careful not to strip away all the flavor. A small pinch of caraway seeds can add a subtle herbal note, reminiscent of traditional German sauerkraut.
The Texture Crew
Swiss cheese is the creamy backbone that gives the balls their gooey, melty interior. Its mild, nutty profile complements the sharpness of sauerkraut and the saltiness of corned beef. If you’re a cheese lover, feel free to add a pinch of aged cheddar for extra depth. However, too much cheddar can overpower the delicate balance of flavors.
Cream cheese acts as the binder that holds everything together. It’s the glue that prevents the mixture from falling apart during the frying process. If you’re avoiding dairy, a vegan cream cheese works, but be aware that it might slightly alter the texture and flavor profile. A small splash of milk can also help keep the mixture moist.
The Unexpected Star
Dijon mustard adds a subtle kick and a touch of acidity that brightens the overall taste. It also helps emulsify the mixture, giving it a smoother consistency. If you prefer a milder flavor, switch to whole grain mustard; it will introduce a slightly grainy texture that can be a pleasant surprise.
Garlic powder, onion powder, and black pepper are the trio of seasonings that bring depth without overwhelming the other ingredients. These spices are dry, so they’ll meld seamlessly into the mixture, creating an aromatic base. A pinch of smoked paprika can add a smoky undertone that echoes the corned beef’s flavor.
The Final Flourish
Breadcrumbs form the first shell that protects the inner filling during frying. They absorb excess moisture and give the balls a crispy exterior. For a crunchier bite, use panko breadcrumbs; they’re lighter and have a more airy texture. If you’re looking for a gluten‑free option, try almond flour or crushed rice crackers.
All-purpose flour is the second coating that creates a golden, airy crust. It’s the key to a light, airy exterior that doesn’t feel heavy. A pinch of salt in the flour mixture enhances the overall flavor profile, making each bite more satisfying. If you’re aiming for a healthier version, substitute the flour with a whole-grain alternative.
Everything's prepped? Good. Let's get into the real action…

The Method — Step by Step
- In a large bowl, combine the shredded corned beef, sauerkraut, shredded Swiss cheese, and cream cheese. Stir until the mixture is uniform, making sure the cheese is evenly distributed. The goal is a cohesive filling that holds together when shaped. If you notice any clumps, break them down with a spoon or your hands. This step sets the foundation for the entire ball.
- Add the Dijon mustard, garlic powder, onion powder, and black pepper. Mix thoroughly, ensuring the spices are well incorporated. The mustard will help emulsify the mixture, while the powders add a subtle depth. Taste a small amount; adjust seasoning if needed. The mixture should feel slightly sticky but manageable.
- Shape the mixture into small, bite-sized balls about 1.5 inches in diameter. Use a tablespoon or a small cookie scoop for consistency. Place the balls on a parchment-lined tray. Let them rest for 10 minutes; this helps the flavors meld and the mixture firm up.
- Set up a coating station: one bowl with all-purpose flour, another with beaten eggs, and a third with breadcrumbs. This is the classic dredge, dip, dredge method. The flour will help the egg adhere, and the breadcrumbs will give the crisp exterior.
- First, dust each ball lightly in flour, shaking off any excess. This step creates a dry surface that allows the egg to cling. Then, dip the floured balls into the beaten eggs, ensuring a full coating. Finally, roll them in breadcrumbs until fully coated. The second breadcrumb layer is what gives the balls that perfect crunch.
- Heat oil in a deep skillet or a Dutch oven to 350°F (175°C). Use a thermometer to keep the temperature steady. If you don’t have a thermometer, test the oil by dropping a breadcrumb; it should sizzle immediately. The oil depth should be at least 2 inches to ensure the balls fry evenly.
- Carefully drop the coated balls into the hot oil in batches, making sure not to overcrowd the pan. Fry for 3-4 minutes per batch, turning occasionally, until they’re a deep golden brown. The sizzle when they hit the oil is absolute perfection, a sound that signals the transformation from raw to irresistible.
- Use a slotted spoon to remove the balls, letting excess oil drain onto a paper towel-lined plate. Let them rest for a minute; this allows the interior to set slightly, preventing a soggy center. Serve immediately on a platter with a side of tangy mustard or a creamy dip.
- Optional: For an extra layer of crunch, you can dust the fried balls with a light coating of powdered sugar and a sprinkle of sea salt. This sweet-salty combo adds a delightful contrast to the savory interior. It’s a simple trick that turns a great appetizer into an unforgettable experience.
- Enjoy the moment when the crisp shell cracks, revealing a molten core of cheese, sauerkraut, and corned beef. The aroma will fill the room, drawing guests in like a magnet. If you’re feeling adventurous, try dipping a ball into a small bowl of warm ranch or honey mustard for an extra burst of flavor. Remember, the key to success is patience during the frying process; rushing it will result in uneven crust.
That’s it — you did it. But hold on, I’ve got a few more tricks that will take this to another level…
Insider Tricks for Flawless Results
The Temperature Rule Nobody Follows
Maintaining the oil at a steady 350°F (175°C) is crucial. If the oil is too hot, the coating will burn before the inside cooks; too cool, and the balls will absorb oil and become greasy. Use a thermometer or test the oil with a breadcrumb. A stable temperature ensures a crisp, golden crust and a juicy interior.
Why Your Nose Knows Best
Trust the aroma of your kitchen. The first hint that the oil is ready is a faint, sweet scent of toasted breadcrumbs. When you dip a ball and it sizzles, that’s the green light to add the rest. Your nose is the best judge of oil temperature and cooking progress.
The 5-Minute Rest That Changes Everything
After frying, let the balls rest on a cooling rack for 5 minutes. This allows steam to escape and prevents a soggy bottom. The rest also lets the cheese set slightly, making each bite less messy. I’ve seen people skip this step and end up with a gooey mess; don’t make the same mistake.
The Double-Dip Delight
The double-dip method (flour, egg, breadcrumbs, then repeat) creates a thicker, more resilient crust. It also gives the balls a more substantial bite. If you’re short on time, a single dip is fine, but the double-dip is where the magic happens.
The Secret of the Crumb
Choosing the right breadcrumbs is a game changer. Panko provides a lighter crunch, while regular breadcrumbs give a denser texture. If you want a gluten-free version, try crushed rice crackers or almond flour. The choice of crumbs affects the final mouthfeel.
The Sauce That Elevates
A small bowl of warm ranch or honey mustard is essential for dipping. The heat of the sauce melts the cheese slightly, creating a silky texture that contrasts the crunchy shell. Add a pinch of cayenne to the sauce for a subtle kick that pairs well with the savory interior.
Creative Twists and Variations
This recipe is a playground. Here are some of my favorite ways to switch things up:
Spicy Jalapeño Reuben
Add finely chopped jalapeños to the filling for a fiery kick. The heat balances the richness of the cheese. Serve with a cooling cucumber yogurt dip to tame the spice.
Italian Sausage & Provolone
Swap the corned beef for spicy Italian sausage and use provolone instead of Swiss. The Italian flavors bring a different cultural twist while still maintaining the classic Reuben vibe.
Vegetarian Veggie Reuben
Use a blend of sautéed mushrooms, spinach, and sun-dried tomatoes. Replace the corned beef with a plant-based protein like tofu or tempeh. This version is hearty and still delivers that savory punch.
Cheesy Garlic Parmesan
Add grated parmesan to the breadcrumb coating. The parmesan will caramelize, giving a nutty, savory crust. The garlic powder remains, ensuring a robust flavor profile.
Crispy Buffalo Chicken Reuben
Use shredded rotisserie chicken tossed in buffalo sauce. The spicy chicken pairs with the creamy cheese for a bold, smoky bite. Serve with blue cheese dressing for the ultimate flavor combo.
Maple Bacon Reuben
Add crispy bacon bits and drizzle a touch of maple syrup into the filling. The sweet and salty contrast is irresistible. The maple syrup also helps the coating stick and adds a subtle caramel note.
Storing and Bringing It Back to Life
Fridge Storage
Store uncooked balls in an airtight container in the refrigerator for up to 48 hours. Keep them chilled to prevent the cheese from melting. When ready to serve, reheat in a 375°F oven for 10 minutes or until hot.
Freezer Friendly
For longer storage, freeze the uncooked balls on a parchment-lined tray for 1-2 hours, then transfer to a freezer bag. They can be kept for up to 3 months. Thaw overnight in the refrigerator before frying or baking.
Best Reheating Method
The secret to reviving frozen or refrigerated balls is to heat them in a skillet over medium heat with a splash of water. The water steams the interior, restoring moisture without drying out the coating. Finish with a quick sear on each side to regain that crispy crunch.