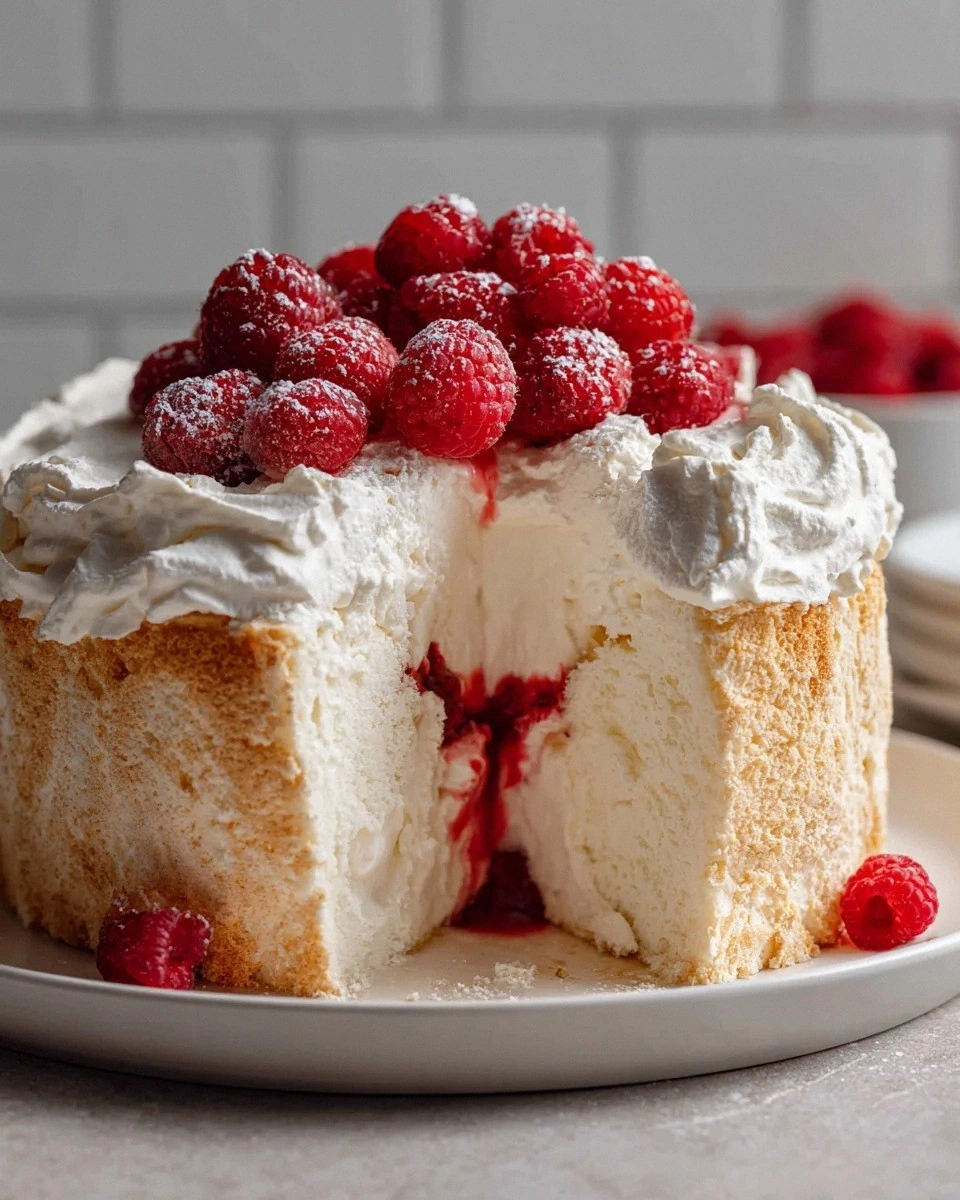
I still remember the first time I attempted angel food cake. It was a humid Tuesday afternoon, and I was armed with nothing but a vague memory of my grandmother's recipe and a stubborn streak that refused to acknowledge defeat. The result? A dense, rubbery mess that tasted like disappointment with a side of embarrassment. Fast forward through three failed attempts, countless YouTube tutorials, and one particularly dramatic kitchen meltdown involving a dramatic egg-white splatter across my ceiling — I finally cracked the code. And let me tell you, when I folded in fresh raspberries and watched that magenta swirl dance through the cloud-like batter, I knew I'd stumbled upon something magical.
Picture this: you're hosting a summer dinner party, and you want a dessert that whispers elegance but doesn't require you to slave away for hours. You want something that'll make your guests' eyes widen as you slice through that pristine white cloud to reveal ruby ribbons of raspberry goodness. This isn't just another angel food cake recipe — this is the angel food cake that'll have people texting you for the recipe at 2 AM because they can't stop thinking about it. The texture is so impossibly light that you'll swear it defies physics, yet each bite carries a burst of tart-sweet raspberry that keeps you coming back for more.
What sets this version apart isn't just the addition of raspberries (though that's undeniably brilliant). It's the technique I've perfected through trial, error, and what my therapist calls "obsessive baking behavior." We're talking about a cake that rises like it's trying to escape the pan, with an interior so tender it practically dissolves on your tongue. The raspberry swirl isn't just decorative — it creates pockets of concentrated flavor that make every bite feel like discovering hidden treasure. And here's the kicker: once you master this method, you'll never fear egg whites again.
If you've ever struggled with angel food cake, you're not alone. Most recipes get this completely wrong — they tell you to grease the pan (disaster!), or they don't whip the egg whites properly, or they use cold eggs straight from the fridge. Trust me, I've made every mistake in the book so you don't have to. By the end of this journey together, you'll not only have the most impressive dessert in your arsenal, but you'll also understand why this cake works so beautifully. Let me walk you through every single step — by the end, you'll wonder how you ever made it any other way.
What Makes This Version Stand Out
Raspberry Ribbons: Instead of just tossing berries on top, we're creating a sophisticated swirl that distributes fruit throughout every slice. The raspberries get lightly sweetened and mashed, creating a concentrate that doesn't water down the batter. When baked, these ribbons become jammy pockets that burst with flavor without compromising the cake's structure.
Room-Temperature Magic: Every ingredient starts at room temperature, creating a stable foam that traps air like a dream. This isn't just culinary nonsense — cold egg whites won't incorporate as much air, and your cake will be dense. I learned this the hard way after numerous flat, sad cakes that tasted fine but looked like they'd given up on life.
The Sugar Strategy: We use superfine sugar divided into two portions — one for stabilizing the meringue, another folded in at the end for structure. Most recipes dump all the sugar in at once, creating a weepy, unstable foam. This method gives you a cake that slices cleanly instead of collapsing into a sticky mess.
Zero Grease Philosophy: Unlike every other cake you've made, this pan stays completely un-greased. The batter needs to cling to the sides to climb properly. I know it feels wrong — trust me, your instincts will scream at you — but greasing is the fastest way to end up with a sunken, dense failure.
Upside-Down Cooling: This might be the most crucial step that separates amateur results from bakery-quality perfection. Cooling the cake upside down prevents it from collapsing under its own weight. The first time I tried this, I balanced the pan on a wine bottle and held my breath for an hour. When I finally unmolded it, the cake stood tall and proud, and I may have done a small victory dance in my kitchen.
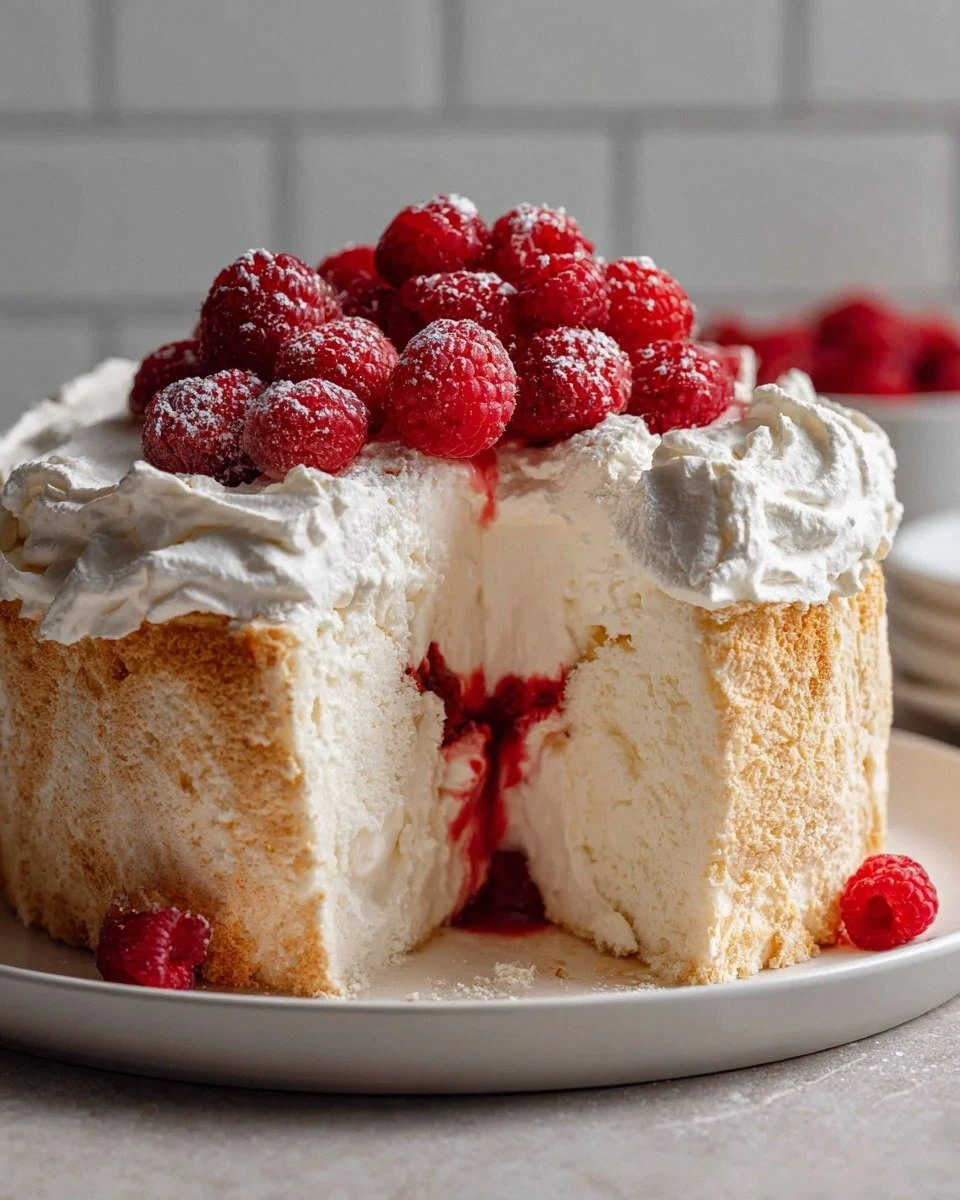
Crowd-Pleasing Presentation: This cake doesn't just taste incredible — it looks like something from a French patisserie. The contrast between the pristine white cake and the jewel-toned raspberry swirl creates a visual impact that makes people reach for their phones before they even taste it. I've served this at everything from baby showers to New Year's Eve parties, and it never fails to steal the show.
Alright, let's break down exactly what goes into this masterpiece...
Inside the Ingredient List
The Flavor Foundation
Cake flour isn't just regular flour with delusions of grandeur — it's milled from soft wheat with lower protein content, which means less gluten development and a more tender crumb. This isn't negotiable; all-purpose flour will give you a chewy, tough cake that defeats the whole purpose of angel food. The fine texture of cake flour allows it to incorporate seamlessly into your delicate meringue without deflating it. If you absolutely must substitute, you can make a homemade version by replacing two tablespoons of every cup of all-purpose flour with cornstarch, but honestly, just buy the cake flour — your future self will thank you.
The vanilla extract here isn't just for flavor — it adds aromatic complexity that makes people wonder what your secret is. Use the good stuff, not the imitation vanilla that tastes like regret and childhood birthday parties. Pure vanilla extract contains hundreds of flavor compounds that bloom in the oven, creating that bakery smell that makes neighbors knock on your door. The almond extract is optional but highly recommended — it adds a subtle marzipan note that makes the raspberry flavor sing.
The Texture Architects
Egg whites are the undisputed stars of this show, and their temperature matters more than you'd think. Room-temperature whites whip up to eight times their volume, creating the lift that makes this cake defy gravity. Cold whites will whip, but they'll never achieve the same volume, leaving you with a dense cake that tastes like sweet scrambled eggs. Separate your eggs while cold (it's easier), then let the whites sit out for 30 minutes. And please, for the love of all things holy, don't let any yolk contaminate your whites — even a trace of fat will prevent them from whipping properly.
Cream of tartar might seem like an unnecessary specialty ingredient, but it's the insurance policy your meringue needs. This acidic powder stabilizes the egg whites, helping them maintain their structure in the oven. Without it, your beautiful peaks can weep and collapse, creating a cake with the texture of a kitchen sponge. If you don't have cream of tartar, you can substitute with twice as much lemon juice or white vinegar, but the results won't be quite as reliable.
The Sweet Science
Granulated sugar does more than sweeten — it stabilizes the meringue and helps create that characteristic angel food texture. We're using it in two stages: first to help build the meringue structure, then folded in at the end for additional stability. The key is adding it gradually while whipping, allowing each grain to dissolve completely before adding more. Undissolved sugar creates a grainy texture and can cause your cake to crack on top like a desert landscape.
The Raspberry Revolution
Fresh raspberries provide the best flavor and texture, but frozen work beautifully too — just don't thaw them first. The slight tartness balances the cake's sweetness, preventing it from becoming cloying. When selecting fresh raspberries, look for plump, dry berries without any mold or mushy spots. Store them unwashed in the fridge, and rinse just before using to prevent them from becoming waterlogged and losing their flavor.
Everything's prepped? Good. Let's get into the real action...
The Method — Step by Step
- Start by separating twelve large eggs, being extraordinarily careful not to let any yolk contaminate your whites. I crack each egg into a small bowl first, then transfer the white to my mixing bowl — this way if one breaks, I don't ruin the entire batch. Let the whites sit at room temperature for 30 minutes while you prepare everything else. During this time, they'll relax and lose their chill, which helps them whip up to maximum volume. While you wait, position your oven rack to the lowest level and preheat to 350°F, giving your oven plenty of time to heat evenly.
- Pulse your cake flour with 3/4 cup of the sugar in a food processor five times to create an ultra-fine mixture that'll incorporate seamlessly into your meringue. This step might seem fussy, but it's the difference between a cake that's silk-smooth and one that's disappointingly dense. The sugar helps break down the flour particles while preventing them from clumping together. Set this mixture aside while you tackle the raspberry swirl — timing matters here because once you start whipping egg whites, you can't stop to prep anything else.
- For the raspberry swirl, gently mash one cup of fresh raspberries with two to three tablespoons of sugar, depending on your berries' tartness. You want them broken down but not completely pureed — think rustic jam with visible fruit pieces. Taste and adjust the sweetness; remember the cake itself is quite sweet, so the berries should have a pleasant tartness that provides contrast. Set this mixture aside to macerate while you whip the meringue — the sugar will draw out the juices, creating a concentrated raspberry essence that won't water down your batter.
- Now comes the moment of truth: whipping the egg whites. Add them to the bowl of your stand mixer (or a large bowl if using a hand mixer) along with the cream of tartar and salt. Start on medium-low speed until the mixture becomes foamy and opaque, about one minute. Increase the speed to medium and beat until soft peaks form — when you lift the beaters, the peaks should flop over gently like a tired puppy's ears. This is your foundation, and rushing it will lead to a unstable meringue that collapses in the oven.
- Gradually add the remaining 3/4 cup sugar, one tablespoon at a time, while beating on medium-high speed. Don't dump it all in at once — this is where patience pays off. Each addition should dissolve completely before you add the next, creating a glossy, stable meringue. After all the sugar is incorporated, continue beating until stiff peaks form — when you lift the beaters, the peaks should stand at attention without drooping. The mixture should be thick, smooth, and hold its shape without looking dry or curdled.
- Time for flavor enhancement: beat in the vanilla and almond extracts just until combined. Over-beating at this stage can cause the meringue to become grainy and start weeping. The batter should smell like sweet clouds and vanilla dreams, with a hint of nuttiness from the almond. If you're not using almond extract, add an extra splash of vanilla — this cake relies on these aromatic compounds for its signature flavor profile.
- Here's where most people mess up: folding in the flour mixture. Sift one-quarter of the flour-sugar mixture over the meringue and use a large rubber spatula to fold it in with a gentle motion. Cut down through the center, scrape along the bottom, and lift up and over — rotate the bowl as you go. The goal is to maintain as much air as possible while ensuring no flour pockets remain. Repeat three more times, being careful not to deflate the batter — it should remain light and billowy throughout this process.
- For the raspberry swirl, pour half the batter into an ungreased 10-inch tube pan, spreading it evenly. Drizzle half the raspberry mixture over the top, then use a thin knife or skewer to create figure-eight motions, marbling the fruit through the batter. Don't over-swirl — you want distinct ribbons, not a pink cake. Add the remaining batter and repeat with the remaining raspberry mixture. The top should look like abstract art with white and magenta ribbons creating a beautiful pattern.
- Bake for 35-40 minutes, or until the top is golden brown and springs back when lightly touched. The cake should have risen dramatically above the rim of the pan, looking like it's trying to escape. Don't open the oven door for the first 30 minutes — this cake is sensitive to temperature changes and can collapse if startled. When it's done, a wooden skewer inserted near the center should come out clean, and the top should feel set but not dry.
- Immediately invert the pan onto a bottle or inverted funnel — yes, this feels terrifying the first time, but it's crucial. The cake needs to cool upside down to prevent it from collapsing under its own weight. Let it hang suspended for at least 90 minutes, or until completely cool. Resist the urge to check on it — walk away and let gravity do its work. When you finally run a knife around the edges and invert it onto a plate, you'll be rewarded with a towering, ethereal cake that defies everything you thought you knew about baking.
That's it — you did it. But hold on, I've got a few more tricks that'll take this to another level...
Insider Tricks for Flawless Results
The Temperature Rule Nobody Follows
Room temperature isn't just a suggestion — it's the law in angel food cake territory. Your egg whites should be around 68-70°F, which feels neither cool nor warm to the touch. Too cold, and they won't incorporate enough air; too warm, and they'll whip up unstable and weepy. I place my bowl of cold egg whites in a larger bowl of warm (not hot) water for 10 minutes, stirring occasionally. This gentle warming brings them to the perfect temperature without cooking them. The same goes for your flour mixture — cold flour can shock the meringue, so let it sit out while the eggs warm up.
Why Your Nose Knows Best
Don't underestimate the power of aromatics in this seemingly simple cake. The combination of vanilla and almond extracts creates complexity that makes people wonder what your secret ingredient is. But here's the thing: add them at the right moment. Too early, and the alcohol cooks off before the flavor develops; too late, and they don't incorporate evenly. I add them right after the meringue reaches stiff peaks but before folding in the flour — the brief mixing distributes them without deflating the foam. If you really want to blow minds, scrape the seeds from half a vanilla bean into the extracts before adding them — those tiny black specks signal serious baking credentials.
The 5-Minute Rest That Changes Everything
After you fold in the flour mixture, let the batter rest for exactly five minutes before adding it to the pan. This brief pause allows the flour to hydrate fully, preventing those tiny white specks that can mar an otherwise perfect cake. During this time, the structure stabilizes, and any large air bubbles rise to the surface. When you're ready to pour, give the bowl one final gentle fold — you'll notice the batter has become smoother and more cohesive. This small step transforms your cake from good to bakery-quality, creating a uniform crumb that melts on your tongue.
The Swirl Secret
Creating those perfect raspberry ribbons isn't about artistic talent — it's about understanding viscosity. Your raspberry mixture should be thick enough to sit on top of the batter without immediately sinking, but fluid enough to marble. If it's too thin, it'll flood the batter and create soggy spots; too thick, and you'll get clumps instead of ribbons. The perfect consistency is like loose jam — when you drizzle it, it should hold its shape for a moment before slowly spreading. Test a small spoonful on top of the batter before committing to the full swirl — it should sit like a jewel rather than immediately disappearing.
The Cooling Game-Changer
Inverting the cake isn't just tradition — it's physics in action. As the cake cools, the steam trapped inside condenses, creating a vacuum that helps maintain the structure. But here's what most recipes don't tell you: the cooling environment matters. Don't cool it in a drafty area or near a hot oven — both can cause uneven contraction that leads to cracks. The ideal spot is a room-temperature counter away from direct sunlight. And resist the temptation to speed things up with a refrigerator — slow, even cooling prevents the dramatic collapse that'll break your heart and waste your afternoon.
Creative Twists and Variations
This recipe is a playground. Here are some of my favorite ways to switch things up:
Blackberry Lemon Zest
Swap the raspberries for blackberries and add the zest of one lemon to the batter for a sophisticated twist. The lemon oil enhances the berry flavor while adding brightness that prevents the cake from feeling too rich. Blackberries create a more dramatic purple swirl that looks stunning against the white cake. The seeds add a pleasant crunch, but if you're serving picky eaters, strain the berry mixture through a fine-mesh sieve before swirling.
Peach Basil Dream
Dice ripe peaches into tiny cubes and toss with minced fresh basil for a summer variation that tastes like sunshine in cake form. The basil adds an herby note that makes people pause and wonder what they're tasting. Use white peaches for a more delicate flavor, or yellow peaches for intense sweetness. The key is to keep the pieces small — no larger than a pea — so they distribute evenly without sinking to the bottom.
Chocolate Raspberry Decadence
Add two tablespoons of Dutch-processed cocoa powder to the flour mixture for a subtle chocolate flavor that pairs beautifully with raspberries. The cocoa doesn't make the cake heavy — instead, it adds depth and richness that transforms it into something worthy of a special occasion. Dust the cooled cake with powdered sugar mixed with a teaspoon of cocoa for a sophisticated finish that hints at the flavor within.
Tropical Paradise
Replace the almond extract with coconut extract and swirl in passion fruit pulp for a tropical variation that'll transport you to a beach in Hawaii. The tart passion fruit provides the perfect counterpoint to the sweet cake, while the coconut adds creaminess that makes each bite feel indulgent. Top with toasted coconut flakes for extra texture and visual appeal.
Spiced Autumn
Add a teaspoon of ground cardamom and a pinch of black pepper to the flour mixture, then swirl in spiced apple butter for a fall version that's like eating apple pie in cake form. The cardamom adds warmth without overwhelming the delicate cake, while the black pepper provides a subtle heat that makes people wonder what makes this so addictive. Serve with warm caramel sauce for the ultimate autumn dessert.
Strawberry Champagne
Reduce champagne by half and mix with strawberry puree for an elegant adult version perfect for celebrations. The alcohol cooks off, leaving behind complex flavors that elevate this simple cake to something worthy of a wedding reception. Use good champagne — the cheap stuff will taste harsh and metallic. The bubbles in the reduction create tiny air pockets that add interesting texture to the swirls.
Storing and Bringing It Back to Life
Fridge Storage
This cake stays remarkably well for up to five days when stored properly. The key is preventing it from drying out — wrap it tightly in plastic wrap, then place it in an airtight container. Don't refrigerate it unless your kitchen is extremely hot; the cold air will dry it out faster than you'd think. Instead, store it in a cool, dry place away from direct sunlight. If you notice the cut edges starting to dry, simply trim them before serving — no one will ever know, and you'll get to enjoy a fresh slice.
Freezer Friendly
Angel food cake freezes beautifully, making it perfect for advance preparation. Wrap individual slices in plastic wrap, then place them in a freezer bag with as much air removed as possible. They'll keep for up to three months without significant quality loss. The trick is to thaw them slowly — overnight in the refrigerator, then bring to room temperature before serving. Never microwave frozen angel food cake — it'll become rubbery and sad. If you're in a hurry, place the frozen slice on a wire rack at room temperature for about an hour.
Best Reheating Method
While angel food cake is best served at room temperature, sometimes you want that fresh-baked warmth. The secret is gentle heat — place slices in a 250°F oven for 5-7 minutes, just until slightly warmed through. This refreshes the cake without drying it out. Alternatively, a quick 10-second zap in the microwave works, but wrap the slice in a damp paper towel first to prevent it from becoming tough. Serve immediately with a dollop of whipped cream or a scoop of vanilla ice cream for the ultimate comfort food experience.