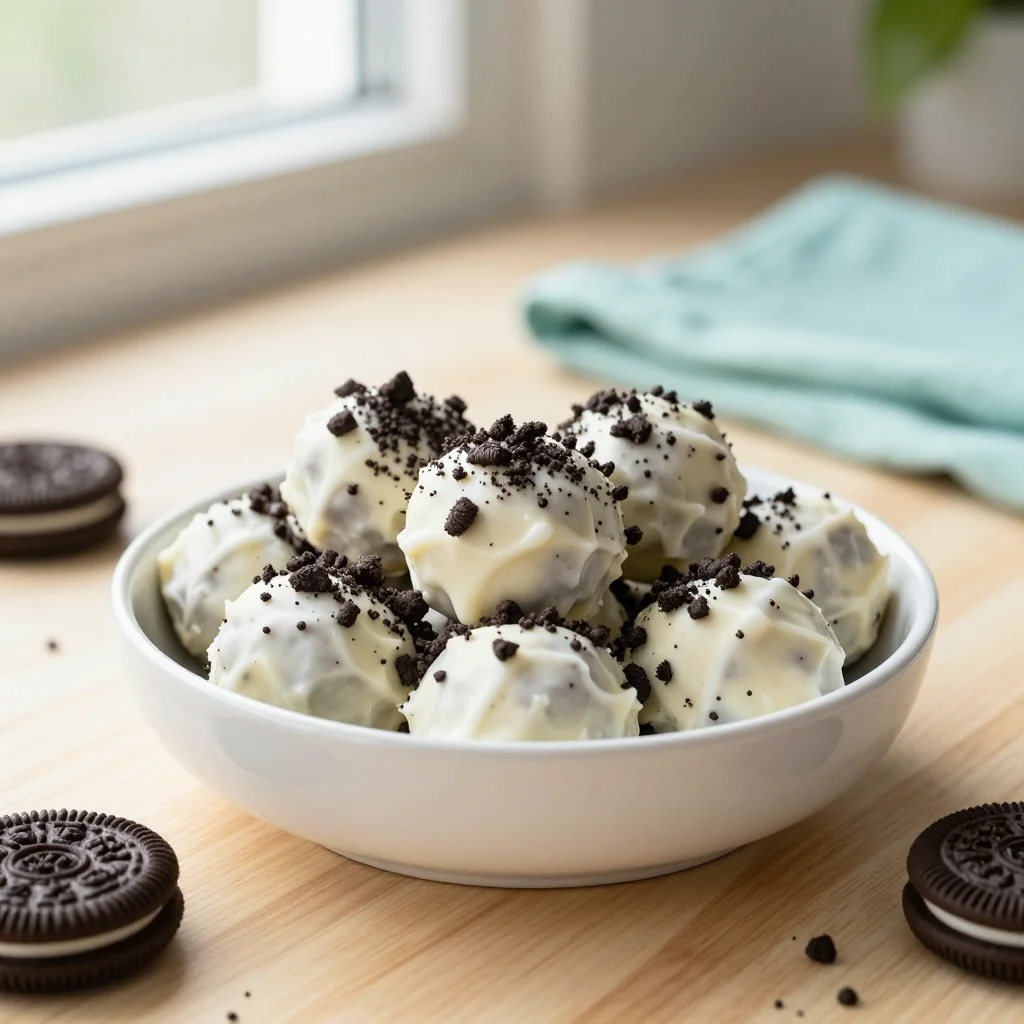
Indulge in creamy, crunchy, and oh‑so‑decadent bite‑size treats that melt in your mouth without ever touching the oven.
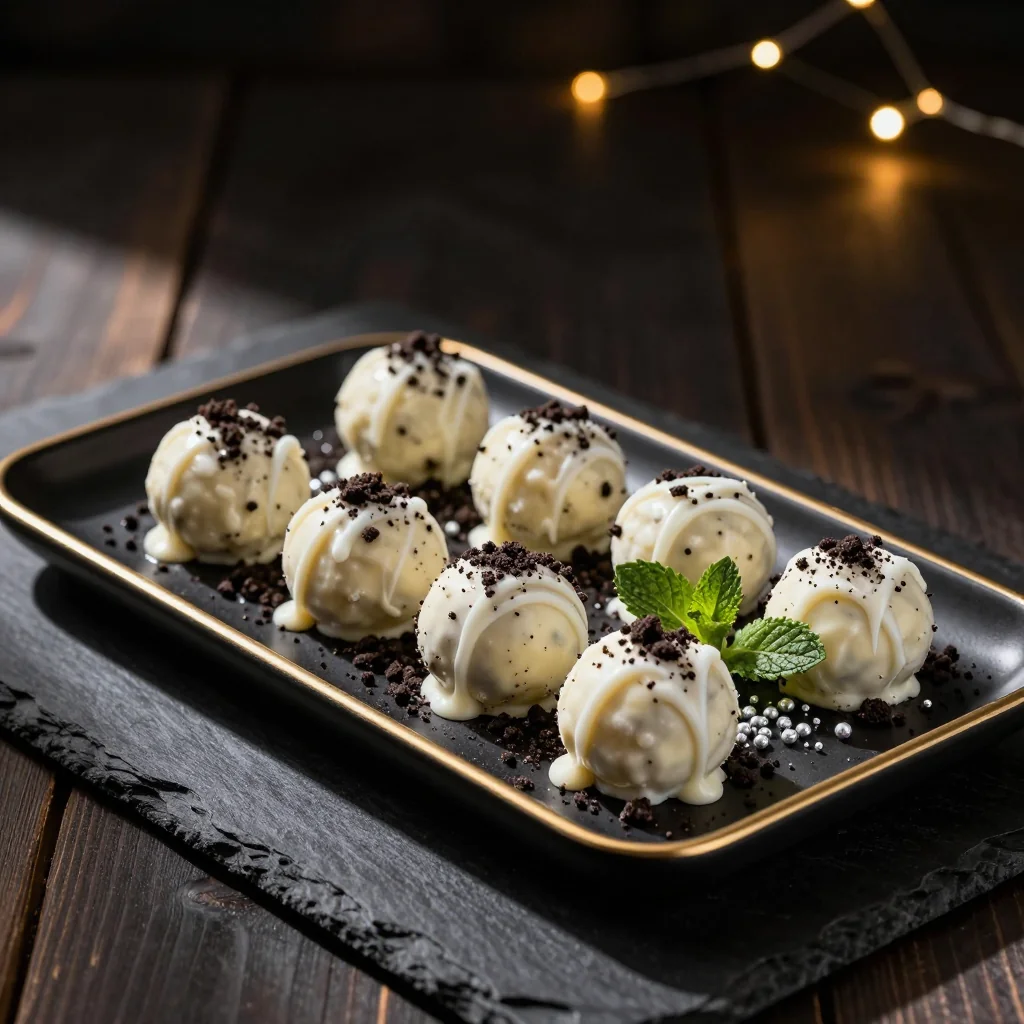
When I was a teenager, my best friend and I would spend countless Saturday afternoons trading homemade sweets at school. One memory that still makes my mouth water is the first time I tasted an Oreo truffle that was coated in silky white chocolate. The moment the bite hit my tongue, the crunch of the cookie met the velvety melt of chocolate, creating a perfect harmony that I’ve chased ever since.
Oreo truffles have a humble origin: they are a creative spin on the classic American cookie, reimagined as a bite‑size confection that feels both familiar and luxurious. The no‑bake method makes them especially appealing for warm weather or for those who don’t want to heat up the kitchen.
In this article, I’ll walk you through every nuance of the recipe—from choosing the right white chocolate to mastering the perfect roll. You’ll learn how to balance sweetness, achieve a smooth coating, and present these truffles like a professional pâtissier.
Ready to impress your friends, family, or just treat yourself? Let’s dive in and create a batch of truffles that will become the star of any gathering.
🌟 Why This Recipe Will Win Your Heart
These truffles combine the nostalgic crunch of Oreos with the luxurious melt of white chocolate, delivering a snack that feels both playful and sophisticated.
- ✨ Effortless No‑Bake Process: No oven means you can prepare these treats any time of year, even in the hottest summer months, without heating your kitchen.
- ✨ Perfect Texture Balance: The crumbly cookie base blends seamlessly with the creamy cheese filling, while the white chocolate coating adds a glossy, melt‑in‑your‑mouth finish.
- ✨ Customizable Flavors: Swap white chocolate for dark, add a hint of espresso, or drizzle with caramel – the base recipe is a versatile canvas.
- ✨ Crowd‑Pleaser: Whether at a birthday party, a holiday gathering, or a casual movie night, these bite‑size delights are universally adored.
- ✨ Minimal Equipment: All you need are a food processor, a microwave, and a few basic kitchen tools.
- ✨ Ideal for Gift‑Giving: Pack them in a decorative tin or a clear jar, and you have a charming homemade gift that looks as good as it tastes.
🥗 Ingredients
📝 Complete Ingredient List
For the Truffle Base:
For the White Chocolate Coating:
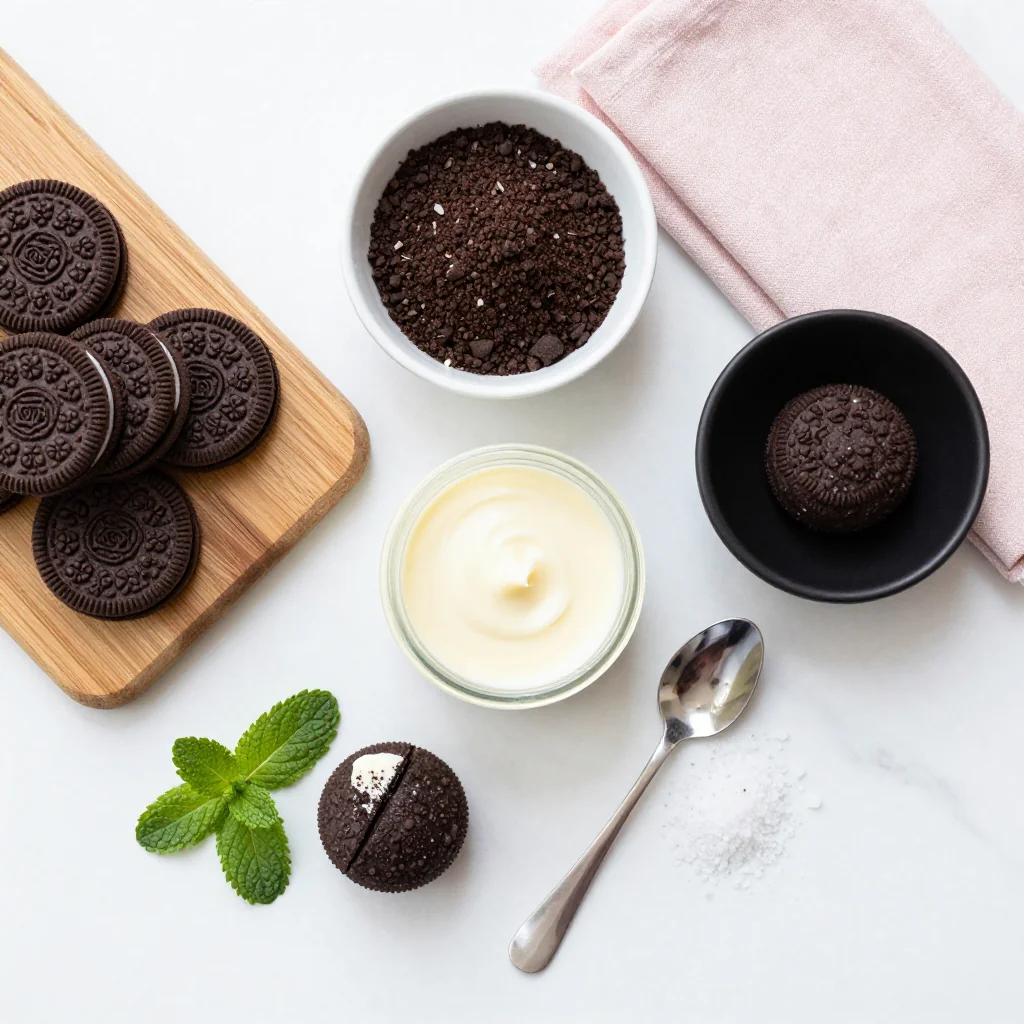
🔍 Focus on Key Ingredients
Oreo Cookies
Oreo cookies provide the signature chocolate‑cream crunch that defines these truffles. When crushing them, aim for fine crumbs with a few small chunks for texture. Freshly opened packages give the best flavor; stale cookies can become soggy when mixed with butter.
Cream Cheese
Full‑fat cream cheese adds richness and a tang that balances the sweetness of white chocolate. Make sure it is softened at room temperature so it blends smoothly with the butter and crumbs, preventing lumps.
White Chocolate
High‑quality white chocolate contains a higher percentage of cocoa butter, which ensures a glossy, snap‑ready coating. Avoid compound chocolate, as it can become grainy when melted.
🔄 Quick Substitutions
| If you don’t have... | Use instead... |
|---|---|
| Cream cheese | Mascarpone or Greek yogurt (drain excess) |
| White chocolate | Milk chocolate with a splash of vanilla |
| Oreo cookies | Chocolate sandwich cookies of any brand |
👨🍳 Step‑by‑Step Instructions
Follow these detailed steps to create perfectly smooth, melt‑in‑your‑mouth truffles that look as good as they taste.
📋 Phase 1: Preparation and Mise en Place
Gather and measure all ingredients before you start. This ensures a smooth workflow.
Crush the Oreos
Place the Oreo cookies in a food processor and pulse until you achieve a fine crumb with occasional small pieces for texture. If you don’t have a processor, place the cookies in a zip‑top bag and crush them with a rolling pin. The goal is a texture similar to coarse sand.
Combine Cream Cheese, Butter, and Vanilla
In a large mixing bowl, whisk together softened cream cheese, melted butter, and vanilla extract until the mixture is smooth and glossy. This should take about 30 seconds with an electric mixer on low speed.
Mix Crumbs into the Cheese Mixture
Add the crushed Oreos to the cream cheese mixture. Stir gently with a spatula until the crumbs are fully incorporated. The mixture should hold together when pressed between your fingers.
🔥 Phase 2: Shaping and Coating
Now we’ll form the truffles and give them a glossy white chocolate coat.
Form the Truffles
Using a small cookie scoop or a teaspoon, portion out the mixture and roll each portion between your palms to create smooth balls about 1.5 inches in diameter. Place the formed balls on a parchment‑lined tray.
Chill the Balls
Refrigerate the rolled balls for at least 30 minutes. This firming step makes the coating process smoother and prevents the truffles from falling apart.
Melt the White Chocolate
Combine white chocolate chips and vegetable oil in a microwave‑safe bowl. Heat in 30‑second intervals, stirring after each burst, until the chocolate is fully melted and glossy. This should take about 1–2 minutes total.
✨ Phase 3: Finishing and Serving
The final touches bring everything together.
Dip the Truffles
Using a fork or a small dipping tool, submerge each chilled truffle into the melted white chocolate, allowing excess to drip back into the bowl. Place the coated truffle back onto the parchment sheet.
Add Decorative Sprinkles (Optional)
While the chocolate is still wet, sprinkle edible glitter, colored sprinkles, or crushed pistachios on top for visual appeal and added texture.
Set the Truffles
Return the tray to the refrigerator for another 15 minutes, allowing the coating to harden completely.
Serve and Enjoy
Transfer the truffles to a decorative platter. Serve at room temperature for the best melt‑in‑your‑mouth experience. They pair beautifully with a glass of chilled sparkling water or a light dessert wine.
💡 Expert Tips and Tricks
🛒 Choosing the Right Ingredients
When selecting white chocolate, look for a label that lists cocoa butter as the first ingredient. Avoid brands that substitute vegetable fats, as they produce a dull, brittle coating. For Oreos, fresh packages guarantee a crisp texture; stale cookies can become soggy when mixed with butter.
🔪 Preparation Techniques
Use a silicone spatula to fold the crushed cookies into the cream cheese mixture; this minimizes air incorporation, resulting in denser truffles. Keep your hands slightly chilled when rolling the balls to prevent the mixture from softening.
🌡️ Mastering the Coating
Adding a teaspoon of vegetable oil to the white chocolate not only improves shine but also lowers the viscosity, making dipping easier. Stir constantly while microwaving to avoid hot spots that can cause the chocolate to seize.
🍽️ Presentation and Service
Arrange the truffles on a marble slab or a glossy black plate for contrast. Dust a light layer of powdered sugar for an elegant finish, or drizzle with a thin ribbon of dark chocolate for a striking visual.
🏆 Pro Tips
Professional pastry chefs know that the smallest details can elevate a simple confection into a masterpiece.
- 🎯 Temperature Control: Keep the cream cheese mixture chilled (around 4 °C) while shaping. This prevents the fats from melting, ensuring a firmer truffle that holds its shape during coating.
- 🎯 Ingredient Ratios: The ideal crumb‑to‑fat ratio is roughly 2 : 1 by weight. This balance yields a dense yet creamy interior without being overly greasy.
- 🎯 Coating Thickness: Dip each truffle just once and let it set. A double dip creates a thick shell that can mask the delicate cookie flavor inside.
- 🎯 Air Bubbles: After dipping, gently tap the fork against the side of the bowl to release trapped air, resulting in a smoother surface.
- 🎯 Storage Strategy: Store truffles in a single layer, separated by parchment paper, to prevent them from sticking together as the coating sets.
- 🎯 Flavor Infusion: Add a few drops of almond extract or orange zest to the melted white chocolate for a subtle aromatic twist that complements the Oreo base.
"The secret to great confections is patience and precision—never rush the tempering, and always respect the balance of flavors." — Pierre Hermé
🔄 Variations and Adaptations
These truffles are a flexible canvas; feel free to experiment with flavors, textures, and dietary needs.
🥬 Vegetarian/Vegan Version
Swap the cream cheese for a blend of silken tofu and a tablespoon of coconut oil, and use vegan white chocolate chips. The texture remains creamy, and the flavor stays rich.
- Vegan cream cheese alternative (200 g) – provides the tang.
- Coconut oil (30 g) – adds melt‑in‑the‑mouth richness.
🌶️ Flavor Variations
Customize the base flavor profile with these ideas.
Spicy Version:
Add a pinch of cayenne pepper to the crumb mixture and drizzle the finished truffles with a thin line of dark chocolate infused with chili oil.
Mediterranean Version:
Mix finely chopped pistachios into the crumb base and coat with white chocolate flavored with a drop of rose water. Garnish with crushed pistachios for a fragrant finish.
Asian Inspired Version:
Incorporate matcha powder (½ tsp) into the white chocolate coating and sprinkle toasted sesame seeds on top for a subtle earthy note.
⚠️ Dietary Adaptations
Gluten‑Free:
Use gluten‑free chocolate sandwich cookies instead of regular Oreos. Ensure the cream cheese is labeled gluten‑free.
Lactose‑Free:
Replace cream cheese with lactose‑free cream cheese and use dairy‑free white chocolate made from rice or almond milk solids.
Low‑Calorie:
Reduce the butter by half and use a sugar‑free white chocolate blend. You’ll still retain the texture while cutting roughly 150 calories from the whole batch.
👶 Kid‑Friendly Version
Kids love bright colors. Add a few drops of natural food‑grade coloring to the melted white chocolate (e.g., strawberry pink or blueberry blue) and use fun-shaped sprinkles. Keep the sweetness level moderate to avoid overwhelming tiny taste buds.
📦 Storage and Reheating
🧊 Conservation
Refrigerator:
- Duration: Up to 5 days
- Container: Airtight glass jar or plastic container
- Tip: Place a sheet of parchment between layers to prevent sticking.
Freezer:
- Duration: Up to 2 months
- Method: Freeze on a parchment sheet, then transfer to a freezer‑safe bag.
- Defrosting: Thaw in the refrigerator for 2–3 hours before serving.
💡 For best texture, avoid frequent temperature changes, as they can cause the white chocolate coating to develop a dull, grainy surface.
♨️ Reheating
🔥 Oven (Recommended):
- Preheat to 150 °C (300 °F).
- Place truffles on a parchment‑lined tray.
- Warm for 5 minutes.
- Remove and let cool 2 minutes before serving.
⚡ Microwave (Quick):
- Arrange truffles on a microwave‑safe plate.
- Heat at 50 % power for 20 seconds.
- Check softness; repeat in 10‑second bursts if needed.
🍳 Stovetop:
Place a skillet over low heat, add a splash of water, and gently warm the truffles for 30 seconds, turning occasionally. This method revives softness without melting the coating.
🍷 Perfect Pairings
🥗 Side Accompaniments
- Fresh Berries: A small bowl of mixed berries adds acidity that cuts through the richness.
- Whipped Mascarpone: Lightly sweetened with a hint of lemon zest, it provides a creamy contrast.
- Salted Caramel Drizzle: A thin line of caramel adds depth without overwhelming the truffle’s flavor.
🍷 Wine & Beverage Matches
- Prosecco: Its bright bubbles and subtle fruit notes complement the sweet white chocolate.
- Late Harvest Riesling: The honeyed sweetness mirrors the truffle’s flavor while offering a crisp finish.
- Non‑Alcoholic: Sparkling elderflower soda provides floral aromatics that pair beautifully.
🍰 Complementary Courses
Start your meal with a light citrus salad, follow the truffles with a citrus‑infused sorbet, and finish with a simple vanilla panna cotta. This progression balances richness with refreshing acidity.
❓ Frequently Asked Questions
Q: Can I use regular chocolate instead of white chocolate?
A: Absolutely! Dark or milk chocolate will change the flavor profile, offering a richer or more caramel‑like taste. Just ensure you adjust the amount of oil slightly if the chocolate is thicker.
Q: How do I prevent the white chocolate from turning grainy?
A: Melt the chocolate slowly, preferably in short microwave intervals or a double boiler, and stir continuously. Adding a small amount of oil (as the recipe suggests) helps maintain a smooth, glossy texture.
Q: What if the crumb mixture is too sticky to roll?
A: Chill the mixture for 15‑20 minutes, or add a tablespoon of additional crushed Oreos. The extra dry crumbs absorb excess moisture, making the mixture easier to handle.
Q: Can I make these truffles ahead of time for a party?
A: Yes! Prepare the truffles up to the coating step, then store them covered in the refrigerator. Add any decorative sprinkles just before serving to keep them crisp.
Q: Are there any common mistakes to avoid?
A: Overheating the white chocolate, using low‑fat cream cheese, or skipping the chilling step are the most frequent errors. Each can lead to a dull coating or a crumbly interior.
Q: How can I scale the recipe for a larger crowd?
A: Multiply all ingredient quantities by the desired factor and adjust the portion control on the recipe card. The built‑in JavaScript will automatically recalculate the amounts for you.
🎉 Let’s Get Cooking!
These Easy No‑Bake Oreo Truffles with White Chocolate are more than just a dessert—they’re a celebration of texture, flavor, and simplicity. By following the detailed steps and embracing the pro tips, you’ll create a batch that looks restaurant‑ready and tastes unforgettable. Whether you’re serving them at a holiday gathering, a birthday party, or simply treating yourself after a long day, these truffles will leave a lasting impression.
Don’t be shy—share your results, ask questions in the comments, and give the recipe a rating. Your feedback helps us improve and inspires other home cooks to try new variations.
Have you tried this recipe?
Leave a comment and rating below! Share your photos on Instagram with #OreoTruffleDelight to be featured on our page.
Easy No Bake Oreo Truffles with White Chocolate
Creamy Oreo truffles dipped in glossy white chocolate – perfect for any occasion.
📝 Ingredients
Truffle Base
Coating
👨🍳 Instructions
- 1 Crush the Oreos into fine crumbs.
- 2 Blend cream cheese, melted butter, and vanilla until smooth.
- 3 Combine crumbs with the cheese mixture; press to form a cohesive dough.
- 4 Roll the dough into 12 equal balls and chill for 30 minutes.
- 5 Melt white chocolate with oil in short bursts, stirring constantly.
- 6 Dip each chilled ball into the melted chocolate, letting excess drip off.
- 7 Sprinkle with optional sprinkles while chocolate is still wet.
- 8 Refrigerate the coated truffles for 15 minutes to set.
- 9 Transfer to a serving platter and enjoy.
- 10 Store leftovers in an airtight container in the fridge.
🥗 Nutritional Information (per serving)
*Nutrition facts are estimated based on typical ingredient brands.
📚 You Might Also Like
Silky Chocolate Mousse
Red Velvet Cupcakes
Lemon Tart with Berries



💬 Comments & Reviews
Leave a Comment
No comments yet. Be the first to share your thoughts!