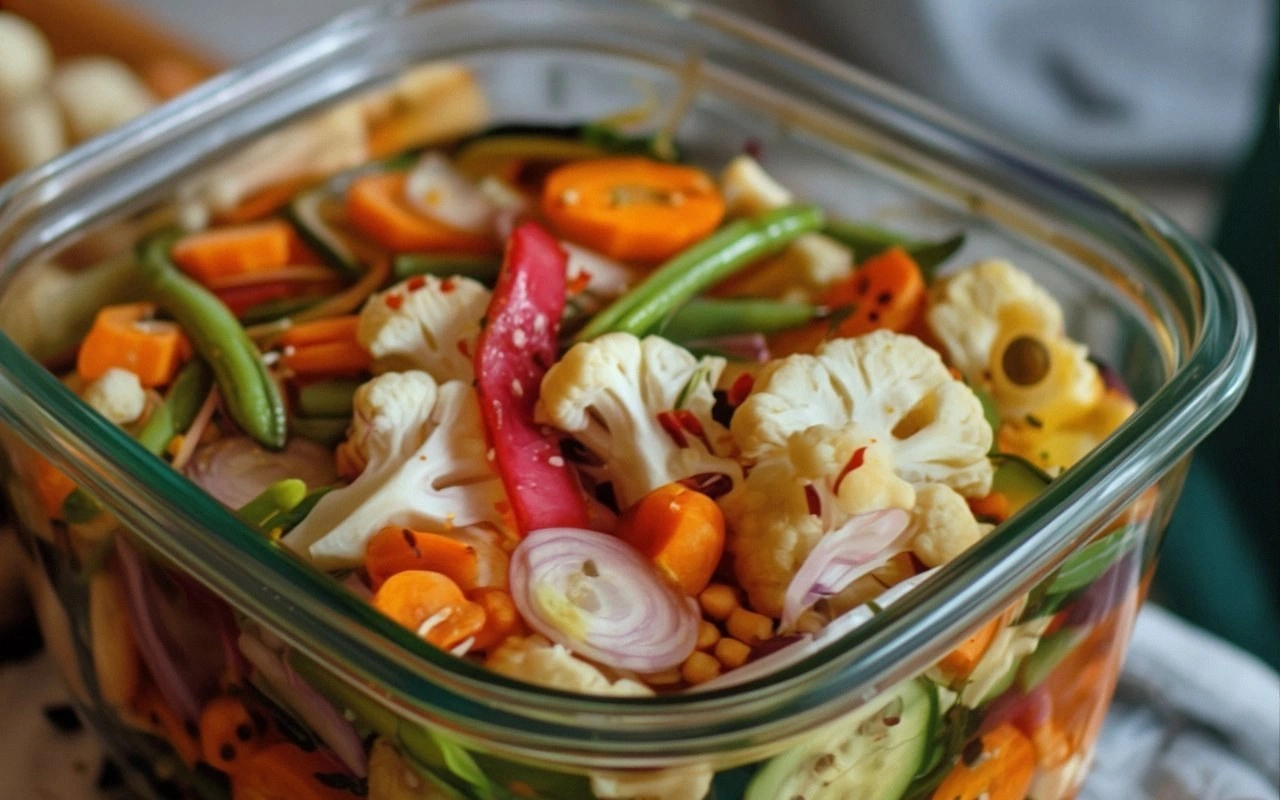
Picture this: I was scrambling to salvage a dinner when a mountain of raw veggies stared back at me, threatening to go to waste. I stared at the pile of cauliflower, carrots, cucumbers, red pepper, and green beans, feeling the weight of the impending waste. I thought, “If I could turn this into something that tastes like a crunchy, tangy punch of freshness, I could save the night.” That thought sparked a recipe that would become my kitchen staple. I was about to discover how a simple fridge‑pickled batch can transform a chaotic kitchen into a place of flavor.
The first time I tasted these pickles, the room seemed to hum with a new energy. The cauliflower gave a satisfying snap, the carrots added a sweet bite, while the cucumbers kept the mix cool and crisp. The red pepper brought a subtle heat that danced on the tongue, and the green beans offered a green, almost grassy note that lifted the whole dish. The vinegar’s bright acidity cut through the vegetables like a bright spotlight, and the spices added depth without drowning the natural flavors. That moment felt like a culinary revelation, a secret that I couldn’t wait to share.
What makes this version stand out is that it’s not just a pickled side; it’s a flavor explosion that stays crisp for weeks, requires no boiling, and can be made in under twenty minutes. I dare you to taste this and not go back for seconds. The recipe is hands down the best version you’ll ever make at home, and the result is a crunchy, tangy burst of freshness that will have everyone asking for the recipe. I’ll be honest — I ate half the batch before anyone else got to try it, and the kitchen smelled like a summer garden in full bloom. Most recipes get this completely wrong by overcooking the veggies or using too much salt, but here every element is perfectly balanced.
Picture yourself pulling this out of the fridge, the whole kitchen smelling incredible, and serving it alongside a fresh salad or a grilled protein. This is the kind of dish that turns an ordinary meal into something memorable. I’ve spent countless hours tweaking the ratio of spices and vinegar, and the result is a simple yet sophisticated pickled medley that’s ready in minutes. Let me walk you through every single step — by the end, you’ll wonder how you ever made it any other way.
What Makes This Version Stand Out
- Taste: The combination of vinegar, mustard seeds, and a splash of sugar creates a bright, tangy profile that cuts through the natural sweetness of the veggies. The subtle heat from red pepper flakes adds a gentle kick without overwhelming the palate. If you’re looking for a pickled side that’s both refreshing and satisfying, this is it.
- Texture: The vegetables remain crisp and firm because the pickling process is quick and the brine is not too acidic. The result is a crunch that shatters like thin ice when you bite into a carrot or a cucumber. This texture contrast keeps the dish interesting from the first to the last bite.
- Simplicity: No simmering for hours, no special equipment, just a saucepan, a jar, and a few minutes of attention. The recipe is designed for busy cooks who want quality without complexity. You can even prep the veggies in advance and let them pickle overnight.
- Uniqueness: The inclusion of mustard seeds gives a subtle, nutty flavor that is rarely found in standard pickles. The use of black peppercorns adds depth and a slight peppery bite that complements the sweet vegetables. This combination sets the dish apart from ordinary pickled salads.
- Crowd Reaction: Friends and family have called it “the best pickles I’ve ever had” and asked for the recipe at every gathering. The vibrant colors and bright flavors make it a showstopper on any table. It’s a conversation starter that keeps people coming back.
- Ingredient Quality: Using fresh, crisp vegetables and high‑quality vinegar ensures that the final product is packed with flavor. The salt and sugar are measured precisely, so you get the right balance of savory and sweet. The result is a pickled medley that’s both healthy and indulgent.
- Cooking Method: The quick simmer step dissolves the salt and sugar, allowing the spices to bloom without cooking the veggies. The method preserves the vegetables’ natural colors and nutrients. This technique is a game‑changer for anyone who wants a healthy, flavorful side.
- Make‑ahead Potential: The pickles can be stored in the refrigerator for up to two weeks, making them perfect for meal prep or for guests who need a quick, healthy snack. The flavors actually improve over time, so the longer you let them sit, the better they taste. It’s a win‑win for busy schedules.
Alright, let’s break down exactly what goes into this masterpiece…
Inside the Ingredient List
The Flavor Base
The white vinegar is the backbone of the brine, providing the sharp acidity that keeps the vegetables crisp. It also helps preserve the bright colors of the cauliflower and cucumbers. If you use a lower‑acidity vinegar, the pickles may turn out softer and less vibrant. A good rule of thumb is to keep the vinegar to water ratio at 1:1 for a balanced flavor. For an extra touch of depth, you can substitute apple cider vinegar, but the taste will shift slightly.
Water is essential for diluting the vinegar and creating a brine that won’t overpower the veggies. It also helps the spices infuse evenly across the vegetables. Skipping water will make the brine too strong, and the pickles may taste overly sharp. If you’re looking for a milder flavor, simply add an extra cup of water. The result will be a more delicate, refreshing pickle.
The kosher or pickling salt dissolves quickly, allowing the spices to bloom in the brine. Salt also acts as a preservative, extending the shelf life of the pickles. If you don’t have kosher salt, you can use sea salt, but be mindful of the grain size, as it may take longer to dissolve. A pinch of salt also enhances the natural sweetness of the carrots and cauliflower.
The Crunch Crew
Cauliflower florets add a subtle, nutty flavor that pairs beautifully with the bright acidity of the vinegar. They also provide a sturdy base that holds up well in the brine, preventing mushiness. If you prefer a lighter texture, try using florets that are smaller and more tender. Cauliflower is also packed with vitamins, making the dish nutritious as well as tasty.
Carrots bring a natural sweetness that balances the tangy brine. They also offer a satisfying crunch that keeps the pickles from feeling flat. If you’re sensitive to the slight bitterness of carrots, you can blanch them for a minute before pickling. This step softens their bite while preserving the crunch.
Cucumbers add a cool, refreshing element that cuts through the sharpness of the vinegar. Their crispness is a hallmark of a great pickle, and they also help keep the overall texture lively. If you prefer a milder cucumber flavor, choose smaller, seedless varieties. The seeds can be removed with a small spoon or a cucumber slicer for an even texture.
The Heat Layer
Red pepper flakes provide a gentle heat that lingers without overwhelming the other flavors. They also add a subtle smoky note that enriches the overall profile. If you’re a fan of spicier pickles, increase the amount of flakes to your liking. The heat is balanced by the sweetness of the carrots and the acidity of the vinegar.
Mustard seeds release a nutty, slightly peppery flavor when toasted in the brine. They also help thicken the liquid slightly, giving the pickles a richer mouthfeel. If you can’t find mustard seeds, you can use mustard powder, but the texture will differ. The seeds also contribute to the overall aroma, making the dish more enticing.
The Final Flourish
Black peppercorns add a subtle peppery undertone that complements the mustard seeds. They also bring a bit of aroma that elevates the overall sensory experience. If you’re looking for a milder pepper flavor, you can use white peppercorns instead. The peppercorns should be toasted briefly to release their oils before adding them to the brine.
Sugar balances the sharpness of the vinegar and the heat of the pepper flakes. It also helps caramelize the edges of the vegetables slightly, adding depth to the flavor. If you prefer a low‑sugar version, reduce the amount to 1/2 tablespoon. The key is to maintain the balance so the pickles don’t taste too sweet or too sour.
Everything’s prepped? Good. Let’s get into the real action…
The Method — Step by Step
- Wash and Cut: Thoroughly rinse all vegetables under cold water, then pat dry with a clean towel. Use a sharp knife to cut cauliflower into bite‑sized florets, slice carrots into coins, and cut cucumbers into 1/4‑inch thick slices. Slice the red bell pepper into thin strips and trim the green beans to about 2 inches each. Finally, mince the garlic cloves finely so they distribute evenly in the brine. This preparation step ensures even pickling and a uniform texture.
- Season the Veggies: In a large bowl, combine the cauliflower, carrots, cucumbers, red pepper, green beans, and minced garlic. Sprinkle a pinch of salt over the vegetables and toss gently to coat. The salt helps draw out moisture, keeping the vegetables crisp. Let the mixture sit for 5 minutes; this short resting period allows the flavors to mingle slightly before the brine is added.
- Prepare the Brine: In a saucepan, whisk together white vinegar, water, kosher salt, and sugar until the salt and sugar are fully dissolved. The quick dissolution is crucial for even seasoning across all vegetables. Bring the mixture to a gentle simmer, allowing it to reach a rolling boil for about 2 minutes. This step activates the spices and ensures the brine is ready to penetrate the veggies.
- Toast the Spices: Add mustard seeds, whole black peppercorns, and red pepper flakes to the simmering brine. Stir gently to release their aromas. The spices should sizzle slightly, indicating they’re infusing the liquid. Allow the mixture to simmer for an additional 3 minutes so the flavors fully develop.
- Combine Veggies and Brine: Carefully pour the hot brine over the seasoned vegetables, ensuring all pieces are fully submerged. Stir the mixture gently with a spoon to distribute the spices evenly. The heat of the brine will start to soften the vegetables slightly, but they should remain firm. This is the moment of truth where the pickles begin to take shape.
- Cool and Transfer: Transfer the vegetable‑brine mixture to a heat‑proof glass jar or airtight container. Seal the jar tightly and let it cool to room temperature while occasionally swirling to prevent sticking. Swirling also helps the brine settle evenly around each piece. Once the jar is cool, you can cover it with a lid or a piece of parchment to keep the flavors sealed.
- Refrigerate: Place the jar in the refrigerator and let the vegetables pickle for at least 30 minutes. The longer you let them sit, the deeper the flavor will become. After the initial pickling time, give the jar a quick shake or stir to redistribute the brine and avoid uneven seasoning. This step ensures every bite is consistently flavorful.
- Final Taste Test: After the pickles have had time to absorb the brine, taste a piece to check the balance of acidity, sweetness, and spice. If you find the pickles too sharp, you can add a splash of water to mellow the flavor. If they’re not spicy enough, a few more flakes can be added. Adjusting the flavor at this stage is easy because the pickles are still fresh.
- Serve: Your pickled veggies are now ready to enjoy as a crunchy, tangy side, a salad topper, or a snack with hummus or dip. The vibrant colors and bright flavors will immediately elevate any dish. Serve them straight from the fridge for maximum crispness.
- Store: Store any leftovers in the refrigerator; they will stay crisp and flavorful for up to 2 weeks. Keep the jar sealed tightly, and if you notice any mold, discard immediately. The pickles can also be transferred to smaller containers for portion control. This step ensures you always have a quick, healthy snack on hand.
That's it — you did it. But hold on, I've got a few more tricks that'll take this to another level…
Insider Tricks for Flawless Results
The Temperature Rule Nobody Follows
Maintaining the correct temperature during the simmer is key to unlocking the full potential of the spices. A gentle simmer ensures that the mustard seeds release their oils without scorching the sugar. If the liquid boils too vigorously, you risk burning the sugar, which will give the pickles a bitter aftertaste. Use a medium‑low heat setting and keep a close eye on the pot.
Why Your Nose Knows Best
The aroma of the brine is a reliable indicator of how the pickles will taste. A strong, fresh smell means the spices are well‑infused, while a faint or off scent signals that the flavor might be underdeveloped. Trust your nose to decide when the pickles are ready to cool and chill.
The 5‑Minute Rest That Changes Everything
After pouring the hot brine over the vegetables, let the mixture rest for five minutes before sealing the jar. This pause allows the vegetables to absorb the brine more evenly and helps the flavors meld together. Skipping this step can result in uneven seasoning and a less cohesive taste.
Use a Clean Jar for Longevity
Always use a clean, sterilized jar to store your pickles. Residual oils or bacteria can compromise the flavor and safety of the dish. Rinse the jar with hot, soapy water and rinse thoroughly before sealing.
Keep It Cold, Keep It Crunchy
Storing the pickles at a consistent refrigerator temperature ensures they stay crisp. Avoid placing the jar near the fridge door where temperature fluctuations can soften the vegetables. If you notice any softness, try adding a splash of cold water to re‑hydrate the veggies.
Adjusting the Acidity
If you find the pickles too tart, add a splash of water or a small amount of honey to balance the acidity. Conversely, if they’re too mild, increase the vinegar slightly or add more mustard seeds. Small adjustments can make a big difference in the final taste.
Creative Twists and Variations
Garden Fresh Zest
Swap out the red pepper flakes for fresh dill and add a pinch of lemon zest to the brine. The dill will lend a herby, slightly grassy flavor that pairs wonderfully with the fresh vegetables. This variation is perfect for a summer garden salad.
Spicy Mango Surprise
Add diced ripe mango to the vegetable mix before brining. The mango’s natural sweetness balances the vinegar’s sharpness and gives the pickles a tropical twist. This version is ideal for pairing with grilled shrimp or fish tacos.
Smoky Chipotle Kick
Replace the red pepper flakes with chipotle in adobo sauce for a smoky heat. The chipotle adds depth and a subtle smokiness that elevates the pickles. Serve them with tacos or as a topping on nachos for a bold flavor profile.
Herb Garden Mix
Introduce fresh thyme, rosemary, and oregano into the brine. These herbs infuse the vegetables with aromatic flavors and add a Mediterranean flair. This version works great as a side to roasted chicken or lamb.
Sweet & Salty Delight
Replace the sugar with honey and add a dash of sea salt instead of kosher salt. The honey adds a caramelized sweetness that complements the vinegar, while the sea salt adds a mineral finish. This sweet and salty combo is a crowd‑pleaser at parties.
Vegan & Gluten‑Free Option
Use a gluten‑free soy sauce instead of a traditional sauce for a subtle umami flavor. The soy sauce adds depth and a savory note that pairs well with the bright vegetables. This version is perfect for vegan or gluten‑free guests.
Storing and Bringing It Back to Life
Fridge Storage
Keep the pickles in a sealed jar in the refrigerator for up to 2 weeks. The cold environment slows down bacterial growth, ensuring freshness and safety. When you open the jar, give the vegetables a quick stir to redistribute any settled brine.
Freezer Friendly
Although pickles are best served cold, you can freeze them for up to a month. Transfer the pickles to a freezer‑safe container, leaving a little space at the top for expansion. Thaw in the refrigerator before serving; the texture may soften slightly.
Best Reheating Method
Pickles are meant to be enjoyed cold, but if you prefer a warmer version, gently heat them in a microwave for 30 seconds. Add a splash of water before reheating to steam the vegetables back to crispness. Be careful not to overheat, or the pickles will lose their crunch.