Love this? Pin it for later! 📌
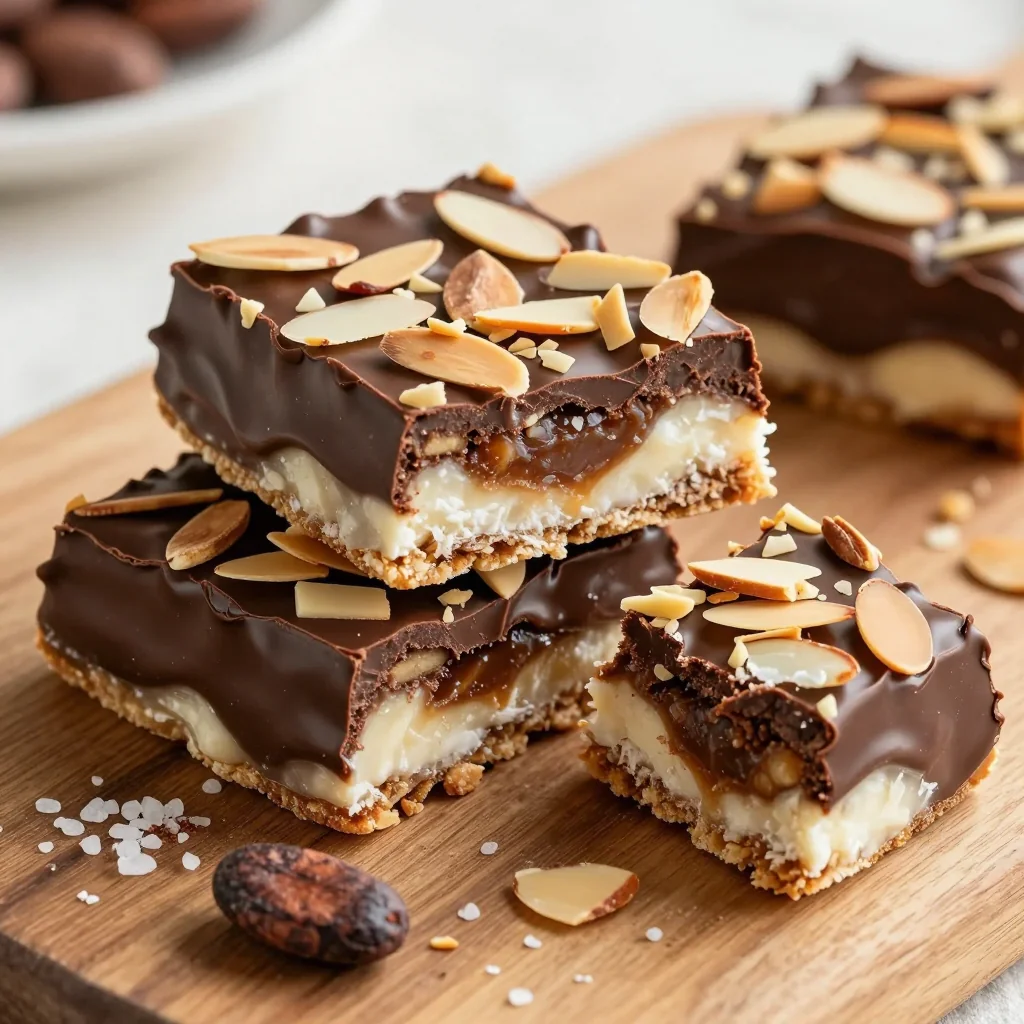
What makes these bars special isn't just their incredible taste – it's the fact that they require zero baking, come together in under 15 minutes, and taste like an indulgent candy bar while being packed with fiber, healthy fats, and natural sweetness. The combination of coconut, almonds, and chocolate creates that familiar flavor we all know and love, but without any refined sugar or processed ingredients.
These bars have become my go-to dessert for everything from afternoon pick-me-ups to dinner party finales. They're sophisticated enough to serve to guests but simple enough that my kids can help make them. Plus, they store beautifully in the freezer, making them perfect for meal prep enthusiasts who like to have healthy treats on hand.
Why This Recipe Works
- No Baking Required: Perfect for hot summer days when you don't want to turn on the oven
- Refined Sugar-Free: Sweetened naturally with dates and maple syrup for steady energy
- Protein-Packed: Almond butter and almonds provide plant-based protein to keep you satisfied
- Make-Ahead Friendly: Stays fresh for up to 2 weeks in the refrigerator or 3 months in the freezer
- Customizable Base: Easy to adapt for nut allergies or dietary preferences
- Kid-Approved: Even picky eaters love the familiar candy bar taste
- Texture Perfection: The contrast between the chewy coconut layer and crunchy almond topping is irresistible
Ingredients You'll Need
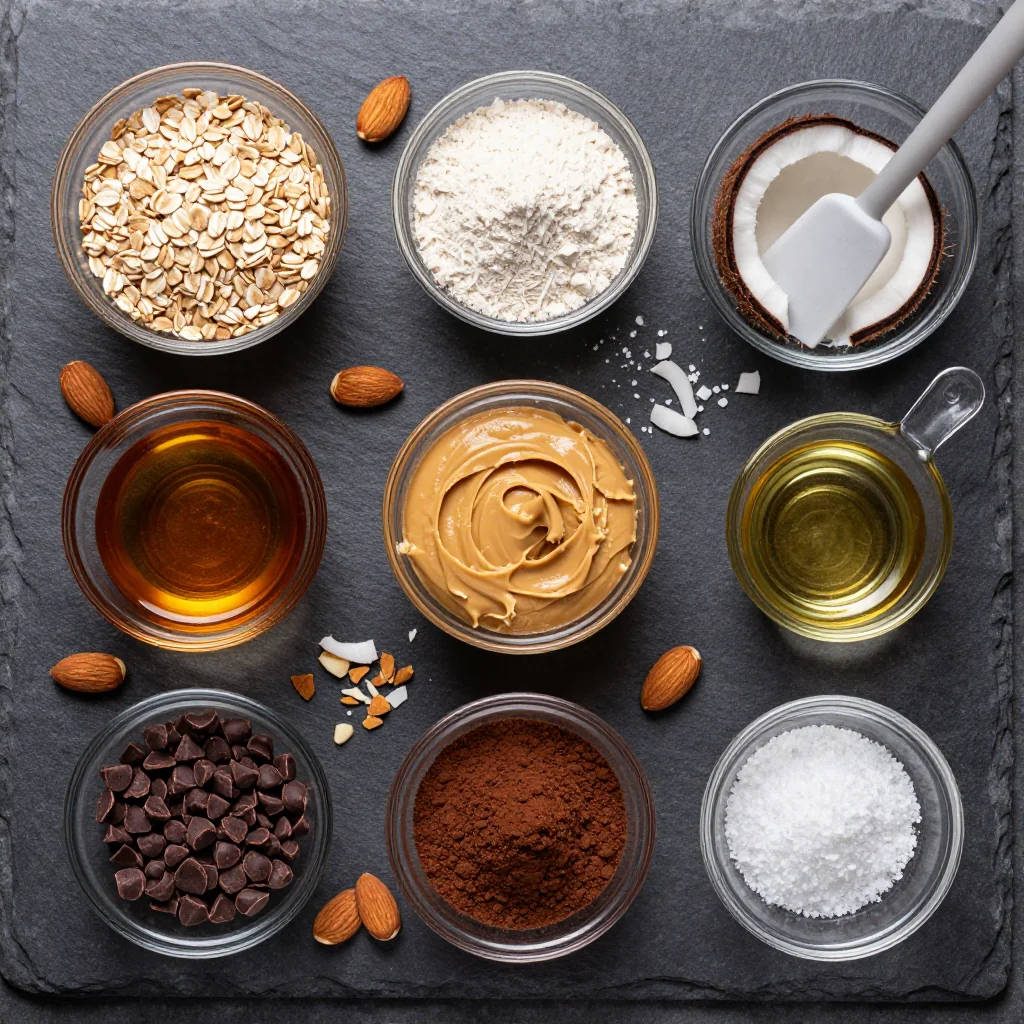
Before we dive into the recipe, let's talk about each ingredient and why it matters. The quality of your ingredients will directly impact the final flavor and texture of these bars, so I always recommend sourcing the best you can find within your budget.
Medjool Dates: These are the backbone of our naturally sweetened base layer. Medjool dates are preferred over other varieties because they're larger, softer, and have a rich caramel-like flavor. When selecting dates, look for plump, glossy fruits that feel soft but not mushy. If your dates seem dry or hard, soak them in warm water for 10 minutes before using.
Raw Almonds: We'll use these both in the base layer for texture and whole almonds pressed into the top for that authentic Almond Joy appearance. Raw almonds provide the best texture and nutritional profile. If you only have roasted almonds on hand, that's fine too – just know they'll have a more intense flavor that might overpower the coconut.
Unsweetened Shredded Coconut: The star of the show! Look for finely shredded coconut rather than large flakes for the best texture. I always recommend buying organic when possible, as coconut is one of the foods that can retain pesticide residues. The unsweetened variety is crucial here since we're controlling the sweetness ourselves.
Almond Butter: This acts as our binding agent and provides that creamy, indulgent mouthfeel. Look for natural almond butter with no added oils or sugars. The consistency should be smooth and pourable at room temperature. If your almond butter has separated, give it a good stir before measuring.
Coconut Oil: This helps our bars set properly when chilled. Use refined coconut oil if you don't want any coconut flavor, or unrefined for an extra coconut boost. Make sure it's in liquid form when using – if it's solid, gently warm it until melted.
Cocoa Powder: For our chocolate layer, I recommend using Dutch-processed cocoa powder for a smoother, less bitter chocolate flavor. The quality really matters here, so spring for a good brand like Valrhona or Ghirardelli if possible.
Maple Syrup: This provides the liquid sweetness for our chocolate topping. Grade A amber is perfect for baking, but any pure maple syrup will work. Avoid pancake syrup or anything with corn syrup added.
Vanilla Extract: A small amount goes a long way in enhancing all the other flavors. Use pure vanilla extract, not imitation vanilla, for the best flavor.
How to Make Healthy No Bake Almond Joy Bars for Dessert
Prepare Your Pan and Ingredients
Line an 8x8 inch baking pan with parchment paper, leaving an overhang on the sides to create "handles" for easy removal later. If your dates aren't soft and pliable, soak them in hot water for 10 minutes, then drain well. Measure out all your ingredients before starting – this recipe moves quickly once you begin.
Make the Coconut Base
In your food processor, combine the pitted dates, 1 cup of shredded coconut, 1/2 cup of almonds, almond butter, and a pinch of sea salt. Process for 60-90 seconds until the mixture comes together in a sticky dough. You'll know it's ready when you can press some between your fingers and it holds together without being too wet. If it's too dry, add a teaspoon of water at a time until it reaches the right consistency.
Press the Base Layer
Transfer the coconut mixture to your prepared pan and use your hands or the back of a measuring cup to press it into an even layer. Make sure to press firmly, especially into the corners, to create a solid base that won't crumble when cut. The layer should be about 1/2 inch thick. If the mixture sticks to your hands, lightly wet them with water.
Add the Whole Almonds
Take your whole almonds (about 16-20) and gently press them into the base layer in neat rows. These will create the signature Almond Joy look and provide that satisfying crunch in every bite. Press them in just enough that they're secure but still visible from the top.
Prepare the Chocolate Topping
In a small saucepan over low heat, whisk together the coconut oil, maple syrup, cocoa powder, vanilla extract, and a pinch of salt. Stir constantly for 2-3 minutes until smooth and glossy. The mixture should be thin enough to pour but thick enough to coat the back of a spoon. Remove from heat and let cool for 2 minutes – if it's too hot, it will melt the base layer.
Assemble the Bars
Pour the chocolate mixture evenly over the base layer, using a spatula to spread it to the edges. Gently tap the pan on the counter to release any air bubbles and ensure the chocolate seeps around the almonds. Sprinkle the remaining shredded coconut over the top for that authentic Almond Joy appearance.
Chill and Set
Place the pan in the freezer for at least 2 hours or until completely firm. This step is crucial for getting clean cuts and the right texture. If you're in a hurry, you can place it in the refrigerator for 4 hours, but the freezer method yields better results.
Cut and Serve
Once firm, remove from the freezer and let sit at room temperature for 5-10 minutes. Use the parchment paper handles to lift the entire block out of the pan. Place on a cutting board and use a sharp knife warmed under hot water to cut into 16 squares. Clean the knife between cuts for the neatest presentation. Store in an airtight container in the refrigerator for up to 2 weeks or in the freezer for up to 3 months.
Expert Tips
Temperature Matters
Let your bars sit at room temperature for 5-10 minutes before cutting. This prevents the chocolate layer from cracking and gives you cleaner edges. If they're too cold, they'll be brittle; too warm, and they'll be messy.
Consistency Check
If your base mixture seems too dry and crumbly, add water one teaspoon at a time until it holds together when squeezed. If it's too wet, add a tablespoon of coconut flour or extra shredded coconut.
Cutting Technique
Dip your knife in hot water and wipe clean between cuts for picture-perfect bars. A bench scraper also works wonderfully for cutting through the firm chocolate layer.
Quick Set Method
If you're short on time, place the assembled bars in the freezer for 30 minutes, then transfer to the refrigerator. This gives you the best of both worlds – quick setting without freezing solid.
Variations to Try
Nut-Free Version
Substitute sunflower seed butter for almond butter and use pumpkin seeds instead of almonds. The flavor profile changes but remains delicious, making it school-safe for lunchboxes.
Mocha Almond Joy
Add 1 teaspoon of instant espresso powder to the chocolate topping for a sophisticated coffee flavor that pairs beautifully with the coconut and almonds.
Tropical Twist
Add 1/4 cup of dried pineapple or mango to the base layer for a tropical flair. The tangy fruit balances the richness of the chocolate and coconut beautifully.
Spicy Mexican Chocolate
Add a pinch of cayenne pepper and cinnamon to the chocolate layer for a warming, spicy kick that elevates these bars to gourmet status.
Storage Tips
Proper storage is key to maintaining the perfect texture and flavor of your Almond Joy bars. These treats are surprisingly stable, but they do require some attention to storage conditions to prevent them from becoming too hard or too soft.
Refrigerator Storage: Store your bars in an airtight container in the refrigerator for up to 2 weeks. Place a piece of parchment paper between layers to prevent sticking. The cold temperature helps maintain the firm texture, but let them sit at room temperature for 5-10 minutes before serving for the best eating experience.
Freezer Storage: These bars freeze beautifully for up to 3 months. Wrap individual bars in parchment paper, then place them in a freezer-safe container or bag. This makes grabbing a single serving incredibly easy. Thaw in the refrigerator overnight or at room temperature for 15-20 minutes.
Room Temperature: While these bars can be kept at room temperature for a few hours, especially in cooler weather, they're best stored cold. In warm environments, the chocolate layer may begin to soften and lose its snap. If serving at a party or picnic, keep them in a cooler with ice packs.
Frequently Asked Questions
While you technically can use sweetened coconut, I strongly recommend sticking with unsweetened. Sweetened coconut contains added sugars and often has a different texture due to the moisture content. If you do use sweetened coconut, reduce or eliminate the maple syrup in the recipe to compensate for the extra sweetness.
The most common culprit is the coconut oil ratio. Make sure you're using the correct amount – too little oil won't allow the chocolate to set properly, while too much can make it greasy. Also, ensure your bars are getting cold enough. If your freezer isn't very cold or if you're trying to set them in the refrigerator when your kitchen is warm, they may need more time.
Absolutely! An 8x8 pan creates bars about 1/2 inch thick. For thinner bars, use a 9x13 pan and reduce the chilling time. For thicker, candy-bar-style treats, use a loaf pan. Just remember that changing the pan size will affect the yield and you may need to adjust the chilling time accordingly.
While these bars are naturally sweetened with dates and maple syrup rather than refined sugar, they still contain carbohydrates that can affect blood sugar. The fiber from the dates, almonds, and coconut helps slow absorption, but portion control is key. I recommend starting with a small piece and monitoring your blood sugar response. You could also reduce the maple syrup slightly, though this may affect the texture.
Yes! Cashew butter creates the creamiest texture and mildest flavor, while peanut butter will give you a more pronounced nutty taste. Tahini (sesame paste) works for a nut-free version but will change the flavor profile significantly. Just ensure whatever nut butter you choose is natural and well-stirred for the best results.
These bars can stay at room temperature for 2-3 hours in a cool environment (under 70°F). In warmer conditions, the chocolate layer may begin to soften. For extended serving at room temperature, consider keeping them on a tray over ice or in a cooler. For best quality and food safety, store them refrigerated and only bring out what you'll serve.
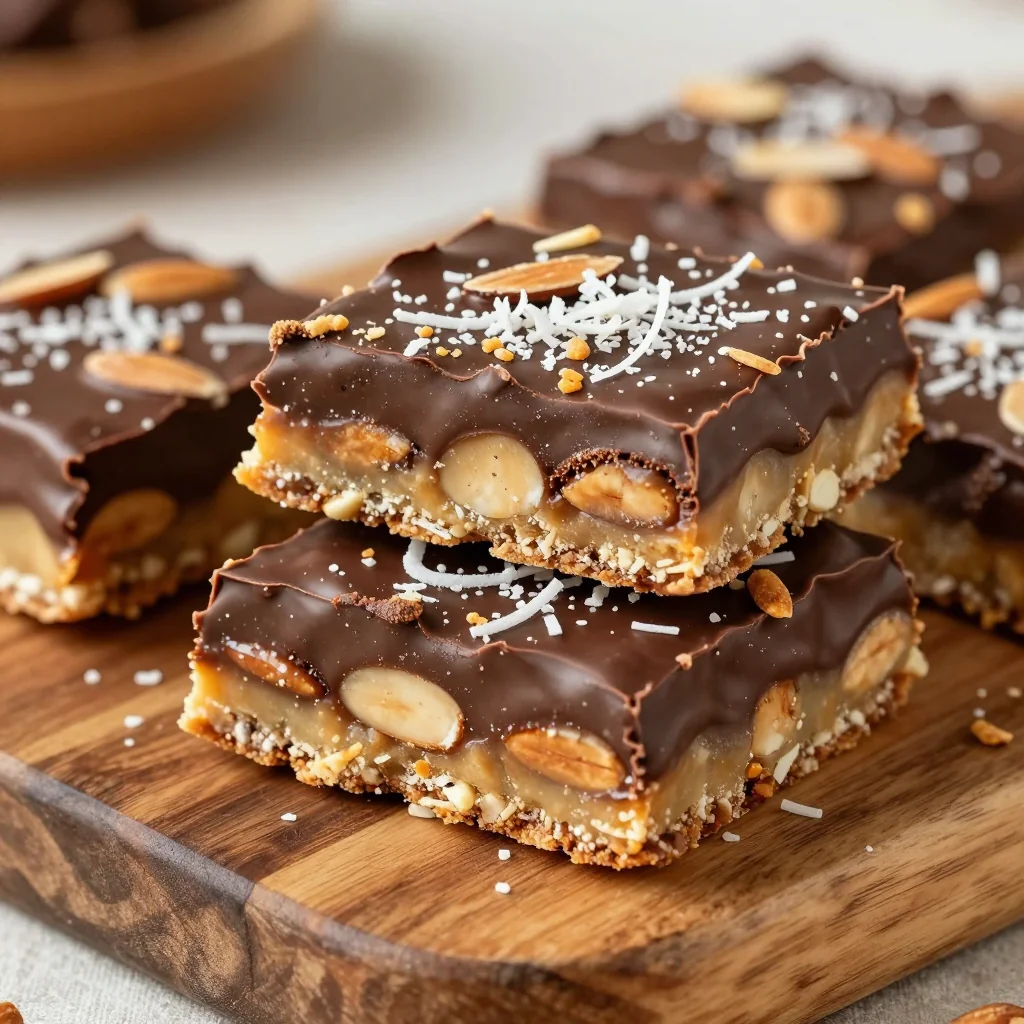
Healthy No Bake Almond Joy Bars for Dessert
Ingredients
Instructions
- Prepare the pan: Line an 8x8 inch baking pan with parchment paper, leaving overhang for easy removal.
- Make the base: In a food processor, combine dates, 3/4 cup shredded coconut, 1/2 cup almonds, almond butter, and salt. Process until a sticky dough forms.
- Press and shape: Press mixture firmly into prepared pan, creating an even layer about 1/2 inch thick.
- Add almonds: Press whole almonds into the base in rows, pressing just enough to secure them.
- Make chocolate topping: In a small saucepan, whisk together coconut oil, maple syrup, cocoa powder, vanilla, and salt over low heat until smooth.
- Assemble: Pour chocolate over base, spreading evenly. Sprinkle remaining 1/4 cup coconut on top.
- Chill: Freeze for 2 hours or until completely firm.
- Cut and serve: Lift out using parchment paper, let sit 5 minutes, then cut into 16 squares with a warm knife.
Recipe Notes
For best results, store bars in an airtight container in the refrigerator for up to 2 weeks or in the freezer for up to 3 months. Let sit at room temperature for 5-10 minutes before serving for the perfect texture.