Picture this: I’m standing in my cramped kitchen, the timer on my old microwave flashing red like a warning light, and I’ve just burned the last batch of take‑out fried rice I tried to replicate. The smoke alarm chirped, the floor was sticky with oil, and my roommate stared at me like I’d just performed a culinary crime. I swore off fried rice forever—until a dare from a friend sparked a midnight experiment that turned my kitchen disaster into a glorious breakthrough. I grabbed the last cup of jasmine rice, a couple of chicken breasts, and a handful of garlic, and I told myself, “If I can’t make this right, nobody can.”
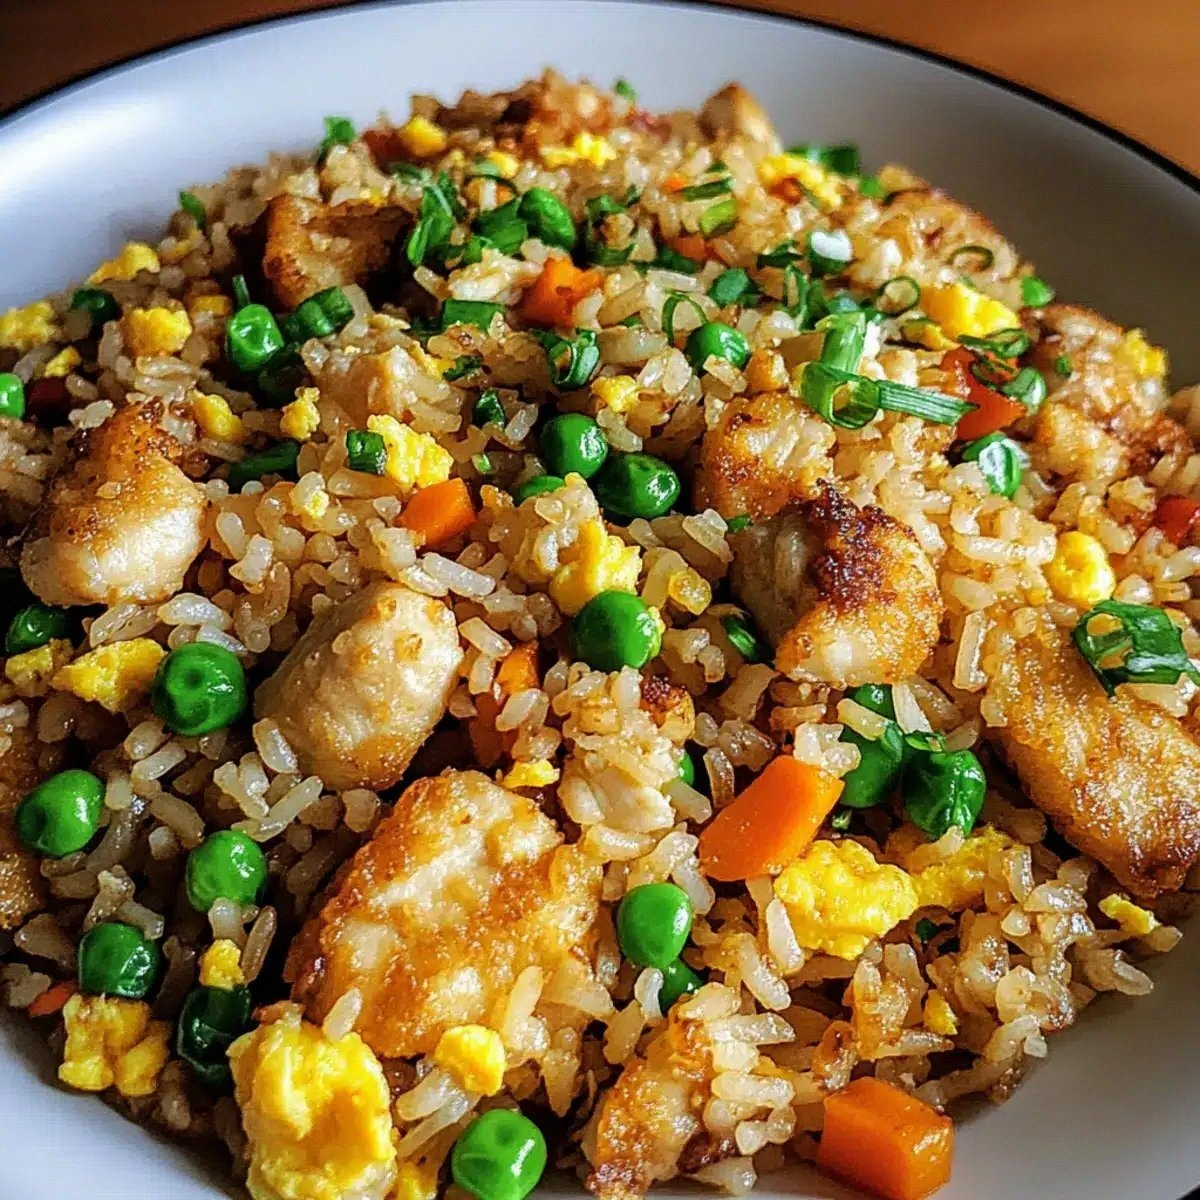
The moment the garlic hit the hot pan, a fragrant pop erupted, sending a wave of buttery, nutty aroma that made the whole apartment feel like a street market in Bangkok. I could hear the rice sizzle, hear it crackle like fireworks, and feel the heat radiating from the wok as the edges of the chicken turned golden and crisp. The taste? A perfect balance of salty, umami, and a hint of sweet from the veggies, all wrapped in a silky yet slightly crunchy texture that danced on my tongue. I dared myself to take a bite, and I was instantly hooked—so good that I ate half the batch before anyone else even got a sniff.
Most fried rice recipes either drown in sauce, get soggy, or lack that protein punch that keeps you full for hours. This version, however, flips the script by using a double‑cook method for the rice, a quick sear for the chicken, and a precise blend of sauces that coat every grain like a glossy, savory veil. The secret? A splash of sesame oil at the end that adds a whisper of nuttiness, and a finishing toss with fresh cilantro that lifts the whole dish into bright, herbaceous heaven. I’m about to reveal the exact technique that turns a simple weekday dinner into a restaurant‑quality plate you’ll want to brag about at every gathering.
Let me walk you through every single step — by the end, you’ll wonder how you ever made it any other way. Okay, ready for the game‑changer? This isn’t just another fried rice; it’s a high‑protein, crispy‑garlic masterpiece that will make your taste buds sing and your muscles thank you. I dare you to taste this and not go back for seconds.
What Makes This Version Stand Out
- Protein‑Packed: Two cups of chicken breast give you a solid 40‑plus grams of lean protein, turning a side dish into a main‑course powerhouse.
- Texture Symphony: The rice is cooked, cooled, then fried to achieve crispy edges that shatter like thin ice, while the chicken stays juicy inside.
- Sauce Balance: Soy, oyster, and fish sauces combine for a umami depth that coats each grain without drowning it.
- Simple Prep: All ingredients are pantry‑friendly, and the whole process fits into a 45‑minute window—perfect for busy weeknights.
- Fresh Finish: A drizzle of sesame oil and a sprinkle of cilantro add a fragrant lift that makes the dish feel fresh and light.
- Versatile Crowd‑Pleaser: Whether you’re feeding a family, a squad of friends, or just yourself, this dish earns rave reviews every single time.
- Make‑Ahead Friendly: Cook the rice a day ahead, store it dry, and you’ll get even crispier results when you fry it.
- Budget‑Smart: Uses inexpensive staples—rice, chicken, veggies—yet feels like a splurge‑worthy dinner.
Inside the Ingredient List
The Flavor Base
Garlic is the hero here—four cloves, minced finely, release a pungent, sweet aroma that forms the aromatic backbone of the dish. If you skip the garlic, you’ll lose that heady perfume that makes the whole kitchen feel alive. A good substitute is shallots, but expect a milder profile. When selecting garlic, choose firm heads with tight skins; soft or sprouting cloves can taste bitter.
The Texture Crew
Jasmine rice provides a fragrant, slightly sticky canvas that holds sauce without turning mushy. The key is to rinse it until the water runs clear, removing excess starch that would otherwise glue the grains together. If you can’t find jasmine, basmati works, but the flavor will shift toward a nuttier note. For the chicken, boneless, skinless breasts are lean, but make sure to pat them dry—moisture is the enemy of crispiness.
The Unexpected Star
Sesame oil is used sparingly, just a teaspoon, yet it delivers a toasty, nutty finish that elevates the entire dish. Many people skip it, thinking it’s unnecessary, but without it the fried rice feels flat. If you’re allergic or avoid nuts, try a drizzle of toasted peanut oil for a similar depth.
The Final Flourish
Fresh cilantro, added at the very end, brings a bright, citrusy lift that cuts through the richness of the sauces. A handful (about a quarter cup) is perfect; too much can overwhelm. If cilantro isn’t your thing, substitute with Thai basil or a squeeze of lime for a different but equally refreshing finish.
Everything's prepped? Good. Let's get into the real action...
The Method — Step by Step
Start by rinsing the jasmine rice under cold water until the water runs clear. This removes excess starch and prevents the grains from clumping. Transfer the rice to a pot with 1½ cups of water, bring to a boil, then reduce to a simmer and cover for 12 minutes. Once cooked, spread the rice on a large tray, fluff with a fork, and let it cool completely; this is the crucial step that gives you those coveted crispy edges later. Tip: If you’re in a hurry, spread the rice on a baking sheet and pop it in a low oven (around 200°F) for 15 minutes.
While the rice cools, dice the chicken breast into bite‑size cubes, then season with one teaspoon of salt and one teaspoon of black pepper. Heat one tablespoon of vegetable oil in a large wok over medium‑high heat. When the oil shimmers, add the chicken in a single layer, letting it sizzle without stirring for about 2‑3 minutes per side. You’ll hear a satisfying crackle as the exterior caramelizes, creating a crispy crust that locks in juices.
Kitchen Hack: Toss the chicken cubes with a tiny splash of cornstarch before frying; this creates an ultra‑crisp coating without deep‑frying.Remove the chicken and set aside. In the same wok, add the remaining tablespoon of oil and toss in the minced garlic. Stir constantly for about 20 seconds—watch it turn a light golden hue, but don’t let it burn, or you’ll get a bitter taste that ruins the whole dish. The garlic should release a sweet, caramelized scent that fills the kitchen like a promise.
Now crank the heat to high and add the cooled rice to the wok. Using a sturdy spatula, spread the rice out and let it sit untouched for 30 seconds; this allows the bottom layer to crisp up. Then, stir‑fry, flipping the rice so each grain gets a chance to develop those golden, crunchy edges. You’ll hear a gentle “sizzle‑pop” that signals the rice is achieving that perfect texture.
Watch Out: If you add the sauces too early, the rice will steam instead of fry, resulting in soggy, mushy rice.Push the rice to the sides of the wok, creating a well in the center. Crack the two eggs directly into the well and scramble quickly, mixing them with the rice once they begin to set. The eggs should coat the grains in a silky veil, adding richness without overwhelming the flavor.
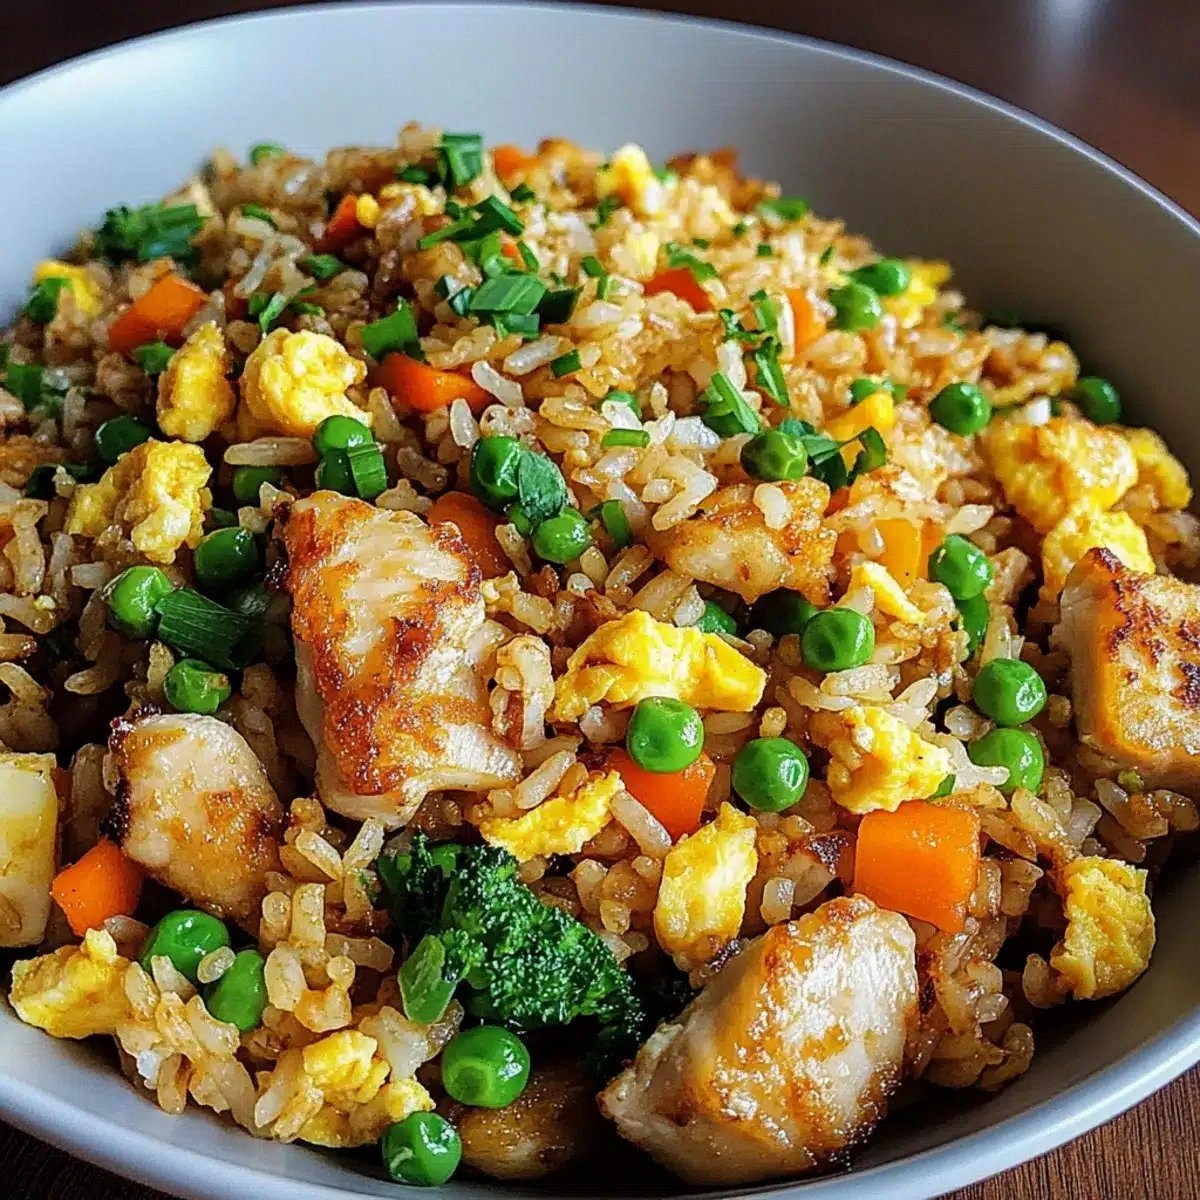
Return the crispy chicken to the wok, then drizzle in two tablespoons of soy sauce, one tablespoon of oyster sauce, and one teaspoon of fish sauce. Stir everything together, ensuring each grain is evenly coated. The sauces should glisten, giving the rice a deep amber hue that looks as good as it tastes.
Add the mixed vegetables—peas, carrots, and corn—along with two tablespoons of chopped green onions. Toss everything for another two minutes, allowing the veggies to heat through while retaining a slight crunch. The colors should pop: vibrant orange carrots, sweet green peas, and bright yellow corn, creating a visual feast.
Finish with a teaspoon of sesame oil, then give the whole pan one final vigorous stir. Sprinkle the quarter‑cup of fresh cilantro over the top, and watch the green flecks swirl through the golden rice like confetti. The aroma at this point is intoxicating—a blend of garlic, soy, and fresh herbs that makes your mouth water.
Turn off the heat, let the wok rest for a minute so the flavors meld, then serve immediately. The rice should be hot, the chicken crisp, and the vegetables perfectly tender. Grab a bowl, dig in, and feel that satisfying protein hit—this is hands down the best version you’ll ever make at home.
That's it — you did it. But hold on, I've got a few more tricks that'll take this to another level...
Insider Tricks for Flawless Results
The Temperature Rule Nobody Follows
High heat is the secret weapon for that fried‑rice crunch. If your wok isn’t screaming hot, the rice will steam instead of fry. I once tried to “play it safe” with medium heat and ended up with soggy clumps. Keep the burner on high, and trust the sound of the sizzle; it’s your best indicator.
Why Your Nose Knows Best
The moment the garlic turns a light golden and releases its perfume, you know you’re on the right track. If the scent smells burnt or acrid, the garlic is overcooked and will dominate the dish with bitterness. Trust your nose more than a timer; it’s an ancient kitchen compass.
The 5‑Minute Rest That Changes Everything
After you finish cooking, let the fried rice sit uncovered for five minutes. This brief rest lets the steam escape, preserving the crisp edges while allowing the flavors to meld. Skipping this step results in a slightly soggy finish that feels less satisfying.
Egg Integration Technique
Instead of scrambling the eggs separately, create a well in the center of the wok and pour them in directly. This method coats each grain with a thin, silky layer of egg, adding richness without creating large, rubbery curds. I tried the separate‑bowl method once; the texture was off, and the dish lost its cohesive feel.
Seasoning Balance Check
Before serving, take a tiny spoonful and taste. If the salt level feels flat, add a pinch more soy sauce or a dash of fish sauce. The key is layering flavor—each addition should be subtle, never overwhelming.
Creative Twists and Variations
This recipe is a playground. Here are some of my favorite ways to switch things up:
Spicy Sriracha Blast
Stir in a tablespoon of sriracha sauce and a pinch of red pepper flakes during step six. The heat pairs beautifully with the garlic, and the bright red hue makes the dish visually striking. Perfect for those who love a kick.
Thai Coconut Curry Twist
Replace the soy sauce with a tablespoon of red Thai curry paste and add a splash of coconut milk in step six. The creamy, aromatic curry melds with the cilantro for a tropical vibe. Serve with lime wedges for extra zing.
Veggie‑Only Power Bowl
Omit the chicken and double the mixed vegetables, adding tofu cubes that have been pressed and lightly pan‑fried. This makes the dish vegetarian while still delivering a solid protein hit from the tofu and eggs.
Smoky Bacon Crunch
Swap half of the chicken for crisped bacon bits. The smoky, salty flavor adds depth, and the bacon’s fat contributes an extra layer of richness that makes the dish feel indulgent.
Herb‑Infused Green Onion
Replace the standard green onions with a mix of chopped basil, mint, and scallions. The fresh herb combo brightens the flavor profile, turning the fried rice into a fragrant, garden‑fresh experience.
Cheesy Fusion
Stir in a quarter cup of shredded mozzarella just before the final garnish. The cheese melts into the hot rice, creating pockets of gooey goodness that contrast with the crispy edges.
Storing and Bringing It Back to Life
Fridge Storage
Transfer any leftovers to an airtight container and refrigerate for up to three days. The rice may lose some crispness, but a quick re‑heat will revive it. Keep the cilantro separate to avoid wilting.
Freezer Friendly
Portion the cooked fried rice into freezer‑safe bags, flattening them for even freezing. It will keep for up to two months. When ready to use, thaw overnight in the fridge, then re‑heat in a hot wok with a splash of water or broth.
Best Reheating Method
Heat a tablespoon of oil in a skillet over medium‑high heat, add the frozen or refrigerated rice, and stir‑fry for 5‑7 minutes. Add a tiny splash of water (about a tablespoon) and cover for a minute; the steam will bring back that fluffy‑yet‑crisp texture. Finish with a fresh drizzle of sesame oil and a pinch of salt.