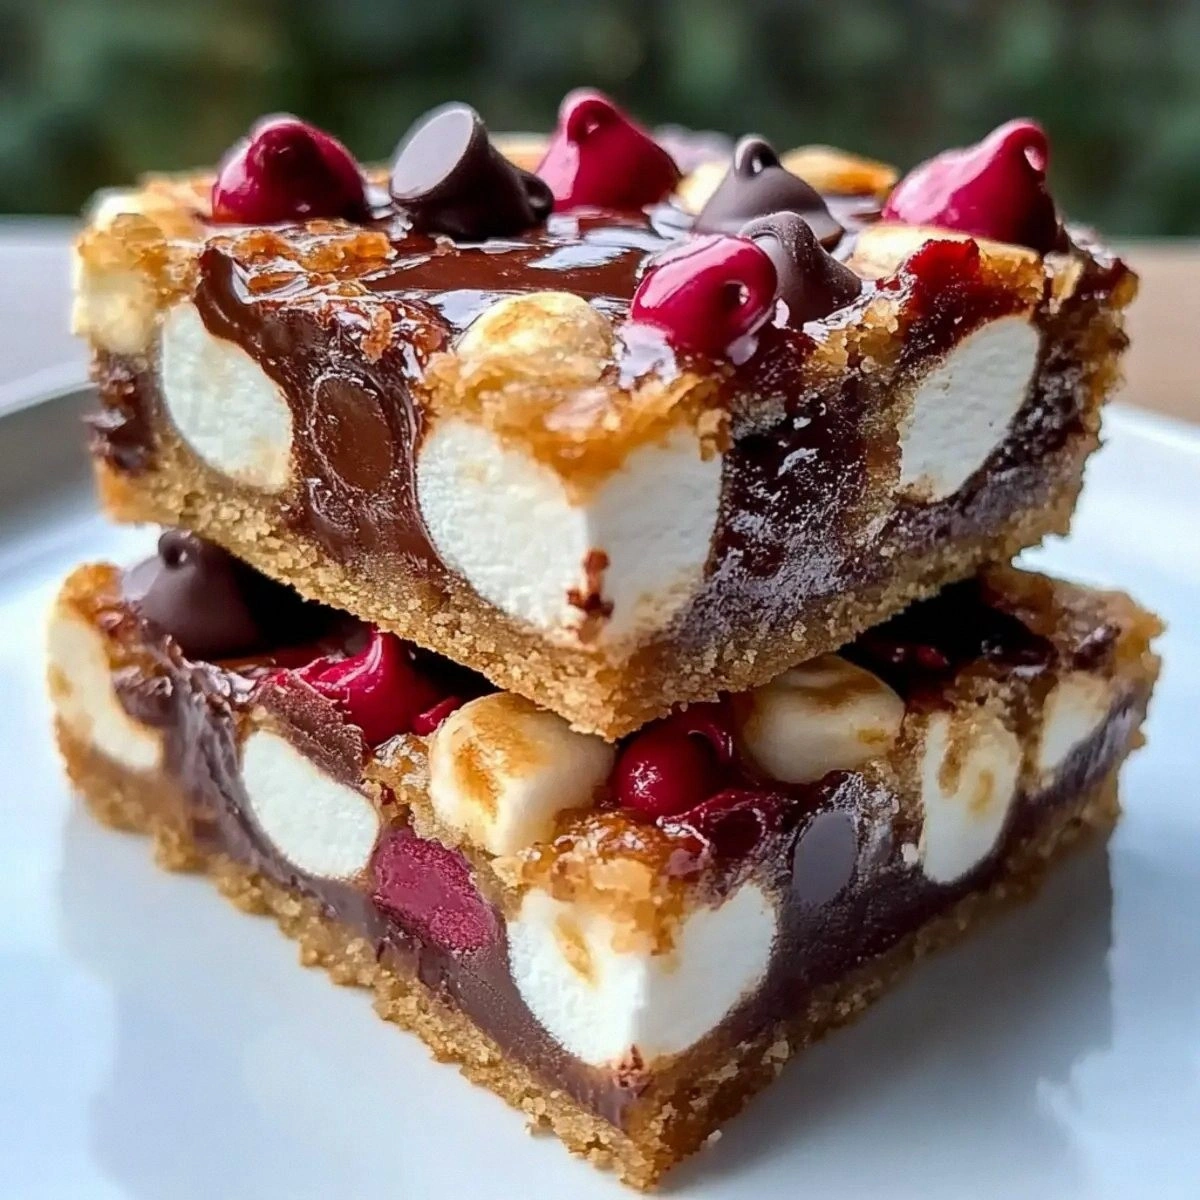
I was in the middle of a frantic holiday prep when the oven timer went off, and the whole kitchen filled with the scent of burnt sugar. I stared at the charred mess and thought, “If only there was a way to turn this disaster into something that actually makes people cheer.” That very moment sparked a dare from my sister: “Make something that will make Grandma forget the turkey and run straight to the dessert table.” I accepted, and after a night of trial, error, and a lot of chocolate‑laden midnight snacking, I finally nailed what I can confidently call the ultimate Christmas bar. This isn’t just another no‑bake treat; it’s a layered, chewy‑and‑crunchy masterpiece that feels like a festive hug in every bite.
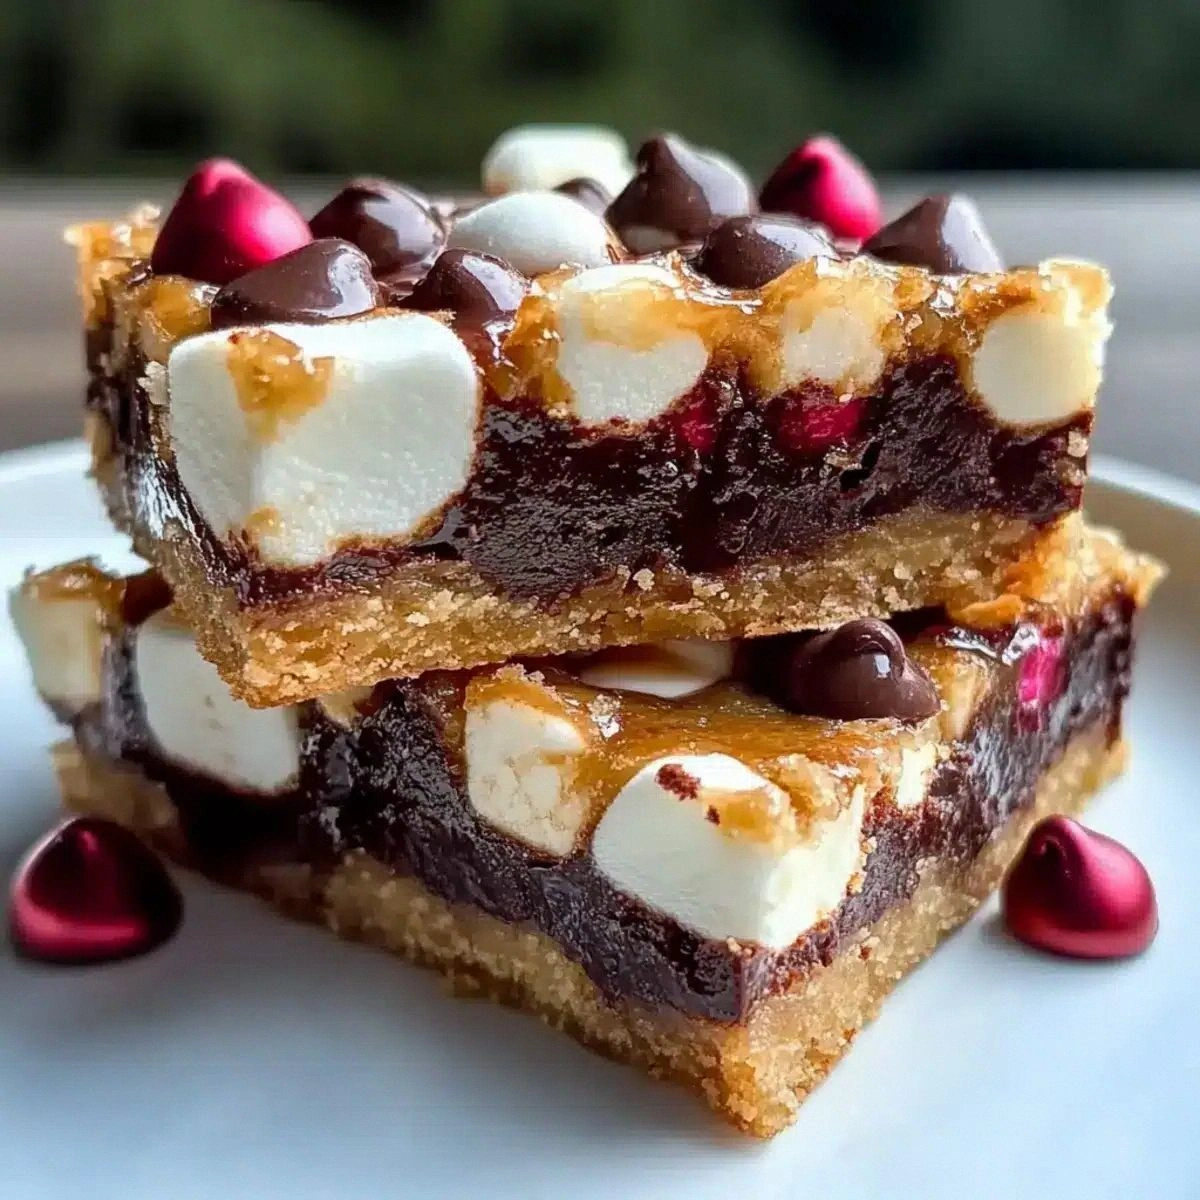
Picture this: a buttery graham‑cracker crust that crunches like fresh snow underfoot, a silky cocoa‑infused caramel that spreads across the base like a midnight sky, and a fluffy marshmallow‑chocolate topping that glistens like ornaments on a tree. The moment you cut into it, the edges pull away with a soft sigh, the middle stays gooey, and the top cracks just enough to release a cloud of sweet aroma that makes the whole house feel like a winter wonderland. I dare you to taste this and not go back for seconds – the combination of textures is so addictive that you’ll find yourself reaching for the pan long after the plates are cleared.
Most holiday bar recipes get this completely wrong. They either over‑sweeten, turn soggy, or end up with a crust that crumbles like stale cookies. What makes this version stand out is the balance of flavors and the strategic layering of ingredients that keep each bite consistent from the first forkful to the last. I’m being honest — I ate half the batch before anyone else got a chance to try it, and that’s because the caramel‑cocoa mixture coats the base like velvet, while the marshmallows melt just enough to create that perfect chewy‑chewy texture without turning into a sticky mess.
And now the fun part: there’s a secret ingredient that most recipes overlook – a pinch of unsweetened cocoa powder folded into the butter‑sugar blend. This not only deepens the chocolate flavor but also stabilizes the mixture, preventing it from becoming overly greasy. Okay, ready for the game‑changer? I’m about to walk you through every single step — by the end, you’ll wonder how you ever made it any other way.
What Makes This Version Stand Out
- Flavor Depth: The cocoa‑butter blend adds a richness that plain sugar‑butter crusts can’t match, giving each bite a subtle bitterness that balances the sweetness of the marshmallows.
- Texture Harmony: You get a crunchy base, a silky middle, and a fluffy, slightly crunchy top – a triple‑textured experience that keeps you interested bite after bite.
- Simplicity: Only eight ingredients, all pantry‑friendly, and no fancy equipment – just a pan, a whisk, and a willingness to indulge.
- Unique Ingredient Pairing: The combination of sweetened condensed milk and cocoa powder creates a caramel‑like sauce that’s richer than any store‑bought frosting.
- Crowd Reaction: Guests often claim these are “the best thing they’ve ever had at a holiday party,” and they’ll ask for the recipe before the night is over.
- Ingredient Quality: Using real butter (or coconut oil for a dairy‑free twist) and high‑quality chocolate chips makes the flavor pop without any artificial aftertaste.
- Cooking Method: A single bake at a moderate temperature ensures the bars set perfectly without drying out.
- Make‑Ahead Potential: These bars keep beautifully for up to a week in the fridge, making them perfect for pre‑holiday prep.
Inside the Ingredient List
The Flavor Base
The first hero of this recipe is the unsweetened cocoa powder. At one‑third of a cup, it’s enough to give the bar a deep, almost espresso‑like undertone without overwhelming the sweet notes. If you skip it, the bars lose that sophisticated edge and taste more like plain sugar bars. For a richer profile, try using Dutch‑process cocoa, which adds a smoother bitterness. A quick tip: sift the cocoa before adding it to the butter to avoid clumps that could turn into bitter pockets.
The Texture Crew
The graham cracker crumbs provide the crunchy foundation. Choose the plain variety for a neutral flavor; honey‑sweetened versions can make the base too sweet and mask the cocoa. If you’re gluten‑free, substitute with crushed gluten‑free cookies or even a blend of oat flour and almond meal. The mini marshmallows are the fluffy stars – they melt just enough to bind the chocolate chips while keeping that pillowy chew. Skipping them turns the top into a hard chocolate crust, which is a whole different experience.
The Unexpected Star
The sweetened condensed milk is the secret sauce that turns this into a holiday classic. Its thick, caramel‑like texture creates a glossy, gooey layer that’s impossible to resist. If you’re watching sugar, you can replace half of it with coconut cream, but expect a slightly lighter texture. A quick buying tip: shake the can well before opening – the sugar can settle at the bottom, and a well‑mixed can gives a smoother batter.
The Final Flourish
Chocolate chips and chopped nuts add the final crunch and burst of flavor. Use high‑quality semi‑sweet chips for a balanced sweetness; dark chocolate will make the bars more sophisticated, while milk chocolate leans into a kid‑friendly vibe. Nuts can be toasted lightly to enhance their aroma – a simple 5‑minute toast in a dry pan does wonders. If you’re allergic, omit the nuts and double the chocolate chips for an equally indulgent result.
Everything's prepped? Good. Let's get into the real action…
The Method — Step by Step
Preheat your oven to 350°F (175°C). While the oven warms, line a 9×13‑inch baking pan with parchment paper, allowing the edges to overhang for easy removal later. This step may sound trivial, but a well‑lined pan prevents sticking and keeps the bars looking pristine when you lift them out.
In a large mixing bowl, combine the graham cracker crumbs, powdered sugar, and unsweetened cocoa powder. Use a whisk to break up any lumps – you want a uniform, dark‑brown dust that will later become the buttery crust. The aroma of cocoa should already start to tease your senses.
In a saucepan over low heat, melt the unsalted butter (or coconut oil) until it just begins to foam. Immediately remove from heat and stir in the powdered sugar mixture until fully incorporated. The mixture should look glossy and slightly thick; if it feels too dry, add a teaspoon of milk.
Kitchen Hack: For an ultra‑smooth crust, press the butter‑sugar mixture into the pan with the back of a flat measuring cup – it spreads evenly and eliminates air pockets.Press the crust firmly into the prepared pan, making sure the surface is level. Use the bottom of a glass to smooth it out; you’ll notice the edges start to pull away from the parchment, a sign that the crust will hold together after baking.
In a separate bowl, whisk together the sweetened condensed milk and the remaining 1/2 cup of butter until smooth. Then fold in the mini marshmallows, chocolate chips, and chopped nuts. The marshmallows should stay whole; they’ll melt just enough during baking to create that gooey texture without disappearing entirely.
Pour the marshmallow‑chocolate mixture over the crust, spreading it evenly with a spatula. As you do this, you’ll see the mixture settle into the crevices of the crust, creating little pockets of caramel‑cocoa goodness.
Place the pan in the preheated oven and bake for 25‑30 minutes. The top should turn a light golden brown, and you’ll hear a faint crackle as the chocolate chips settle. Watch Out: If the edges start to brown too quickly, loosely cover the pan with foil to prevent burning.
Watch Out: Over‑baking will turn the marshmallow layer hard; the perfect bar is slightly soft in the center when you remove it from the oven.Allow the bars to cool in the pan for at least 20 minutes. This cooling period lets the caramel set, making the bars easier to cut. While you wait, the kitchen will be filled with a sweet, buttery perfume that practically screams “holiday”.
Using the parchment overhang, lift the entire slab onto a cutting board. Slice into 12‑16 bars with a sharp knife, wiping the blade clean between cuts for neat edges. Serve warm for maximum gooeyness, or at room temperature for a firmer bite. And now the fun part: drizzle a little extra melted chocolate on top if you’re feeling extra festive.
Insider Tricks for Flawless Results
The Temperature Rule Nobody Follows
Most home bakers think “high heat = faster bake,” but with these bars, a moderate 350°F is crucial. The lower temperature allows the butter‑sugar crust to set without scorching, while giving the marshmallow layer enough time to melt and bind. If you crank the oven to 400°F, the top will brown too quickly, leaving a dry crust and a gummy interior. Trust the gentle heat, and you’ll get that perfect glossy finish every time.
Why Your Nose Knows Best
Instead of relying solely on a timer, listen for the subtle “sizzle” that occurs when the chocolate chips start to melt. That sound, coupled with the sweet scent drifting from the oven, tells you the bars are at the sweet spot. If you hear a louder crackle, they’re likely over‑baking. This sensory checkpoint is a game‑changer for consistent results.
The 5‑Minute Rest That Changes Everything
After removing the pan from the oven, let it sit untouched for five minutes before you even think about cutting. This short rest allows the caramel‑cocoa layer to thicken just enough to hold its shape. Skipping this step leads to messy, smeared slices that lose that clean, professional look.
Nuts Toasted, Not Burned
A quick toast of the chopped nuts in a dry skillet for 3‑4 minutes brings out a nutty aroma that elevates the entire bar. Keep the heat low and stir constantly; burnt nuts introduce bitterness that clashes with the sweet caramel. The toasted nuts add a crunchy contrast that makes each bite memorable.
The Secret Butter Swap
If you want a slightly lighter texture, replace half of the unsalted butter with coconut oil. The coconut oil solidifies at cooler temperatures, giving the crust a firmer bite while still retaining that buttery flavor. This swap also adds a subtle tropical note that pairs surprisingly well with the chocolate.
Creative Twists and Variations
This recipe is a playground. Here are some of my favorite ways to switch things up:
Peppermint Crunch
Add 1 teaspoon of crushed peppermint candy to the marshmallow mixture and sprinkle extra peppermint pieces on top before baking. The minty crunch pairs beautifully with chocolate, making it a holiday classic that even the kids will love.
White Chocolate Raspberry
Swap the semi‑sweet chocolate chips for white chocolate chips and fold in ½ cup of freeze‑dried raspberry pieces. The tangy berries cut through the sweetness, creating a sophisticated flavor profile perfect for a holiday dinner party.
Caramel Pecan Delight
Replace the regular chopped nuts with toasted pecans and drizzle a thin layer of homemade caramel over the top after baking. The buttery caramel and nutty pecan combo adds an extra layer of indulgence that feels like a dessert from a five‑star restaurant.
Mocha Espresso
Dissolve 1 tablespoon of instant espresso powder into the condensed milk before mixing. This gives the bars a subtle coffee kick, perfect for adult gatherings where you want a dessert that pairs nicely with after‑dinner drinks.
Vegan Velvet
Use coconut oil in place of butter, dairy‑free chocolate chips, and a plant‑based sweetened condensed milk alternative (such as coconut condensed milk). The result is a vegan‑friendly bar that still delivers that gooey, festive feel.
Storing and Bringing It Back to Life
Fridge Storage
Place the cooled bars in an airtight container and store them in the refrigerator for up to 7 days. The chilled environment keeps the caramel layer firm, preventing it from becoming overly soft. When you’re ready to serve, let them sit at room temperature for 10‑15 minutes to regain that perfect bite.
Freezer Friendly
Wrap each bar individually in plastic wrap, then place them in a zip‑top freezer bag. They’ll stay fresh for up to 3 months. To reheat, unwrap and microwave for 15‑20 seconds, or bake at 300°F for 5 minutes – the bars will return to their gooey glory.
Best Reheating Method
Add a tiny splash of water (about a teaspoon) to the bar before reheating in the microwave. The steam generated revives the marshmallow‑chocolate layer, making it as soft as the day it was baked. This trick saves the texture that often gets lost when leftovers sit too long.