Picture this: I’m standing in my cramped kitchen, a bag of stale bread rolls, a handful of garlic cloves, and a dream of a snack that will make my friends swoon. I had just finished a marathon cooking session that ended in a kitchen that smelled like burnt onions and a half‑finished batch of garlic bread that looked like a sad, soggy disappointment. The moment I popped the first roll into the oven, a wave of buttery, garlicky aroma flooded the room, and I knew something had to change.
It was a late‑night craving that turned into a culinary obsession. I remembered the first time I tasted Korean garlic cheese bread in a Seoul street market—those golden, crispy rolls stuffed with gooey mozzarella, kissed by a sweet‑garlic butter that was almost too good to be true. The memory made my mouth water, and I decided to bring that magic home, but with a twist that would set it apart from every other version I’d tried.
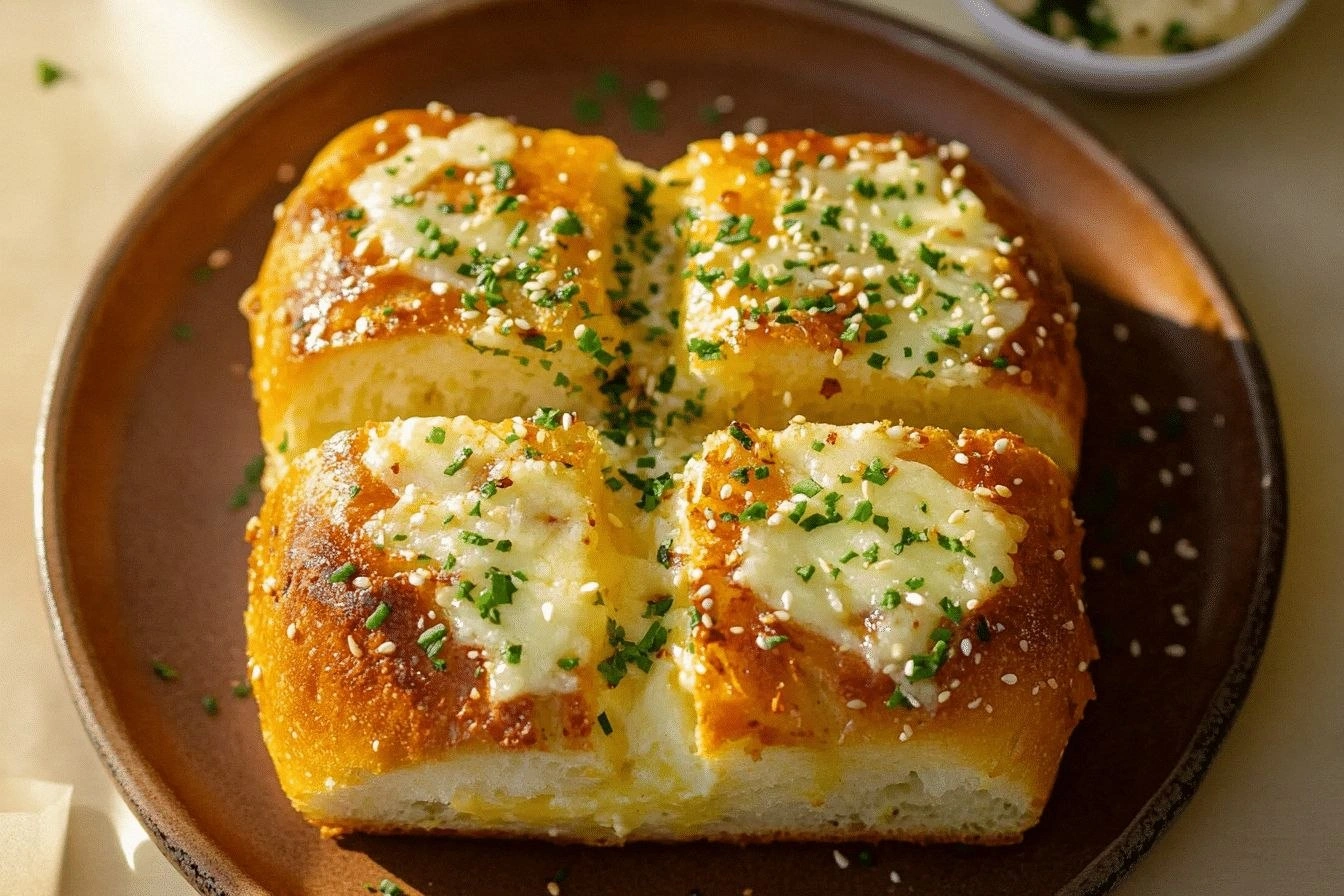
What makes this recipe a game‑changer is the way it balances the sharpness of fresh garlic with the mellow sweetness of butter and the subtle hint of sugar, creating a flavor profile that’s both bold and surprisingly harmonious. The brioche rolls provide a soft, pillowy base that holds the filling without becoming soggy, while the mozzarella melts into a molten center that practically sings with every bite. It’s the kind of snack that can be a midnight treat, a party starter, or a comforting lunch—versatile, comforting, and undeniably addictive.
But here’s the kicker: I discovered a simple technique that turns ordinary bread into a crispy, golden masterpiece without a fancy oven or a complicated dough. By lightly brushing the rolls with a butter‑garlic mixture before baking, you create a glaze that caramelizes into a crunchy shell, while the inside stays fluffy. This single tweak is what separates the good from the unforgettable.
Let me walk you through every single step—by the end, you’ll wonder how you ever made it any other way. I dare you to taste this and not go back for seconds.
What Makes This Version Stand Out
- Taste: The marriage of sharp garlic, sweet butter, and a whisper of sugar creates a flavor that lingers long after the last bite.
- Texture: A crisp, caramelized crust gives way to a soft, buttery interior, while molten mozzarella delivers a silky, gooey center.
- Ingredient Quality: Using fresh, high‑quality brioche and real mozzarella makes a world of difference compared to pre‑made rolls or processed cheese.
- Speed: The entire process takes less than 30 minutes from start to finish, perfect for a quick snack or last‑minute party prep.
- Versatility: It can be served hot, cold, or reheated, making it ideal for meal prep or leftovers.
- Crowd Appeal: Whether you’re a seasoned foodie or a kitchen novice, the familiar comfort of cheese and garlic guarantees a crowd‑pleaser.
Inside the Ingredient List
The Flavor Base
At the heart of this snack lies a simple yet powerful butter‑garlic mixture. Fresh garlic is the star—minced finely so it releases its aromatic oils, turning the bread into a fragrant cloud of flavor. Butter, when melted, carries that garlic through the heat, creating a silky glaze that caramelizes on the surface. A pinch of sugar balances the sharpness, coaxing the garlic into a mellow, almost sweet undertone. If you skip the sugar, you’ll end up with a harsher bite that may overwhelm the delicate brioche.
Choosing the right butter matters. Unsalted butter gives you control over the final saltiness, while salted butter can add a subtle depth if you’re watching your sodium intake. A good rule of thumb is to use a high‑fat butter (80% or more) to ensure the glaze doesn’t separate during baking. If you’re in a hurry, a quick melt in the microwave works, but always stir to combine the garlic and butter thoroughly before brushing it onto the rolls.
When brushing, apply a thin, even layer—too much butter can make the rolls soggy, while too little will leave the crust bland. Think of it like a fine paint job; a light coat that glistens and caramelizes under the heat. The result is a golden, fragrant crust that’s as visually appealing as it is delicious.
The Texture Crew
Brioche or sweet bread rolls are the canvas for this masterpiece. Their soft, slightly sweet dough holds the buttery filling without collapsing, allowing the cheese to melt into a luscious center. If you can’t find brioche, a high‑protein roll will also work, but it may produce a firmer bite. The key is to choose rolls that are fresh and not too dry; a dry roll will absorb the butter too quickly, losing its fluffy texture.
Before filling, cut the rolls in half horizontally, leaving a hinge so they can be closed like a sandwich. This ensures the cheese stays inside and the garlic butter spreads evenly. If you prefer a bite‑size snack, cut the rolls into smaller wedges before filling; this increases the surface area for the caramelized crust.
Once the rolls are filled, you can lightly press the edges together. This step is crucial for a clean, cohesive appearance and helps the cheese stay within the roll during baking. The pressure also creates a slight seal, preventing the butter from seeping out and keeping the crust crisp.
The Unexpected Star
Mozzarella cheese is the unexpected star that turns this bread from ordinary to extraordinary. Its high moisture content and low melting point create a molten, stringy center that contrasts beautifully with the crispy crust. Fresh mozzarella has a milder flavor compared to processed cheese, allowing the garlic butter to shine through. If you can’t find mozzarella, a blend of provolone and cheddar will give a similar gooey texture with a richer flavor profile.
Shredding the cheese before stuffing ensures even distribution, preventing pockets of dry or over‑cooked cheese. For an extra touch, sprinkle a pinch of pepper or paprika on top of the cheese before baking; the spice will add a subtle kick that elevates the overall taste.
Remember, the cheese is the main attraction—don’t overfill. Too much cheese can cause the rolls to split apart during baking, resulting in a messy presentation. Keep the filling moderate, and you’ll achieve that perfect gooey center.
The Final Flourish
Fresh parsley is the final flourish, adding a burst of color and a hint of herbal freshness that cuts through the richness. Chop the parsley finely so it distributes evenly across the surface of the bread. Sprinkle it just before serving to preserve its bright green hue and fresh flavor. If you’re a fan of a slightly peppery note, a dash of freshly ground black pepper will complement the parsley nicely.
Salt is essential for bringing all the flavors together. Use a fine sea salt, and sprinkle it sparingly over the rolls after brushing the butter‑garlic mixture. Salt enhances the sweetness of the sugar and balances the sharpness of the garlic, creating a well‑rounded taste experience. Too much salt can overpower the delicate flavors, so a light hand is best.
With all the ingredients prepped, you’re ready to dive into the real action. Everything’s prepped? Good. Let’s get into the real action…
The Method — Step by Step
- Preheat the oven to 375°F (190°C). While the oven heats, line a baking sheet with parchment paper or a silicone mat to prevent sticking. This step ensures a uniform bake and makes cleanup a breeze. The temperature is crucial; too hot, and the crust will burn before the cheese melts; too cool, and the bread will stay soft and undercooked.
- Prepare the butter‑garlic glaze. In a small bowl, combine the melted butter, minced garlic, and a teaspoon of sugar. Whisk until the garlic is fully coated, creating a fragrant mixture that will caramelize on the bread. The sugar helps the butter brown evenly, giving the crust a beautiful golden hue.
- Brush the glaze onto each roll. Use a pastry brush to apply a thin, even layer of the butter‑garlic mixture to the cut side of each roll. Make sure to cover the edges as well, as this is where the crust will form. If you’re feeling fancy, you can swirl a little more butter into the glaze for an extra glossy finish.
- Fill each roll with mozzarella. Sprinkle a generous amount of shredded mozzarella onto the glazed side of each roll, ensuring the cheese covers the surface but doesn’t overflow. The cheese will melt into a gooey center, creating a satisfying contrast with the crisp crust. If you prefer a stronger cheese flavor, add a pinch of grated Parmesan on top.
- Close the rolls and seal the edges. Gently press the halves together, ensuring the cheese stays inside. This step prevents the cheese from spilling out during baking. The seal also helps the crust form a clean, professional look.
- Bake the rolls. Place the prepared rolls on the lined baking sheet and bake for 12–15 minutes, or until the crust turns golden brown and the cheese is bubbling and slightly browned. Watch for the edges; when they start pulling away from the center, the bread is ready. The oven’s heat will caramelize the butter‑garlic glaze into a crisp, flavorful shell.
- Finish with parsley. While the rolls are still hot, sprinkle the chopped parsley over the top. The heat will wilt the herbs slightly, releasing their aroma and adding a fresh contrast to the rich cheese and buttery crust. The parsley also provides a pop of green that makes the dish visually stunning.
- Serve immediately. Transfer the rolls to a cutting board and let them rest for a minute before slicing. This brief rest allows the cheese to set slightly, preventing a messy, molten mess. Serve hot for the best experience, or let them cool for a quick snack later.
That’s it — you did it. But hold on, I've got a few more tricks that'll take this to another level…
Insider Tricks for Flawless Results
The Temperature Rule Nobody Follows
Many bakers think a higher oven temperature is always better, but for garlic cheese bread, a moderate 375°F (190°C) is ideal. This temperature allows the butter‑garlic glaze to caramelize without burning and lets the cheese melt evenly. If you’re using a convection oven, reduce the temperature by 25°F to avoid over‑browning. This subtle adjustment ensures a consistent, golden crust every time.
Why Your Nose Knows Best
The aroma of garlic and melted cheese is a powerful indicator of doneness. As the bread bakes, you’ll notice a sweet, nutty scent rising from the oven—this means the butter‑garlic glaze is caramelizing just right. If the smell turns sharp or burnt, pull the bread out immediately. Trusting your nose can save you from a ruined batch.
The 5-Minute Rest That Changes Everything
After removing the rolls from the oven, let them rest for five minutes. This pause allows the cheese to set, preventing a gooey mess when you slice. It also lets the crust firm up slightly, giving a satisfying crunch with each bite. During this time, the steam inside the roll condenses, creating a moist, tender interior.
Don’t Forget the Salt
Seasoning is the unsung hero of any dish. A pinch of sea salt on the finished rolls elevates the flavors and balances the sweetness of the sugar. If you’re watching sodium, use a low‑sodium salt or a salt substitute. Remember, a little goes a long way, so sprinkle lightly and taste before adding more.
Use Fresh Garlic, Not Powder
Garlic powder lacks the depth of fresh cloves. Minced garlic releases its essential oils, creating a robust flavor that powder can’t match. If you’re short on time, finely chop the garlic and let it sit for a few minutes before mixing with butter; this allows the flavors to meld.
Keep the Rolls Warm Until Serving
Serve the bread immediately while it’s still steaming hot. If you need to keep it warm, wrap the rolls in foil and place them in a low‑heat oven (200°F) for up to 10 minutes. This method keeps the crust crisp while maintaining the gooey interior.
Creative Twists and Variations
Spicy Korean Kimchi Bread
Swap the mozzarella for shredded mozzarella mixed with kimchi bits. Add a dash of gochujang to the butter‑garlic glaze for an extra kick. The fermented kimchi adds a tangy depth that pairs beautifully with the creamy cheese. This variation is perfect for those who love a spicy, umami‑rich snack.
Herbed Parmesan Crunch
Replace the mozzarella with a blend of mozzarella and grated Parmesan for a sharper cheese flavor. Sprinkle chopped basil and oregano on top before baking. The Parmesan adds a nutty crunch, while the herbs bring a fragrant, aromatic finish. This version is great for a sophisticated appetizer.
Vegan Garlic Bread
Use vegan butter and a plant‑based cheese substitute like Daiya or a cashew‑based cheese. Add nutritional yeast to the glaze for a cheesy flavor. The result is a creamy, dairy‑free bread that still delivers the buttery, garlicky goodness. Ideal for vegans or those with dairy sensitivities.
Breakfast Twist with Eggs
After baking, crack a fresh egg onto each roll and bake for an additional 2 minutes until the egg whites set. The runny yolk adds richness and creates a savory, brunch‑ready treat. Serve with a side of fresh tomatoes for a balanced meal.
Chocolate‑Cheese Fusion
For a daring dessert, use dark chocolate chips mixed into the mozzarella before filling. Add a drizzle of honey on top after baking. The chocolate adds a bittersweet depth, while the honey balances the richness. This sweet‑savory combo is a conversation starter.
Breakfast Burrito Bread
Fill the rolls with scrambled eggs, diced bell peppers, and a sprinkle of cheddar cheese. Bake until the cheese melts and the edges crisp. This variation transforms the bread into a portable, protein‑packed breakfast. Serve with salsa for an extra burst of flavor.
Storing and Bringing It Back to Life
Fridge Storage
Store any leftovers in an airtight container at room temperature for up to 2 days. The crust may soften slightly, but the interior remains moist. To restore crispness, warm the bread in a 350°F oven for 5 minutes before serving. This quick step brings back the golden crunch you love.
Freezer Friendly
Freeze the baked rolls in a sealed bag for up to 3 months. When ready to eat, thaw at room temperature for 1 hour, then reheat in a 350°F oven for 10 minutes. The cheese will melt again, and the crust will regain its crispness. Freezing is ideal for meal prep or a quick snack.
Best Reheating Method
Reheat the bread in a toaster oven or conventional oven at 350°F for 5–7 minutes. The key is to keep the temperature moderate to avoid burning the crust. If you’re using a microwave, add a splash of water to the container to create steam, preventing the bread from drying out. This technique keeps the cheese gooey and the crust crisp.