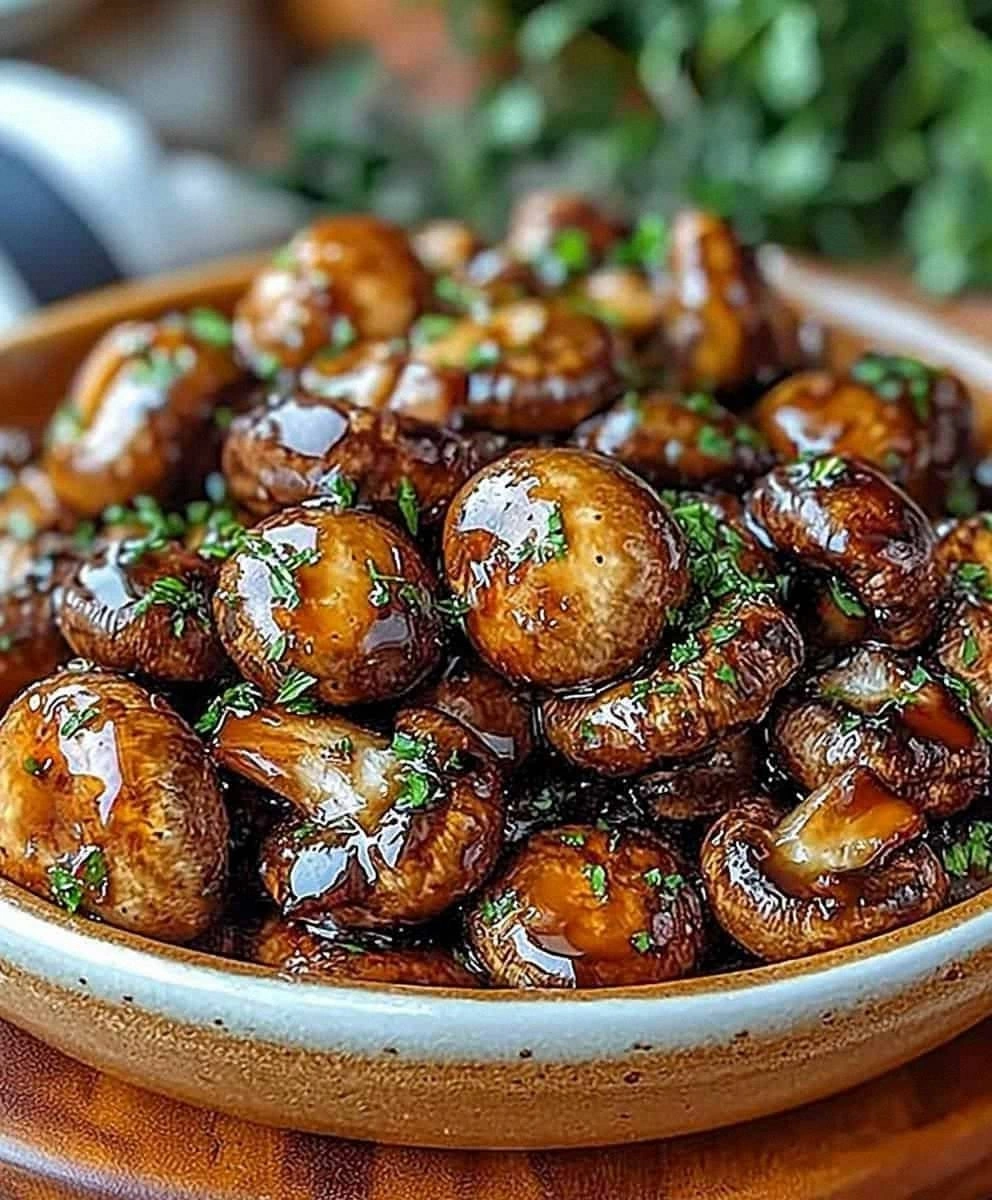
I still remember the mushroom disaster of 2019. There I stood, hovering over a baking sheet of shriveled, rubbery button mushrooms that tasted like wet cardboard and disappointment. My dinner guests were arriving in twenty minutes, and the promised side dish looked like something you'd find growing under a log. Fast forward to today, and I can confidently say these oven roasted mushrooms will make you rethink everything you thought you knew about fungi. The transformation from that culinary catastrophe to this show-stopping recipe involved months of testing, dozens of mushroom varieties, and enough garlic to ward off an army of vampires.
What you're about to discover isn't just another roasted vegetable recipe — it's a masterclass in coaxing out the deepest, most complex flavors from humble mushrooms. We're talking about achieving that perfect balance where the edges caramelize into crispy, savory bits while the centers remain tender and juicy. The kind of mushrooms that make people close their eyes involuntarily when they take the first bite, then immediately reach for more before they've even finished chewing.
Picture this: it's Sunday evening, you've got a glass of wine in hand, and the aroma of garlic and thyme is wafting through your kitchen as these beauties roast away in the oven. The mushrooms are sizzling, releasing their earthy perfume, and you know that in just thirty minutes, you'll have achieved something magical. This isn't hyperbole — once you master this technique, you'll never look at mushrooms the same way again. I dare you to taste this and not go back for seconds.
The secret lies in understanding that mushrooms aren't just vegetables — they're flavor sponges that can either become your meal's greatest asset or its saddest disappointment. Most recipes get this completely wrong. They treat mushrooms like any other vegetable, tossing them with oil and hoping for the best. But here's what actually works: high heat, the right mushroom variety, a few key ingredients that amplify rather than mask the natural umami, and timing that would make a Swiss watchmaker proud. Let me walk you through every single step — by the end, you'll wonder how you ever made it any other way.
What Makes This Version Stand Out
Flavor Explosion: These mushrooms develop an incredibly deep, concentrated umami flavor that tastes like they've been slow-cooked for hours. The combination of high-heat roasting with strategic seasoning creates layers of taste — first the earthy mushroom base, then the garlic's pungent sweetness, followed by the herbaceous thyme dancing on your tongue.
Texture Perfection: We're achieving what I call the "golden ratio" of mushroom textures — crispy, caramelized edges that shatter like thin ice under your teeth, while maintaining tender, meaty centers that practically melt on your tongue. Most recipes give you rubbery or bone-dry mushrooms, but this method delivers both contrasts in perfect harmony.
Zero Fuss Cooking: Despite sounding fancy, this recipe requires exactly fifteen minutes of hands-on time. No babysitting a pan, no complicated techniques, no obscure ingredients you'll use once then forget in your pantry. Just honest, straightforward cooking that delivers restaurant-quality results every single time.
The Balsamic Secret: That tablespoon of balsamic vinegar isn't just for show — it's the ingredient that makes people ask "what's your secret?" It adds a subtle sweetness and tang that brightens the mushrooms' earthiness without announcing itself. Think of it as the backup singer that makes the star sound even better.
Crowd-Pleasing Power: I've served these to self-proclaimed mushroom haters who ended up fighting over the last pieces. They're that good. The roasting process transforms the mushrooms into something entirely different from their raw state — more like savory candy than vegetables.
Make-Ahead Magic: These mushrooms actually improve in flavor if made a few hours ahead, making them perfect for entertaining. The seasonings have time to meld and deepen, turning an already great dish into something transcendent.
Ingredient Quality Flexibility: While great mushrooms shine, this recipe is forgiving enough to work with less-than-perfect specimens. Got slightly older cremini? No problem. Mixed varieties from the clearance section? Even better. This method coaxes greatness from whatever you've got.
Alright, let's break down exactly what goes into this masterpiece...
Inside the Ingredient List
The Flavor Foundation
Cremini mushrooms are the unsung heroes here — they're actually baby portobellos, which explains their deeper flavor than regular white mushrooms. When roasted, they develop these incredible meaty notes that make them perfect as a vegetarian main or a hearty side. The key is keeping them whole or halved depending on size, which prevents them from drying out and creates those gorgeous caramelized surfaces we're after. Don't even think about slicing them thin — that's the path to mushroom jerky, and nobody wants that.
The Aromatics Alliance
Garlic plays a crucial supporting role here, but timing is everything. Adding it too early results in bitter, burnt garlic that ruins the entire dish. We'll add it halfway through roasting, letting it infuse the oil and mushrooms with its sweet, nutty essence without crossing into bitter territory. The four cloves might seem excessive, but trust me — roasted garlic becomes mellow and almost sweet, nothing like its raw, aggressive cousin.
The Herbal Enhancement
Fresh thyme is non-negotiable in this recipe. Dried thyme tastes like dust compared to the bright, lemony-woodsy notes fresh thyme brings to the party. The tiny leaves nestle into all the mushroom crevices, releasing their essential oils as they roast and creating aromatic pockets that'll make your kitchen smell like a French countryside cottage. If you absolutely must substitute, fresh rosemary works, but use half the amount — it's much more assertive.
The Acid Alchemy
Balsamic vinegar might seem out of place here, but it's the ingredient that ties everything together. Just one tablespoon adds necessary acidity to balance the rich, earthy mushrooms. It also helps with caramelization, contributing to those gorgeous dark edges that make these mushrooms look as incredible as they taste. The vinegar reduces slightly in the oven, becoming syrupy and concentrated, creating little flavor bombs throughout the dish.
The Finishing Touches
Fresh parsley isn't just for color — its bright, slightly peppery notes provide the perfect contrast to the rich, roasted mushrooms. Add it right before serving so it stays vibrant and fresh-tasting. The optional Parmesan cheese adds salty, nutty complexity that melts slightly from the warmth of the mushrooms, creating little pockets of umami heaven. If you're serving these as an appetizer, the Parmesan makes them feel more substantial.
Everything's prepped? Good. Let's get into the real action...
The Method — Step by Step
- Preheat your oven to 425°F (220°C) and position the rack in the center. This high temperature is crucial for proper caramelization — lower temperatures will steam your mushrooms instead of roasting them, leaving you with a soggy, rubbery mess. While the oven heats, resist the urge to start prepping everything else. Let that oven get screaming hot first, because temperature consistency is what separates good roasted vegetables from great ones.
- Clean your mushrooms using a barely damp paper towel, wiping away any dirt. Don't soak them in water — they'll absorb it like little sponges and steam instead of roast. If you've got particularly dirty mushrooms, a quick rinse under cold water is okay, but dry them thoroughly immediately after. Trim any woody stem ends, but keep most of the stem intact — it's full of flavor and will become tender during roasting. Think of this as giving your mushrooms a spa treatment, not a bath.
- In a large bowl, toss the mushrooms with 3 tablespoons of olive oil until every surface is glistening. This isn't the time to be stingy with oil — it's what conducts heat and helps those gorgeous caramelized edges form. The mushrooms should look glossy but not swimming in oil. Use your hands to really massage it into all the nooks and crannies. This intimate moment between you and your mushrooms ensures even coating and better flavor distribution.
- Spread the mushrooms in a single layer on a rimmed baking sheet, cut side down if you've halved any. Give them space — if they're crowded, they'll steam instead of roast. Use two sheets if necessary. This step is where most people go wrong, cramming everything onto one pan because they're too lazy to wash another. Trust me, the extra dish is worth it for properly caramelized mushrooms that'll make you look like a culinary genius.
- Slide the pan into your preheated oven and roast for 15 minutes. During this time, something magical happens — the mushrooms start releasing their moisture, which evaporates in the hot oven, concentrating their flavor. Don't open the oven door to peek, no matter how tempting it is. Let them work their transformation in peace while you prep the remaining ingredients.
- While the mushrooms roast, combine the remaining tablespoon of olive oil with the minced garlic, thyme leaves, and balsamic vinegar. Let this mixture sit — the acid from the vinegar will slightly pickle the garlic, mellowing its harsh edges while infusing the oil with herbaceous flavor. The thyme will start releasing its essential oils into the mixture, creating a flavor concentrate that's about to take your mushrooms from great to extraordinary.
- After 15 minutes, quickly pull out the baking sheet and drizzle the garlic-thyme mixture over the mushrooms. Give everything a good toss using a spatula, making sure to flip the mushrooms so what was on the bottom is now on top. This is the moment of truth — the mushrooms should be starting to brown and release their liquid. If they're still pale and firm, your oven wasn't hot enough. Don't panic, just give them a few more minutes and adjust the temperature up next time.
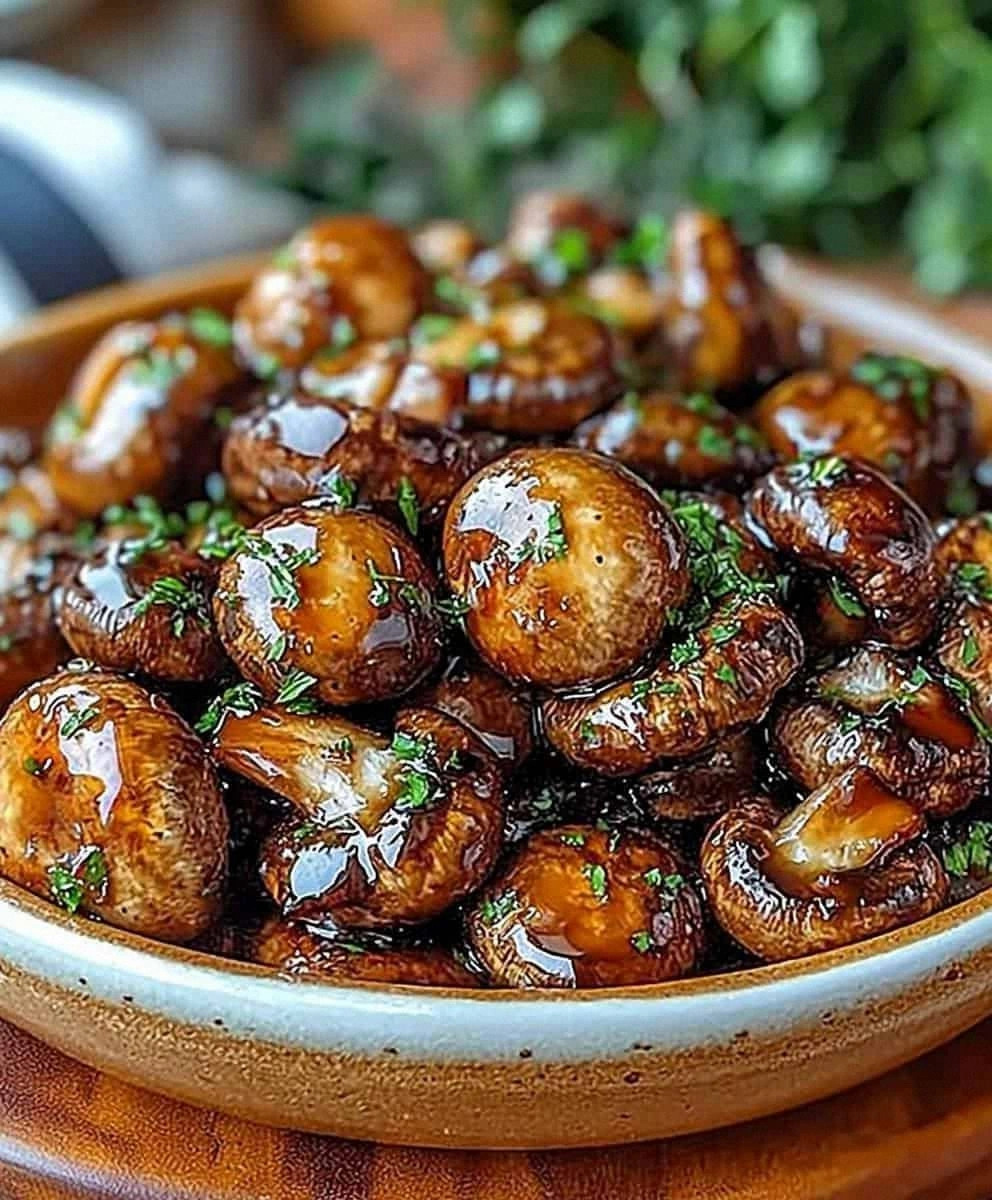
- Return the pan to the oven for another 10-12 minutes, until the mushrooms are deeply golden and the garlic is fragrant but not burnt. The edges should look caramelized and slightly crispy, while the centers remain tender. Your kitchen should smell absolutely incredible at this point — earthy, garlicky, and herbaceous all at once. That sizzle when it hits the pan? Absolute perfection.
- Remove from the oven and immediately season with salt and pepper while they're still hot. This helps the seasoning adhere better to the oil-coated surfaces. Start with the recommended amounts, then taste and adjust. Mushrooms can handle more salt than you'd think — they need it to bring out their natural umami flavor. Don't be shy here, but add gradually. You can always add more, but you can't take it away.
- Transfer to a serving dish and shower with fresh parsley and Parmesan if using. Serve immediately while they're at their peak of crispy-edged perfection, or let them cool to room temperature — they're delicious either way. The contrast of hot, garlicky mushrooms with cool, fresh parsley creates a harmony that'll have everyone asking for the recipe.
That's it — you did it. But hold on, I've got a few more tricks that'll take this to another level...
Insider Tricks for Flawless Results
The Temperature Rule Nobody Follows
Here's the thing — most home ovens lie to you. That 425°F reading might actually be 400°F or 450°F, and mushrooms are surprisingly sensitive to temperature variations. After ruining three batches, I finally started using an oven thermometer and discovered mine ran 25 degrees cool. The fix? A simple $10 oven thermometer that hangs from your rack. Once I knew my actual temperature, my mushrooms went from inconsistent to absolutely perfect every time. If your mushrooms are steaming instead of roasting, your oven isn't hot enough. If they're burning before they caramelize, it's running too hot.
Why Your Nose Knows Best
Your sense of smell is the most reliable indicator of when these mushrooms are perfectly done. When they're ready, your kitchen will fill with an intoxicating aroma that's equal parts earthy, garlicky, and slightly sweet from the caramelizing balsamic. If you can smell them from the living room, they're probably close to done. But here's the real trick — stick your nose right near the oven vent when you open the door. If you smell even a hint of burnt garlic, pull them out immediately. That slight acrid note means you have maybe 60 seconds before they cross the line from perfect to bitter disappointment.
The 5-Minute Rest That Changes Everything
After pulling your mushrooms from the oven, let them rest on the pan for exactly five minutes before transferring to a serving dish. This isn't just about avoiding burnt fingers — during this rest, the mushrooms reabsorb some of the flavorful oil that's pooled on the pan, becoming even more succulent. The residual heat also continues the cooking process slightly, ensuring the centers are perfectly tender while the edges stay crisp. A friend tried skipping this step once — let's just say it didn't end well. The mushrooms were good, but they lacked that final touch that makes them truly exceptional.
The Double Batch Strategy
Always, always make a double batch. Here's why: these mushrooms shrink dramatically during roasting, so what looks like a huge pile of raw mushrooms becomes a modest serving once cooked. Plus, they're incredible in omelets the next morning, tossed with pasta for a quick dinner, or just eaten cold straight from the fridge when you're too hungry to wait for proper reheating. I'll be honest — I ate half the batch before anyone else got to try it. Every single time I make them. They're that addictive.
The Mixing Method That Matters
How you combine the oil and mushrooms makes a real difference. Instead of dumping everything in a bowl and stirring, try this: place mushrooms in the bowl, drizzle oil around the sides of the bowl rather than directly on top, then use your hands to gently lift and fold the mushrooms. This method ensures every mushroom gets coated evenly without crushing them or bruising their delicate surfaces. It takes 30 seconds longer but results in perfectly roasted mushrooms without any dry spots or overly greasy ones.
Creative Twists and Variations
This recipe is a playground. Here are some of my favorite ways to switch things up:
The Mediterranean Remix
Swap the thyme for oregano and add a handful of halved cherry tomatoes and some pitted Kalamata olives during the last 10 minutes of roasting. Finish with crumbled feta instead of Parmesan and a squeeze of fresh lemon juice. The tomatoes burst and create a natural sauce, while the olives add briny complexity. This version is particularly stunning served over creamy polenta or alongside grilled fish.
The Asian-Inspired Version
Replace the olive oil with toasted sesame oil, swap thyme for fresh ginger and scallions, and use rice wine vinegar instead of balsamic. Finish with a drizzle of soy sauce and a sprinkle of sesame seeds. These mushrooms become an incredible topping for ramen or fried rice, adding deep umami and a lovely glossy finish that makes them look like they came from a high-end restaurant.
The Breakfast Champion
Add diced pancetta or bacon to the pan for the initial roasting, letting the fat render and coat the mushrooms with porky goodness. The smoky, salty pork fat infuses everything with breakfast magic. Serve these alongside eggs with crusty bread for sopping up the juices. It's like the best parts of a full English breakfast condensed into one pan of mushroom perfection.
The French Countryside
Use a mix of wild mushrooms if you can find them — shiitake, oyster, and chanterelle all work beautifully. Add a splash of white wine along with the garlic mixture, and finish with fresh tarragon and a pat of butter melted over the hot mushrooms. This version feels incredibly luxurious and pairs perfectly with roast chicken or beef. The wine adds acidity while the butter enriches everything into pure decadence.
The Spicy Southwest
Add a teaspoon of smoked paprika and a pinch of cayenne to the oil mixture, and swap the thyme for fresh cilantro. Finish with a squeeze of lime juice and some crumbled cotija cheese. These mushrooms are incredible in tacos or served alongside grilled steak. The smoke and heat complement the earthy mushrooms in a way that feels both unexpected and completely natural.
The Holiday Special
During the last few minutes of roasting, add some fresh cranberries and chopped pecans. The cranberries burst and create a sweet-tart glaze, while the pecans toast and add crunch. This version is absolutely stunning on a holiday table, especially when garnished with pomegranate seeds. It's fancy enough for company but simple enough that you won't be stressed about timing while managing the rest of your holiday meal.
Storing and Bringing It Back to Life
Fridge Storage
Store cooled mushrooms in an airtight container in the refrigerator for up to 5 days. The key is letting them cool completely before storing — trapping warm mushrooms creates condensation that makes them soggy. Layer them between sheets of paper towel to absorb excess moisture, which helps maintain their texture. They'll actually improve in flavor for the first day or two as the seasonings meld and deepen.
Freezer Friendly
These mushrooms freeze surprisingly well, though the texture changes slightly. Freeze them in a single layer on a baking sheet first, then transfer to a freezer bag. This prevents them from freezing into one solid block. They'll keep for up to 3 months. The texture becomes slightly softer after freezing, making them perfect for adding to soups, stews, or pasta sauces where they'll be cooked further anyway.
Best Reheating Method
The microwave is your enemy here — it'll turn your beautiful mushrooms into rubbery disappointments. Instead, spread them in a single layer in a dry skillet over medium heat. Add a tiny splash of water before reheating — it steams back to perfection. This gentle reheating method restores their texture without drying them out. Alternatively, wrap them in foil and warm them in a 350°F oven for about 10 minutes. If you're adding them to hot dishes like pasta or grain bowls, just toss them in during the last minute of cooking — they'll warm through without becoming overcooked.