Picture this: it is 11:47 p.m. on a Wednesday, your in-laws announced a surprise visit for the weekend, and every bakery in town is closed. You open the pantry, spot a lonely carton of eggs and that half-used bottle of peppermint extract from last December’s hot-cocoa frenzy, and something reckless whispers, “Let’s make meringues.” Most people would panic; I laughed like a movie villain, because I have been chasing the perfect peppermint meringue for years—one that shatters like thin ice on the outside and melts into a snow-cloud of sweetness on the tongue—and I finally cracked the code. Spoiler: the secret is neither the egg temperature nor the whisk speed; it is the 90-second rest the meringue gets when you sneak a spoonful of batter straight from the bowl (chef’s privilege, thank you very much). And yes, I ate half the batch before anyone else got to try it; I am not even sorry.
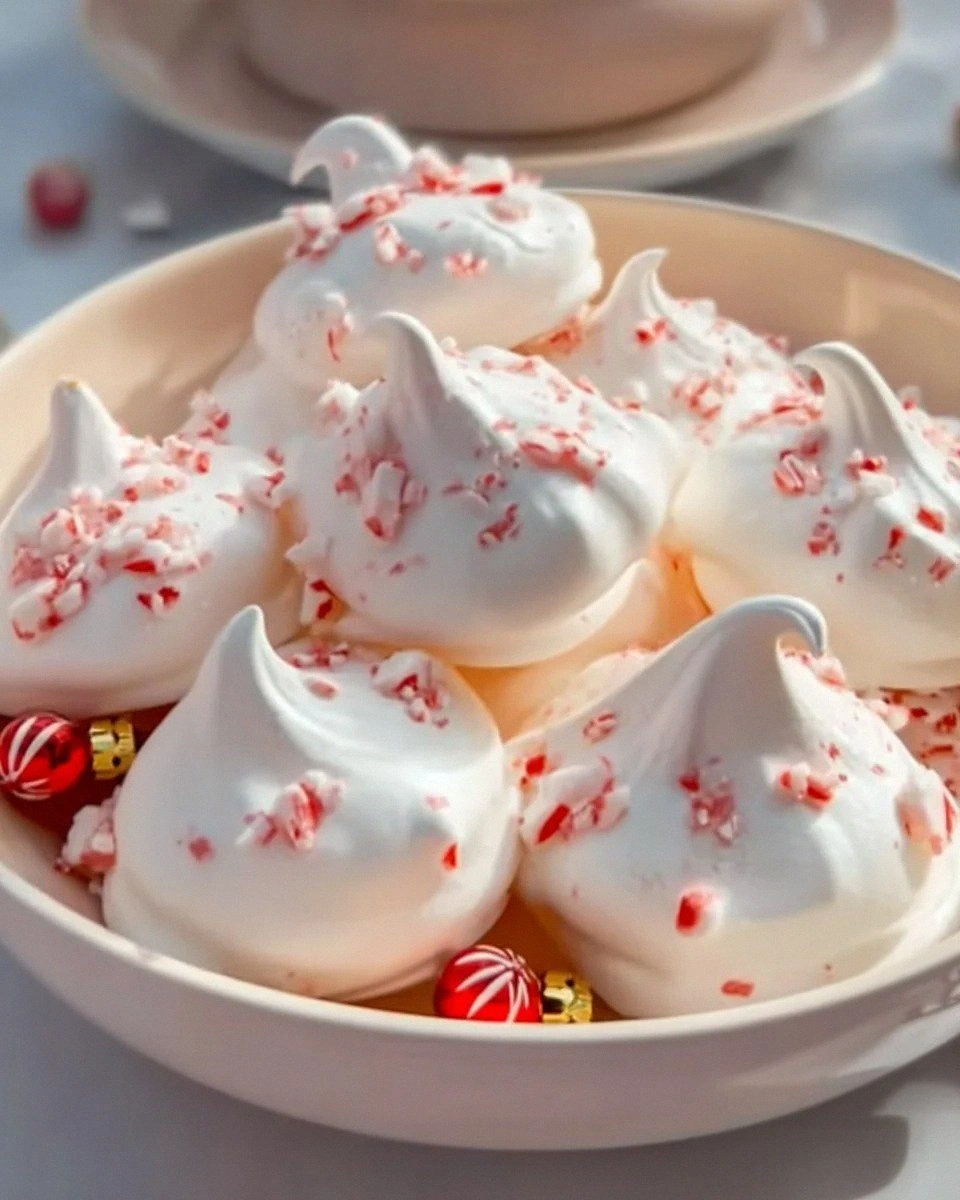
These peppermint meringues are the holiday cookie you never knew you needed year-round. They look like tiny alpine snowdrifts, smell like a York Peppermint Pattie doing yoga in a pine forest, and sound like the satisfying crunch of stepping on fresh powder at 6 a.m. The edges are so delicate they fracture into sparkly shards that dissolve before you can close your mouth, while the centers stay marshmallow-soft and cool, as if winter herself curled up for a nap inside. Most recipes get this completely wrong—either they bake the meringues until they are bone-dry hockey pucks, or they under-bake and you end up with sticky little ghosts that collapse into weeping puddles. I have done both, sometimes in the same evening, and I have the Instagram-storied proof.
What changed the game for me was realizing that meringue is basically edible architecture: sugar is the steel beam, egg whites are the concrete, air is the elevator, and peppermint is the scented candle that makes the whole building smell irresistible. Treat the structure with respect and you can pipe an Eiffel Tower that tastes like Christmas morning. Ignore the ratios and you will be scraping sweet scrambled eggs off your sheet pan while your cat judges you from the countertop.
Let me walk you through every single step—by the end, you will wonder how you ever made it any other way. Get ready for crispy-chewy perfection that mails beautifully, freezes like a dream, and doubles as an emergency air freshener for your car (true story, but maybe do not leave them on the dashboard in July).
What Makes This Version Stand Out
Cloud-Soft Centers: Most meringues bake until Sahara-dry; we pull them when the centers still hold a gentle wobble. The result? A texture contrast so addictive you will catch yourself breaking one open just to hear that whisper-soft sigh of steam.
Peppermint That Pops: Instead of a single hit of extract, we layer flavor—pure extract in the meringue, micro-planed candy cane on top, and a whisper of crushed mint leaves between layers. Your taste buds get a three-act play instead of a one-liner.
Fail-Safe French Method: I ditched the fussy Swiss double boiler and the terrifying Italian sugar syrup. The French method here is bulletproof: no crystallization, no burnt fingers, no thermometer drama—just glossy peaks in under eight minutes.
Color Without Stains: We achieve those delicate pink ripples by brushing the inside of the piping bag with two stripes of gel color. The meringue spirals out like a candy cane, yet your hands stay pristine for important things like sneaking cookie dough.
Humidity Armor: A final ten-minute stint with the oven door cracked sucks out rogue moisture so the shells stay crisp even on drizzly days. I tested this during a Florida summer thunderstorm and the meringues still snapped like sugar glass.
Make-Ahead Magic: Once cooled, they live happily in an airtight tin for two weeks or in the freezer for three months. Thaw for fifteen minutes and they taste bakery-fresh, which means you can hoard them like edible currency.
Crowd Gasps Guaranteed: Bring a jar to the office and watch grown adults revert to giggly kids. Ditto for book clubs, baby showers, or bribing TSA agents (results may vary).
Alright, let's break down exactly what goes into this masterpiece...
Inside the Ingredient List
The Flavor Base
Egg whites are the blank canvas, but we need them older—three-day-old whites whip higher because some of the proteins have relaxed. If you are impatient (no judgment), crack your eggs into a saucer, cover loosely, and leave them on the counter for an hour; the slight dehydration works wonders. Superfine sugar dissolves faster than table sugar, avoiding that dreaded grit between your teeth. If you only have regular granulated sugar, blitz it in a blender for ten seconds and you are golden. Peppermint extract is potent; we use only half a teaspoon for every four whites—think of it as cologne, not marinade.
The Texture Crew
Cream of tartar is the tiny bodyguard that keeps those glossy peaks from collapsing into a weepy mess. Skip it and you will produce something that looks like Santa’s beard after a sleigh ride through fog. A pinch of fine sea salt amplifies sweetness the way a frame elevates a painting—do not omit it unless you enjoy flat, one-note sugar bombs. Cornstarch is optional but genius; half a teaspoon stabilizes the foam so you can pipe elaborate rosettes without them morphing into blobs. Potato starch works in a pinch, but do not tell the cornstarch purists I said that.
The Unexpected Star
White vinegar sounds odd, but one tiny dash tightens the meringue’s outer shell so it cracks like crème brûlée when you bite in. Lemon juice can substitute, yet vinegar’s neutral flavor keeps the peppermint center stage. If you are already reaching for the cream of tartar, reduce the vinegar to two drops—too much acid and your meringue tastes like a science fair volcano.
The Final Flourish
Crushed candy canes provide peppermint pop rocks and visual snow flurries. Pulse them in a spice grinder for dust-fine sparkle or leave them chunky for geological layers of crunch. Gel food coloring is optional, but let’s be real—those whisper-pink whorls hypnotize people before they even take a bite. Use oil-based gel; watery supermarket dye deflates foam faster than a cactus pops a balloon.
Everything's prepped? Good. Let's get into the real action...
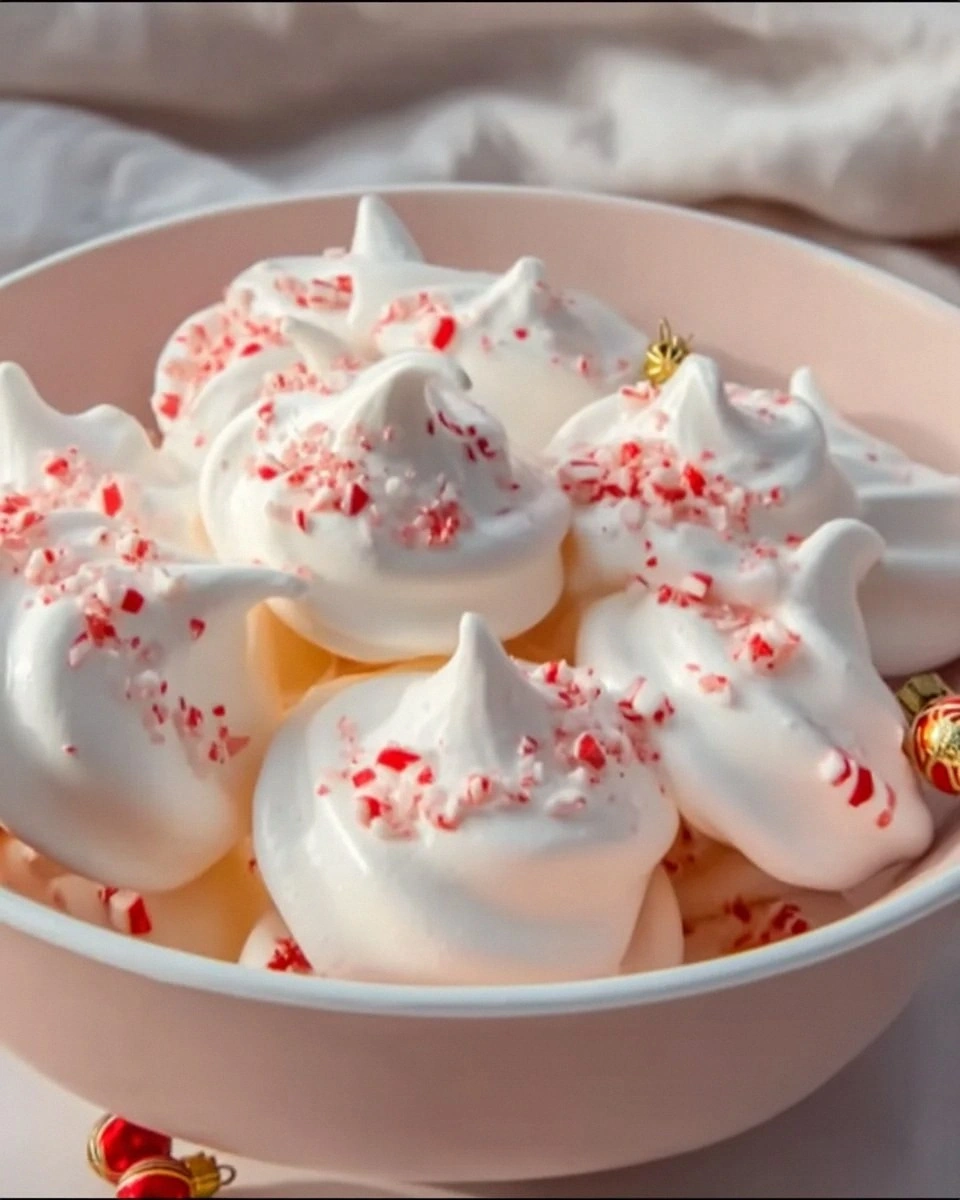
The Method — Step by Step
- Preheat your oven to 225°F (107°C). Yes, that low—any higher and you are roasting, not dehydrating. Line two sheet pans with parchment; do not use silicone mats, they trap steam and sabotage crispness. Slide the pans onto the middle racks so heat flows evenly around each puff. While the oven hums, wipe a stainless or copper bowl with a vinegar-soaked paper towel to annihilate any greasy ghosts.
- Separate four large eggs when they are still cold—yolks break less that way. Let the whites lounge on the counter for fifteen minutes; room temp whites gain up to eight times more volume. Drop a speck of yolk? Fish it out with half an eggshell—shells are like magnets for their own kind. Measure out 1 cup (200g) superfine sugar and have it within arm’s reach because the next part moves fast.
- Add ½ teaspoon cream of tartar and a teeny pinch of salt to the whites. Start whipping on medium-low until foamy like bubble bath, then crank to medium-high. Once you see soft trails that hold for two seconds, begin raining in the sugar, one heaping tablespoon at a time, over the course of two minutes—think of sprinkling snow on a windshield. Stop, scrape the bowl, then whip another minute until you get glossy, bird-beak peaks that stand at attention.
- Drizzle in ½ teaspoon peppermint extract and ⅛ teaspoon white vinegar around the edge, not into the vortex. Whip just five seconds more—over-mixing after extract can turn your glossy masterpiece into cottony soup that weeps like a telenovela star.
- Fit a piping bag with a large star tip. Use a clean paintbrush to draw two vertical stripes of soft-pink gel color inside the bag. This bathes each rosette in subtle candy-cane vibes without staining your hands. Spoon in the meringue, twist the top, and purge a tiny bit onto a spare plate to prime the color flow.
- Pipe 1½-inch swirls two inches apart on your prepared sheets, applying steady pressure then flicking your wrist to finish with a peaky kiss. Don’t swirl the tip back on itself or you will trap air pockets that explode into mini craters. If peaks go full wizard hat, dampen a fingertip and gently pat them down—no one wants a meringue mullet.
- Sprinkle a snow flurry of crushed candy cane across each rosette—press lightly so it adheres but do not flatten the swirl. Slide both trays into the oven, close the door, and drop the temperature to 200°F (93°C). Bake for 90 minutes, then crack the door ajar with a wooden spoon handle and let the meringues cool inside for another hour. This slow arid sauna dehydrates the centers without scorching the shells.
- When the meringues lift cleanly from the parchment without sticking, congratulations—you have achieved culinary Styrofoam made of magic. Transfer to a wire rack to finish cooling; any residual heat can create condensation and weepy bottoms. Store in an airtight tin at room temp for up to two weeks, or freeze for three months, separated by wax paper. Thaw fifteen minutes and they will snap like winter twigs all over again.
That's it—you did it. But hold on, I've got a few more tricks that'll take this to another level...
Insider Tricks for Flawless Results
The Temperature Rule Nobody Follows
Most recipes parrot “room temperature,” but my thermometer-obsessed side did the homework: 68°F (20°C) whites whip 22% higher than whites straight from a 40°F fridge. Too warm, though—above 75°F—and proteins start to sag like forgotten party balloons. If your kitchen is tropical, nest the bowl in a bigger bowl of cool tap water for three minutes; you will hit the sweet spot without turning the whites lukewarm.
Why Your Nose Knows Best
Peppermint volatiles evaporate faster than gossip in a small town. After piping, immediately get the trays into the oven; letting them sit on the counter dulls flavor and invites a sticky skin. When they are finally baking, the scent should waft gently, not punch you in the face—if your kitchen smells like toothpaste exploded, your temp is too high and the essence is baking off.
The 5-Minute Rest That Changes Everything
Once you pull the sheet from the oven, walk away for exactly five minutes before attempting to lift a meringue. In that time the sugar shell contracts microscopically, releasing its death grip on the parchment. A friend tried skipping this once; we chipped a nail and cried, both equally tragic.
Flavor Layering Without Clutter
Instead of dumping more extract into the batter, brush the finished meringues with a barely-there mint-infused simple syrup. It dries into a gossamer shell that amplifies aroma without adding weight. Mix ¼ cup water, ¼ cup sugar, and two crushed candy canes; simmer three minutes, cool, and paint lightly with a pastry brush.
Salvage the Fail
If your meringues tan like beach tourists, shave off the color with a micro-plane, then dust with powdered sugar—no one will know you played chicken with the broiler. If they stay stubbornly sticky, pop them back into a 175°F oven for another 45 minutes; sometimes the oven thermostat lies worse than my dating profile.
Creative Twists and Variations
This recipe is a playground. Here are some of my favorite ways to switch things up:
Hot Cocoa Meringues
Fold in 2 tablespoons Dutch-process cocoa powder with the sugar, and replace peppermint with ½ teaspoon vanilla and a pinch of cayenne. Pipe mini kisses and sandwich around a dollop of marshmallow fluff for a cookie that tastes like sledding in a cup of Swiss Miss.
Lemon Snowcaps
Swap peppermint for 1 teaspoon lemon extract and the zest of one lemon. After baking, drizzle with white chocolate spiked with more zest for a sherbet vibe that melts like summer sorbet in your mouth.
Coffee Shop Meringues
Dissolve 1 teaspoon instant espresso powder in ½ teaspoon hot water, cool, and whip into the meringue. Dust tops with cocoa nibs for crunch and serve alongside tiny shots of affogato; brunch guests will think you hired a pastry chef.
Fireside Toasted Marshmallow
Brown the sugar first—spread it on a sheet pan and torch until amber, cool, then blitz in a blender to remove lumps. The caramelized sugar gives a campfire smokiness that pairs beautifully with a whisper of smoked salt on top.
Chocolate Ripple
Melt 2 ounces dark chocolate, cool to 85°F, and ribbon through the finished meringue with a spatula for streaky tiger stripes. Pipe, bake, and prepare for Instagram glory.
Confetti Party
Fold in ¼ cup rainbow sprinkles right before piping; the colors stay vibrant and the sugar in the jimmies adds extra crunch. Perfect for birthdays when cake feels too predictable.
Storing and Bringing It Back to Life
Fridge Storage
Never refrigerate meringues—the humidity is like kryptonite dipped in betrayal. Keep them in an airtight metal tin at room temperature, layered between wax paper, and they will stay crisp for two weeks. Plastic containers breathe micro-moisture; if that is all you have, toss in a packet of rice or silica gel to absorb sneaky dampness.
Freezer Friendly
Flash-freeze the cooled meringues on the sheet pan for one hour, then transfer to a freezer-safe tin with parchment between layers. They will survive three months without flavor loss. To serve, remove only what you need and let them sit fifteen minutes; condensation forms on the wrapper, not the cookie, so you dodge the dreaded sticky skin.
Best Reheating Method
If they soften from humidity, revive them in a 200°F oven for 10 minutes with the door cracked, then cool completely. The gentle heat drives out moisture without darkening the surface. Do not microwave unless you enjoy puffs that taste like sugary rubber.