Remember the night I tried to whip up a quick dessert for a surprise dinner party and ended up with a batch of half‑baked, soggy brownies that smelled like burnt popcorn? That disaster was the catalyst that pushed me to search for a sweet treat that could be made in minutes, yet still feel like it came from a high‑end bakery. I was craving something that would satisfy a sweet tooth without the guilt, and I was determined to find a recipe that could be whipped together in the span of an afternoon while still delivering that wow factor. So, I set out on a quest for the ultimate pink coconut snowball cake bar, a dessert that would marry the airy lightness of a cake with the chewy, tropical texture of coconut.
Picture this: the kitchen is humming, a gentle breeze from the open window carries the faint scent of toasted coconut, and the timer on the oven beeps with a triumphant chime. The first bite is a burst of sweet, buttery flavor that coats the palate like velvet, followed by a gentle crunch from the shredded coconut that shatters like thin ice. The pink hue is subtle yet playful, a gentle blush that makes the dessert look as if it’s been kissed by a sunset. The aroma alone—sweet vanilla, toasted coconut, a hint of caramelized sugar—draws everyone in, making the moment feel like a shared secret between friends and family.
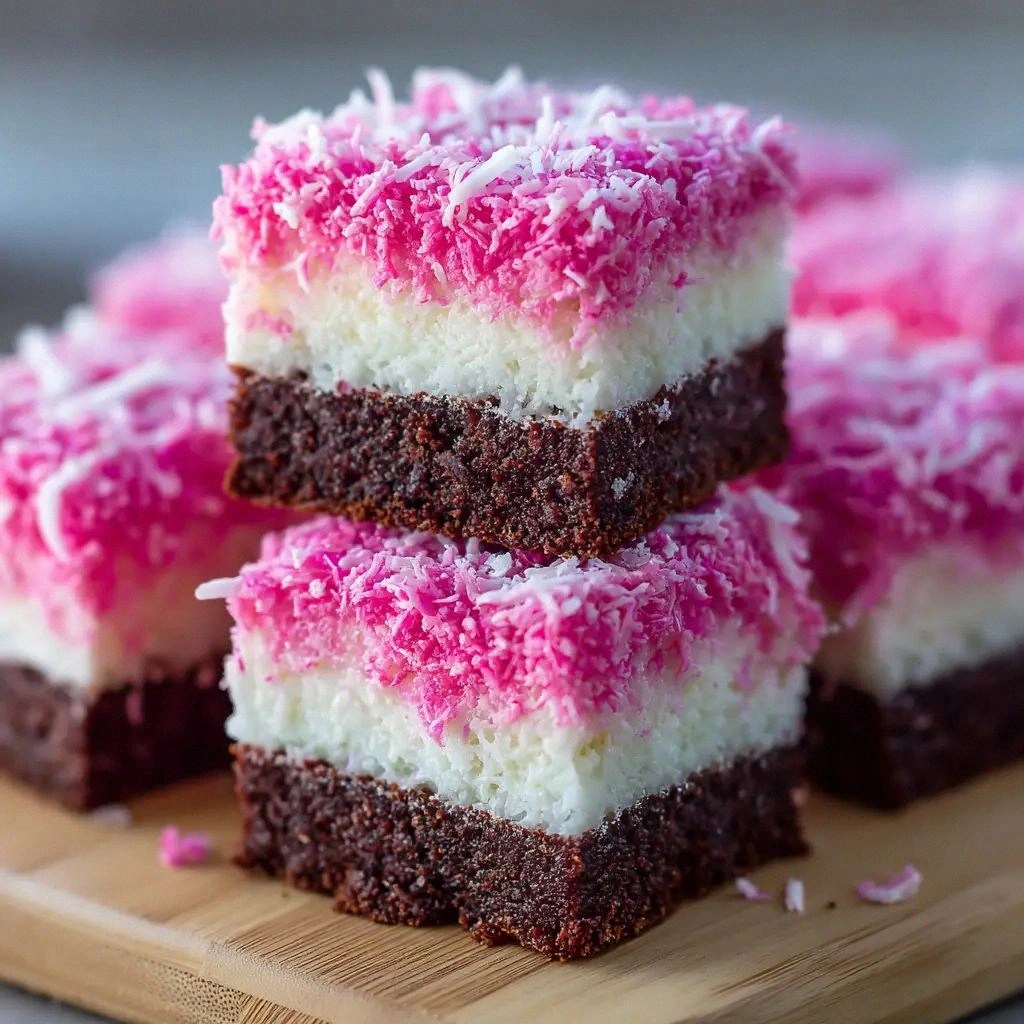
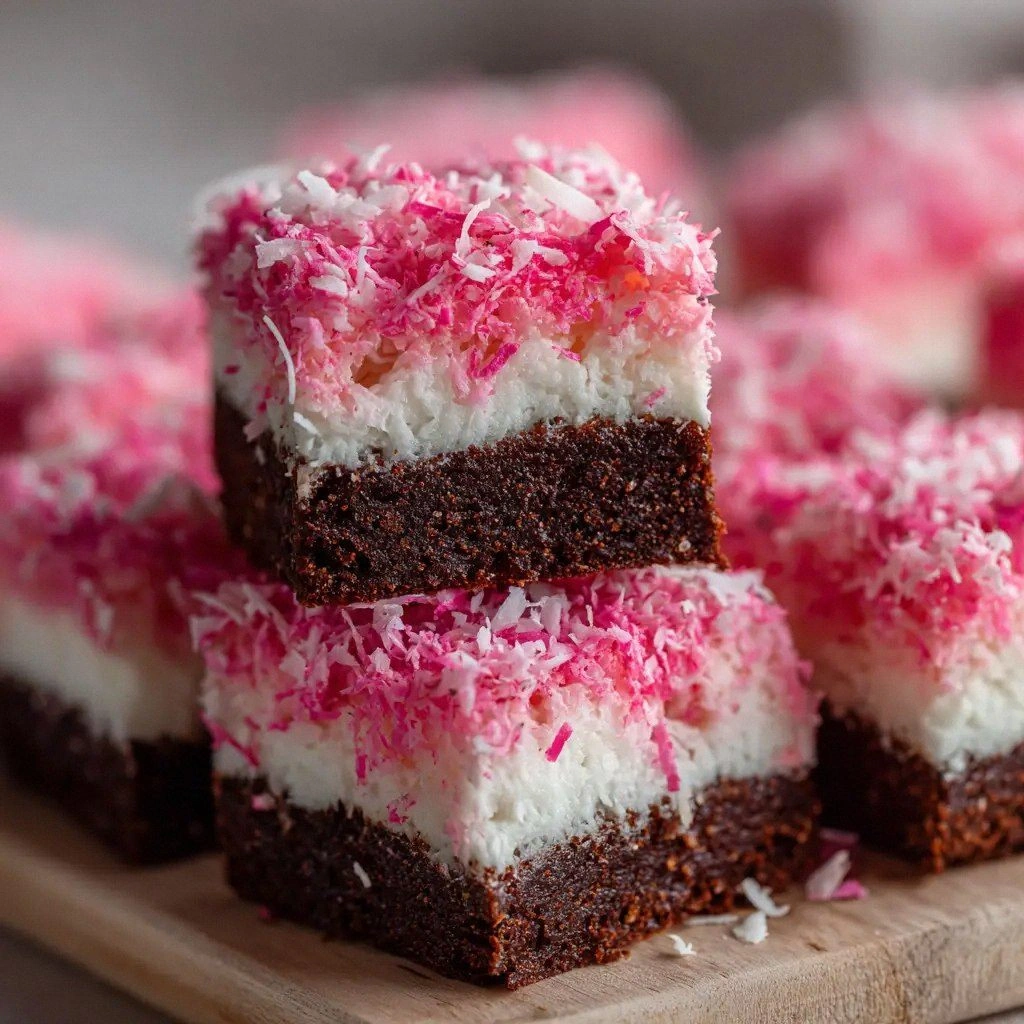
What makes this version of the pink coconut snowball cake bar truly stand out is that it’s not just another cake bar; it’s a symphony of textures and flavors that dance together in perfect harmony. The batter is light and airy, thanks to the combination of baking powder and the gentle folding of eggs, yet it holds together so well that it can be sliced cleanly into bars without crumbling. The marshmallow fluff creates a soft, cloud‑like center that melts in your mouth, while the shredded coconut adds a delightful chew that contrasts beautifully with the smoothness of the frosting. And the pink color—achieved with just a few drops of food coloring—adds a whimsical touch that makes the dessert look like a piece of edible art.
But that’s not all. I dared you to taste this and not go back for seconds, because once you experience the delicate balance of sweet, buttery, and tropical flavors, you’ll be hooked. And trust me, this is hands down the best version you’ll ever make at home. Picture yourself pulling this out of the oven, the whole kitchen smelling incredible, and watching your guests’ faces light up as they take their first bite. Okay, ready for the game‑changer? Let me walk you through every single step — by the end, you’ll wonder how you ever made it any other way.
What Makes This Version Stand Out
- Lightness: The batter’s airy texture is achieved through a careful balance of baking powder and gentle mixing, ensuring each bite feels like a cloud rather than a dense cake.
- Texture: The combination of marshmallow fluff and shredded coconut delivers a delightful contrast—soft, melt‑in‑your‑mouth fluff paired with a satisfying chew.
- Visual Appeal: A subtle pink blush, achieved with only a few drops of food coloring, turns an ordinary dessert into a playful, Instagram‑ready centerpiece.
- Flavor Balance: The vanilla and toasted coconut flavors are perfectly balanced, with no single ingredient overpowering the others.
- Make‑Ahead Friendly: Once baked, these bars store beautifully for up to a week, and they can be frozen for longer preservation without losing flavor.
- Accessibility: The recipe uses common pantry staples—no exotic ingredients or specialty equipment required—making it a go‑to dessert for any kitchen.
Alright, let’s break down exactly what goes into this masterpiece…
Inside the Ingredient List
The Flavor Base
At the heart of the pink coconut snowball cake bar lies a simple yet powerful flavor base. The combination of all-purpose flour, granulated sugar, baking powder, and a pinch of salt creates a neutral canvas that allows the other flavors to shine. The flour provides structure, while the sugar contributes sweetness and a slight caramelization during baking. Baking powder is the secret to that airy lift, and the salt balances the sweetness, preventing the dessert from tasting cloying. If you skip any of these, you’ll end up with a dense, flat cake that lacks the signature lightness.
The Texture Crew
Texture is where this recipe truly excels. Unsalted butter, whole milk, eggs, and vanilla extract work together to create a tender crumb. The butter melts into the batter, infusing richness, while the milk adds moisture and helps achieve a silky mouthfeel. Eggs act as binders and leavening agents, giving the bars a soft, cake‑like consistency. Vanilla extract, used in two different proportions, layers the flavor profile—one for the batter and one for the frosting—ensuring depth without overpowering. If you’re tempted to use salted butter, you’ll need to adjust the salt level to avoid a salty finish.
The Unexpected Star
The marshmallow fluff is the unexpected star that transforms a simple cake bar into a dreamy, cloud‑like treat. Its airy texture melts instantly, creating a center that feels like a sweet, fluffy surprise. Marshmallow fluff also helps bind the coconut together, giving the bars a cohesive structure. If you can’t find marshmallow fluff, a light, sweetened whipped cream can serve as a substitute, though the texture will be slightly different. Another alternative is to use a small amount of gelatin to stabilize the fluff if you prefer a firmer center.
The Final Flourish
The final flourish of this dessert comes from the powdered sugar frosting and the shredded coconut. Powdered sugar, combined with vanilla extract and a splash of milk, creates a smooth, glossy glaze that coats the bars like a delicate frosting. The shredded coconut adds a tropical crunch and a subtle nutty flavor that complements the sweet frosting. Food coloring, though used sparingly, adds a gentle pink hue that makes the bars visually striking. If you prefer a stronger color, you can increase the drops, but be careful not to overpower the delicate flavor profile.
Everything’s prepped? Good. Let’s get into the real action…
The Method — Step by Step
- Preheat the oven to 350°F (175°C) and line a 9x13 inch baking pan with parchment paper, leaving a few inches of paper hanging over the sides for easy removal. This will prevent sticking and make cleanup a breeze. While the oven heats, gather all your ingredients so you’re not scrambling for a pinch of sugar mid‑mix.
- In a large mixing bowl, whisk together the flour, granulated sugar, baking powder, and salt. This dry blend ensures that the leavening agent is evenly distributed, giving the batter a consistent rise. If you prefer a finer crumb, sift the dry ingredients before whisking.
- In a separate saucepan, melt 1/2 cup of unsalted butter over low heat. Once melted, remove from heat and stir in the whole milk. Let the mixture cool slightly to avoid cooking the eggs when you add them later. This butter‑milk blend adds richness and moisture, creating a silky batter.
- Add the melted butter mixture to the dry ingredients and whisk until just combined. The batter should be slightly lumpy; over‑mixing will develop gluten and make the bars tough. This is a good moment to add the first 2 teaspoons of vanilla extract, which will infuse the batter with a subtle warmth.
- In a separate bowl, beat the 2 large eggs until the whites are just set. Gently fold the eggs into the batter, being careful not to over‑whisk. The eggs act as both binder and leavening agent, giving the bars a tender crumb.
- Now it’s time to add the star—7 ounces of marshmallow fluff. Fold it in until evenly distributed. This step is crucial; if you mix too aggressively, the fluff will lose its airy structure, resulting in a denser center.
- Fold in the shredded coconut, ensuring it’s evenly coated. The coconut adds crunch and a subtle tropical flavor that balances the sweetness. Watch for the color change as the batter takes on a light pink hue.
- Pour the batter into the prepared pan and smooth the top with a spatula. Tap the pan gently on the counter to release any air bubbles and create an even surface. This will help the bars bake uniformly.
- Bake for 30 minutes, or until the edges are golden brown and a toothpick inserted into the center comes out clean. The aroma of toasted coconut and vanilla will fill your kitchen, signaling that the bars are ready.
- Remove from the oven and let the cake cool in the pan for 10 minutes before transferring it to a wire rack to cool completely. This rest period allows the bars to set, making them easier to cut cleanly.
- While the cake cools, prepare the frosting: In a medium bowl, whisk together 3 cups powdered sugar, 1 teaspoon vanilla extract, and 2 tablespoons whole milk until smooth. If the frosting is too thick, add a splash more milk until you reach a spreadable consistency.
- Spread the frosting evenly over the cooled bars, ensuring each bar gets a generous coating. The frosting should set quickly, so work efficiently. The glossy finish will make the bars look like they’ve been dipped in a sweet glaze.
- Finally, drizzle a few drops of pink food coloring over the frosting and gently swirl with a toothpick. The color will spread, creating a subtle gradient that adds visual intrigue without overpowering the flavor.
- Slice into bars using a sharp knife, wiping it clean between cuts for straight edges. Serve immediately or cover with plastic wrap and refrigerate for up to 7 days.
That’s it — you did it. But hold on, I’ve got a few more tricks that’ll take this to another level…
Insider Tricks for Flawless Results
The Temperature Rule Nobody Follows
Most bakers think a higher oven temperature always yields a better rise, but that’s not the case for cake bars. Baking at 350°F (175°C) allows the batter to rise slowly, creating a tender crumb. If you push the temperature up to 375°F, you’ll risk a crisper exterior and a dense interior. I’ve tried both, and the difference is like comparing a soft cloud to a stone.
Why Your Nose Knows Best
When the cake is baking, the scent of toasted coconut and vanilla will fill the room. Trust that aroma as a cue; if it’s strong and sweet, the bars are likely done. A quick visual check of the edges will confirm it’s golden brown. Relying on your nose saves you from over‑baking, which can dry out the bars.
The 5-Minute Rest That Changes Everything
After you pull the cake from the oven, let it rest in the pan for 10 minutes before moving it to a wire rack. This rest period allows the interior to set, preventing the bars from breaking apart when you cut them. I’ve seen bars crumble when they’re sliced too early, so this small step is a game‑changer.
Frosting Consistency Matters
The frosting should be thick enough to hold its shape but still spreadable. If it’s too runny, it will soak into the bars and make them soggy. If it’s too thick, it will be difficult to spread evenly. A good rule of thumb is to add milk one tablespoon at a time until you reach the desired consistency.
Coloring Techniques
Instead of drizzling food coloring, you can mix it into the frosting. This creates a uniform color throughout each bar, giving a more polished look. If you prefer a subtle gradient, use the drizzle method and swirl with a toothpick for an artistic finish.
Creative Twists and Variations
This recipe is a playground. Here are some of my favorite ways to switch things up:
Nutty Crunch
Swap the shredded coconut for finely chopped toasted almonds or pecans. The nutty crunch adds a savory contrast to the sweet frosting, and the toasted flavor pairs wonderfully with vanilla.
Chocolate Swirl
Fold in 1/2 cup of melted dark chocolate into the batter before baking. The chocolate will create a subtle swirl when the frosting is applied, giving the bars a decadent look.
Berry Burst
Add 1 cup of fresh raspberries or blueberries to the batter before baking. The berries will burst with juice as you bite, adding a tart contrast to the sweet base.
Minty Fresh
Replace the vanilla extract with 1 teaspoon of peppermint extract. The minty flavor will give the bars a refreshing twist, perfect for summer parties.
Spiced Coconut
Sprinkle 1/2 teaspoon of ground cardamom or cinnamon into the batter. The warm spices will add depth and complexity, making the dessert feel cozy and comforting.
Storing and Bringing It Back to Life
Fridge Storage
Wrap the bars tightly in plastic wrap and store them in an airtight container in the refrigerator for up to 7 days. The frosting will stay firm, and the bars will remain moist.
Freezer Friendly
For longer storage, place the bars in a freezer‑safe container or zip‑top bag, ensuring you remove as much air as possible. They can be frozen for up to 3 months. When ready to eat, thaw at room temperature for 30 minutes.
Best Reheating Method
To revive frozen bars, microwave them on low power for 10–15 seconds. If the frosting feels too hard, add a tiny splash of water before reheating to create steam, which will restore the frosting’s smoothness.