It all started on a rainy October afternoon when I attempted to bake a batch of “just‑any” pumpkin muffins to impress a friend who claimed she could tell the difference between a good pumpkin dessert and a bland one from a mile away. I whisked, I folded, I over‑mixed, and the result was a soggy, crumbly mess that could barely hold a spoon. I stared at the kitchen counter, the smell of burnt sugar hanging in the air, and thought, “There has to be a better way.” That moment of failure sparked a daring promise to myself: create the ultimate pumpkin bar that would make even the most skeptical pumpkin‑hater swoon.
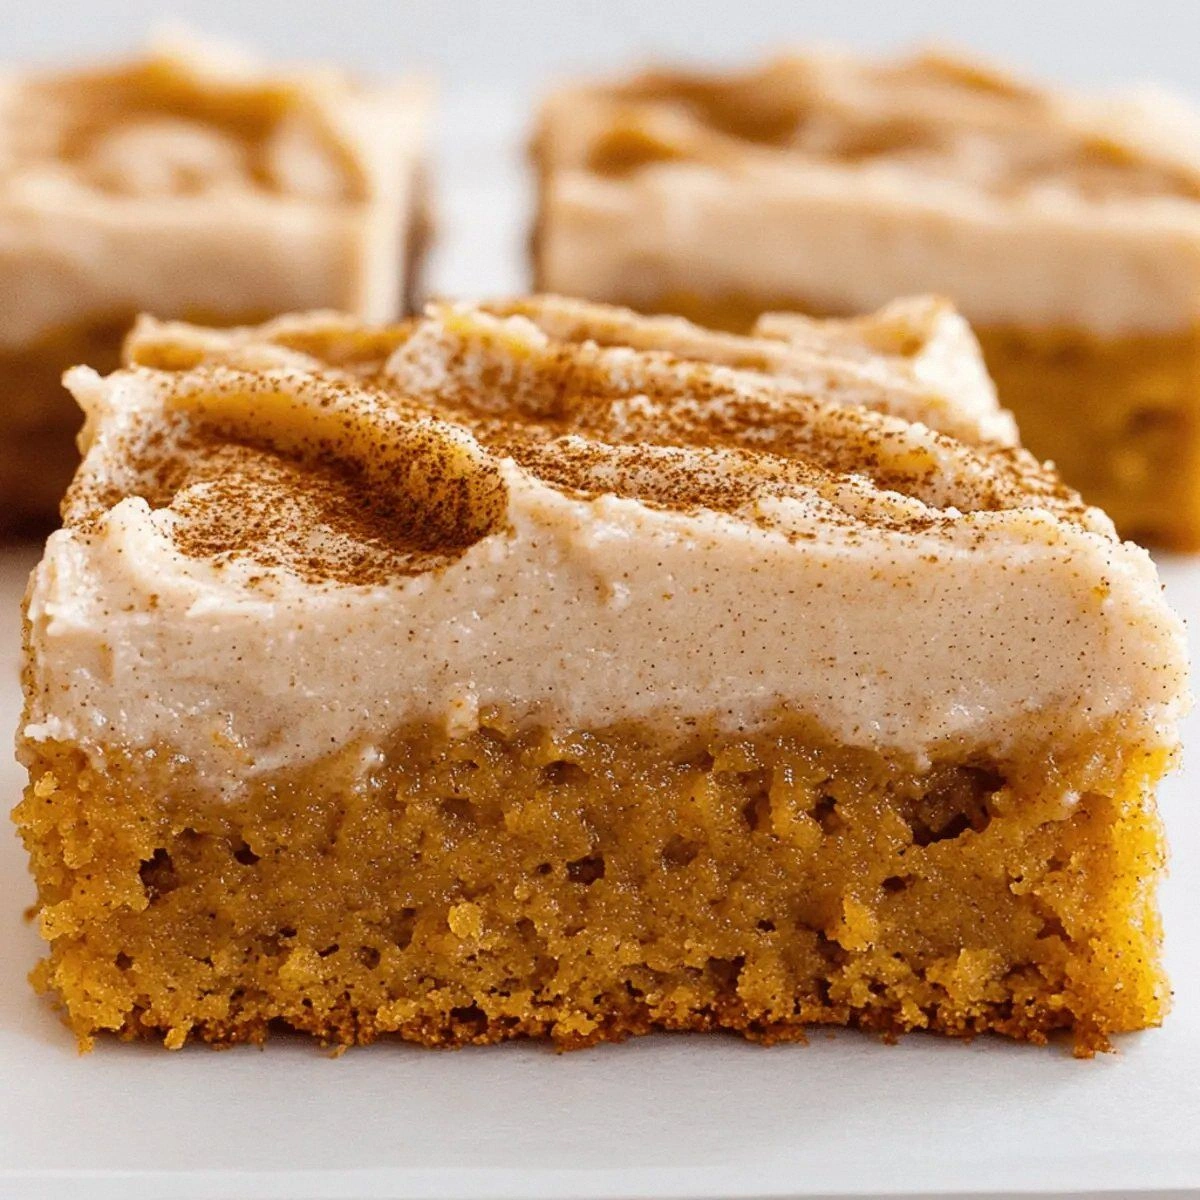
Picture this: the oven door swings open, a wave of warm spices and caramelized pumpkin rushes out, and the bars sit in the pan like golden treasure chests. The crust is buttery and slightly crisp at the edges, the interior is moist and spiced just right, and the crown? A silky brown‑sugar frosting that glistens like a sunrise over a maple forest. The first bite delivers a symphony—crunch, chew, sweet, and a hint of earthiness that makes you think of walking through a leaf‑strewn path on a perfect fall day. I dare you to taste this and not go back for seconds; it’s that good.
Most pumpkin bar recipes get the texture wrong—either they’re dry as a desert or soggy enough to need a paper towel. This version fixes that by balancing the fat from butter with the natural moisture of pumpkin puree, and by using baking soda for a gentle lift that keeps the crumb tender without turning it into a cake. I also threw in a secret weapon: a dash of fine sea salt that amplifies the sweetness and a double‑dose of light brown sugar that gives the frosting a caramel‑kissed depth you won’t find anywhere else. The result? Hands down the best version you’ll ever make at home.
And here’s the kicker: I’m not just handing you a recipe; I’m spilling the kitchen hacks that turned a simple mistake into a masterpiece. From the moment you preheat the oven to the final swirl of frosting, each step is a game‑changer. Okay, ready for the game‑changer? Let me walk you through every single step — by the end, you’ll wonder how you ever made it any other way.
What Makes This Version Stand Out
- Flavor Explosion: The combination of pumpkin, warm spices, and brown‑sugar frosting creates a layered taste that evolves with each bite, delivering sweet, spicy, and buttery notes all at once.
- Texture Harmony: A crisp edge gives way to a moist, tender crumb, while the frosting adds a creamy, melt‑in‑your‑mouth finish that’s neither too thick nor too runny.
- Simplicity Meets Sophistication: Only pantry staples are needed, yet the final product feels like something you’d order at a high‑end bakery.
- Ingredient Quality: Using real pumpkin puree (not the canned stuff with added sugars) and light brown sugar ensures natural sweetness and depth without artificial aftertaste.
- Crowd‑Pleaser Factor: Whether it’s a family gathering, a potluck, or a quiet night in, these bars disappear fast—trust me, I’ve watched entire trays vanish in minutes.
- Make‑Ahead Magic: The bars keep beautifully in the fridge, and the frosting stays glossy, so you can prep them a day ahead and still enjoy fresh‑baked vibes.
- Versatile Base: The recipe can be tweaked for gluten‑free, vegan, or even pumpkin‑spice latte‑infused variations without losing its core charm.
- Visual Wow Factor: The frosting’s caramel hue and the dusting of cinnamon on top make these bars Instagram‑ready without any extra effort.
Inside the Ingredient List
The Flavor Base
Pumpkin puree is the heart of this bar. It brings natural moisture, subtle sweetness, and that unmistakable earthy aroma that screams autumn. If you substitute canned pumpkin, look for a brand that lists only pumpkin and nothing else—no added sugars or spices, or you’ll end up with a flavor clash. For a fresher taste, you can roast a small sugar pumpkin, scoop out the flesh, and blend it yourself; the extra effort pays off in a richer, more vibrant color.
The Texture Crew
Unsalted butter, split into two portions, is the secret to the perfect crumb. The first cup creates a creamy base that holds the batter together, while the half‑cup in the frosting adds silkiness without making it greasy. Light brown sugar, used in both the bar and the frosting, contributes a caramel‑like depth that regular granulated sugar can’t achieve. If you’re out of brown sugar, a tablespoon of molasses mixed into white sugar works as a quick fix.
The Unexpected Star
Fine sea salt might seem like a background player, but a pinch (or half a teaspoon) amplifies every other flavor, turning sweet into complex. Baking soda is the quiet lift‑off crew; it reacts with the pumpkin’s acidity to create tiny air pockets that keep the bars tender. Ground cinnamon, ginger, and nutmeg form the classic pumpkin spice trio—don’t skimp on them, or the bars will taste flat. If you love heat, a pinch of cayenne can add a surprising kick that balances the sweetness.
The Final Flourish
The frosting’s star is powdered sugar, which dissolves into a cloud‑like glaze that sets just enough to hold its shape yet remains soft enough to bite through. Milk or cream adjusts the frosting’s consistency; I prefer a splash of heavy cream for a richer mouthfeel, but any milk works. A second teaspoon of vanilla extract ties the whole thing together, echoing the vanilla in the bar batter and creating a cohesive flavor loop.
Everything's prepped? Good. Let's get into the real action...
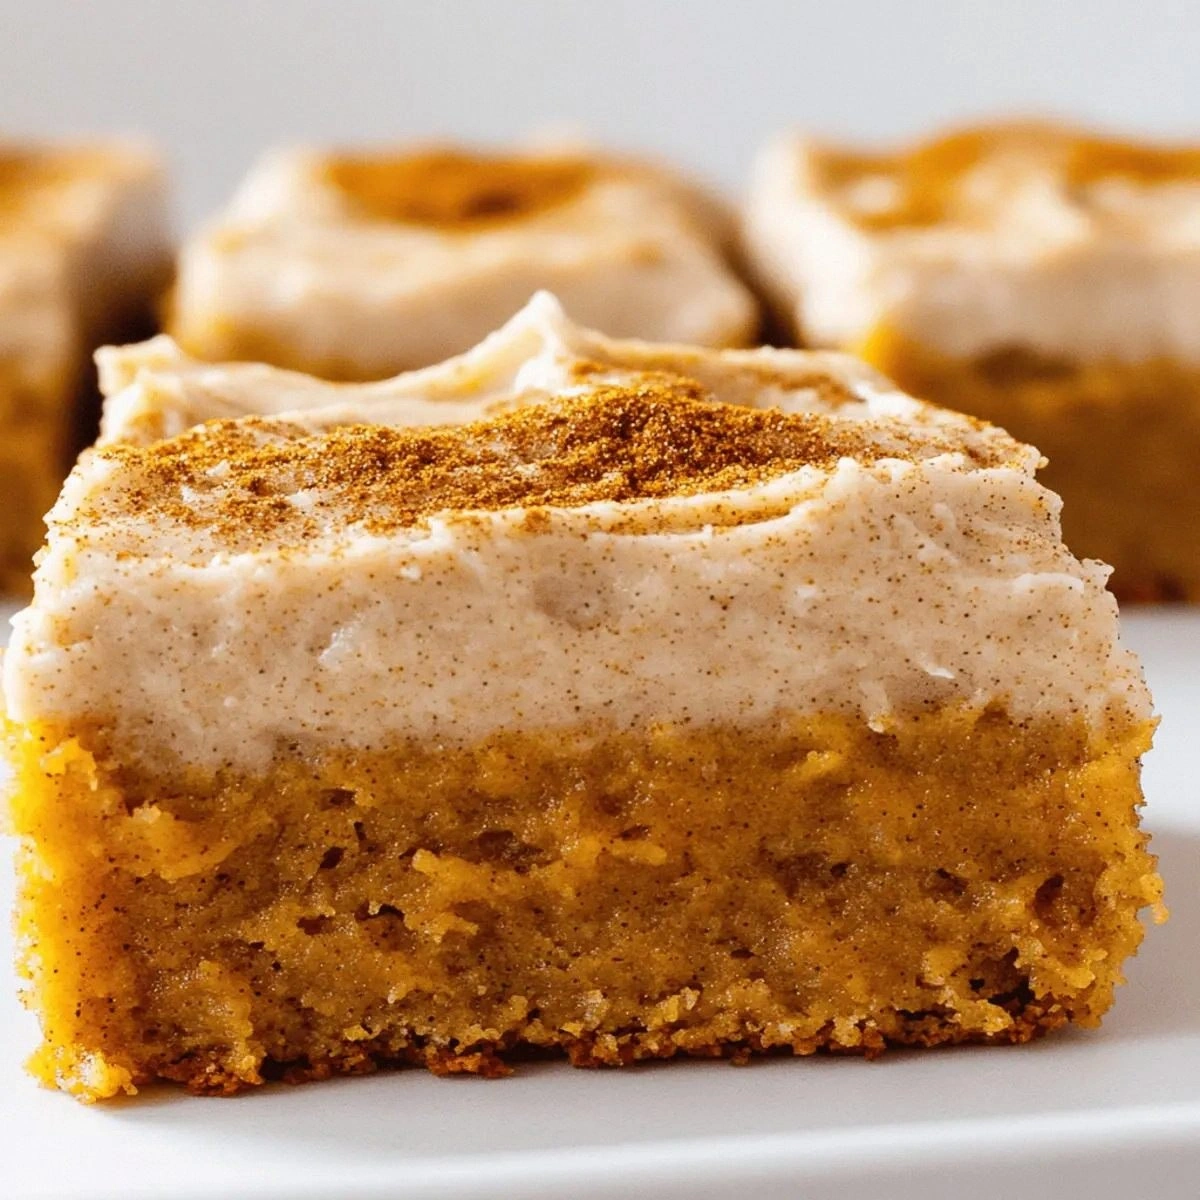
The Method — Step by Step
Preheat your oven to 350°F (175°C) and line a 9‑by‑13 inch baking pan with parchment paper, letting the edges hang over for easy removal later. While the oven warms, give the butter a quick 10‑minute chill in the fridge; this little pause creates a flaky texture later on. Power transition: Okay, ready for the game‑changer?
In a large mixing bowl, cream together 1 cup unsalted butter and 1 cup light brown sugar until the mixture is pale, fluffy, and smells like caramel on a summer road trip. This should take about 3‑4 minutes on medium speed—don’t rush it, the air you incorporate now is what keeps the bars from turning dense.
Add the large egg and 1 teaspoon vanilla extract to the creamed butter, beating just until combined. The batter should look glossy, not curdled; if it looks too thick, a splash of milk (about a tablespoon) can loosen it without affecting flavor.
Stir in 1 cup pumpkin puree, ensuring it’s fully incorporated. You’ll notice the batter turning a beautiful orange hue—this is the moment the kitchen starts to smell like a pumpkin patch after a rainstorm.
Kitchen Hack: Use a rubber spatula to scrape the sides of the bowl; this ensures every speck of pumpkin is folded in, preventing pockets of dry dough.In a separate bowl, whisk together 1 cup all‑purpose flour, 1 teaspoon ground cinnamon, 0.5 teaspoon ground ginger, 0.25 teaspoon ground nutmeg, 1 teaspoon baking soda, and 0.5 teaspoon fine sea salt. This dry mix is the backbone of the bar’s structure; the soda reacts with the pumpkin’s natural acidity to give a gentle rise.
Gradually add the dry ingredients to the wet pumpkin mixture, folding gently until just combined. Over‑mixing here will develop gluten and lead to a tougher bar, so stop as soon as you no longer see flour streaks.
Spread the batter evenly in the prepared pan, smoothing the top with an offset spatula. The edges should be slightly thicker—they’ll turn into the coveted crisp border we all love. Slide the pan into the oven and bake for 20‑25 minutes, or until a toothpick inserted near the center comes out with just a few moist crumbs attached.
- While the bars bake, whip up the frosting. In a medium bowl, beat 0.5 cup unsalted butter until creamy, then gradually add 1 cup light brown sugar, beating until the mixture is light and fluffy (about 2 minutes).Watch Out: Do not open the oven door before the 15‑minute mark; a sudden temperature drop can cause the bars to sink in the middle.
Slowly sift in 2 cups powdered sugar, mixing on low speed to avoid a sugar cloud explosion. Once incorporated, add 1 teaspoon vanilla extract and 2 tablespoons milk or cream, beating on high until the frosting is smooth, glossy, and holds soft peaks. This is the moment of truth—if the frosting is too runny, add a tablespoon more powdered sugar; if it’s too stiff, drizzle in a tad more milk.
When the bars are done, let them cool in the pan for 10 minutes, then lift them using the parchment overhang and transfer to a wire rack. While they’re still warm (but not hot), spread the frosting generously over the top, allowing it to melt slightly into the bars for that perfect “kiss” of glaze. Let the frosting set for about 15 minutes before slicing.
That's it — you did it. But hold on, I've got a few more tricks that'll take this to another level...
Insider Tricks for Flawless Results
The Temperature Rule Nobody Follows
Never bake pumpkin bars straight from the fridge. Let the batter sit at room temperature for 10‑15 minutes before sliding it into the oven; this ensures even baking and prevents the edges from over‑crisping while the center stays gummy. I once tried to rush the process and ended up with a bar that looked like a burnt pancake on the bottom and a raw batter on top—lesson learned.
Why Your Nose Knows Best
Trust the aroma as your ultimate doneness cue. Around the 20‑minute mark, you’ll notice a sweet, nutty perfume wafting through the kitchen, and the edges will start pulling away from the pan. If you smell a faint caramel note, that’s your signal to pull the pan out—overbaking turns the brown‑sugar frosting into a hard crust.
The 5‑Minute Rest That Changes Everything
After removing the bars from the oven, let them rest uncovered for exactly five minutes before frosting. This short pause lets the steam escape, preventing the frosting from sliding off and creating a glossy, set finish. Skipping this step makes the frosting melt into a soupy mess that looks more like a glaze gone rogue.
Frosting Consistency Hack
If you prefer a thicker frosting that holds its shape for piping, swap the 2 tablespoons of milk for heavy cream and add an extra quarter cup of powdered sugar. The added fat creates a richer texture that can be piped into decorative swirls, turning a simple bar into a show‑stopper.
Pan Choice Matters
A light‑colored metal pan distributes heat more evenly than dark, non‑stick pans, which can cause the edges to brown too quickly. If you only have a dark pan, lower the oven temperature by 10°F and add an extra 5 minutes to the bake time to compensate.
Creative Twists and Variations
This recipe is a playground. Here are some of my favorite ways to switch things up:
Maple‑Pecan Crunch
Stir ½ cup chopped toasted pecans into the batter and drizzle a tablespoon of pure maple syrup over the frosting before it sets. The nuts add a buttery crunch while the maple deepens the caramel notes, making the bars perfect for holiday brunches.
Chocolate Swirl
Melt ½ cup dark chocolate and swirl it into the frosting just before spreading. The bitter chocolate contrasts the sweet brown‑sugar glaze, creating a sophisticated flavor pairing that will wow coffee‑drinkers.
Spiced Apple Fusion
Fold in 1 cup finely diced, lightly sautéed apples (with a pinch of cinnamon) into the batter. The apples add a juicy burst and a subtle tartness that balances the richness of the butter.
Vegan Velvet
Replace butter with equal parts coconut oil, use a flax‑egg (1 tbsp ground flaxseed + 3 tbsp water) instead of the large egg, and swap milk for almond milk in the frosting. The bars retain their moist crumb while being fully plant‑based.
Gluten‑Free Goodness
Use a 1‑to‑1 gluten‑free flour blend in place of all‑purpose flour. Add a teaspoon of xanthan gum to mimic the elasticity of gluten, and you’ll get the same tender texture without any wheat.
Pumpkin Latte Infusion
Dissolve 1 tablespoon instant espresso powder and 1 teaspoon pumpkin spice in the milk before adding it to the frosting. The coffee undertone adds depth and turns the bars into an after‑dinner treat that pairs beautifully with a glass of cold milk.
Storing and Bringing It Back to Life
Fridge Storage
Place the cooled, frosted bars in an airtight container and store them in the refrigerator for up to five days. The frosting stays glossy, and the bars remain moist thanks to the sealed environment.
Freezer Friendly
Wrap each bar individually in plastic wrap, then place them in a freezer‑safe zip‑top bag. They’ll keep for up to three months. When you’re ready to enjoy, let them thaw at room temperature for 30 minutes, then pop them in the microwave for 15 seconds to revive the softness.
Best Reheating Method
Preheat a low oven (300°F/150°C) and warm the bars for 8‑10 minutes. Add a tiny splash of water to the pan before reheating; the steam gently revives the crumb without drying it out, and the frosting becomes velvety again.