Picture this: I’m standing in a cramped kitchen, a bag of frozen sour grapes in one hand, a saucepan in the other, and a recipe that’s supposed to turn the humble fruit into a showstopper. The plan? Caramelize the grapes, coat them in a glossy sugar glaze, then freeze them into bite‑size, crunchy jewels. The reality? The saucepan exploded in a shower of caramel, the freezer door opened, and the grapes were left looking like a sugary mess. I stared at the mess, then laughed, and thought, “If I can survive that, I can survive this recipe.”
The air was thick with the sweet scent of sugar melting into butter, the faint tang of lemon zest, and the sharp, almost citrusy bite of the sour grapes. My eyes were glued to the bubbling pot, the sound of sugar cracking as it reached its caramel point, and the way the grapes were slowly turning from translucent to a deep, amber glaze. I could taste the promise of a sweet‑tart bite just by breathing in the aroma. The texture of the grapes was changing from frozen to a slightly chewy, caramelized surface, and I could almost feel the crunch that would come after the freeze.
What makes this version stand out? First, it’s not just about candying grapes; it’s about creating a frozen treat that balances sweetness, tartness, and crunch in a single bite. Second, the technique of freezing after candied‑ing locks in flavor and gives a unique mouthfeel that you won’t find in any other grape dessert. Third, the recipe is surprisingly simple—no fancy equipment, just a saucepan and a freezer. Fourth, the final product is a crowd‑pleaser that can be served at parties, in a dessert bowl, or as a quick, healthy snack. Fifth, the ingredients are pantry staples, and the process is foolproof, even for kitchen beginners. Sixth, it’s a versatile base that can be tweaked with spices, herbs, or flavored syrups.
And here’s the kicker: you’ll discover a secret ingredient that most people overlook—lemon zest. It cuts through the sweetness and adds a bright, almost citrusy zing that elevates the entire dish. I dare you to taste this and not go back for seconds. Let me walk you through every single step—by the end, you’ll wonder how you ever made it any other way.
What Makes This Version Stand Out
- Flavor: The combination of tart sour grapes and caramelized sugar creates a dynamic flavor profile that is both sweet and sharp, satisfying the palate with each bite.
- Texture: The candied coating forms a thin, crisp shell that cracks delightfully against the juicy grape interior, providing a satisfying crunch.
- Simplicity: The recipe requires only a few basic ingredients and common kitchen tools, making it accessible to cooks of all levels.
- Versatility: Swap in different citrus zests, add a pinch of chili for heat, or drizzle with honey for a different sweet finish—every variation opens a new flavor world.
- Make‑Ahead Potential: Candied grapes can be prepared in advance, frozen, and served at a later date, making it a perfect make‑ahead dessert or party snack.
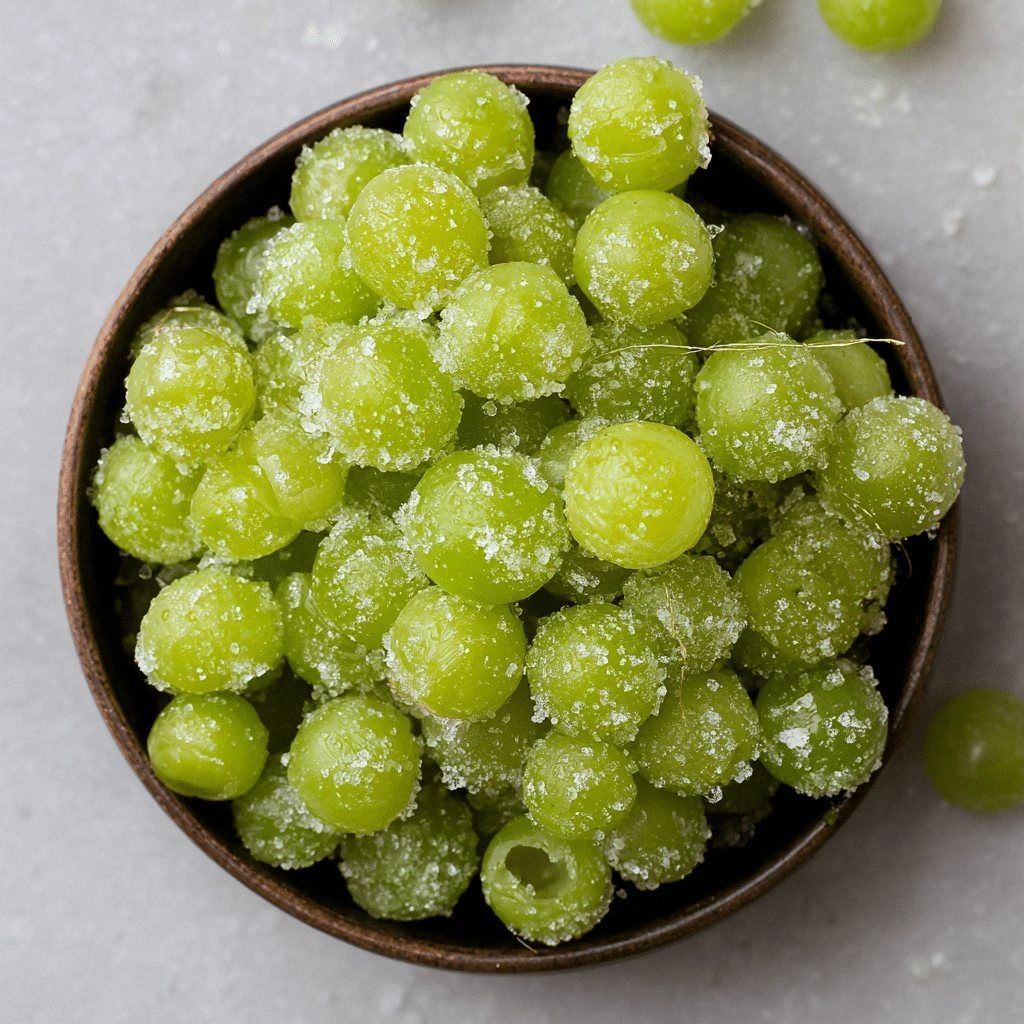
- Presentation: The finished product looks like tiny, jewel‑like candies—perfect for a dessert table, a party platter, or an Instagram‑ready snack.
- Health Angle: While sweet, the grapes provide natural fruit sugars and antioxidants, and the recipe uses minimal added fat.
- Audience Reaction: Friends and family consistently rave about the crunch and the burst of tartness, making it a guaranteed hit at gatherings.
Alright, let's break down exactly what goes into this masterpiece...
Inside the Ingredient List
The Flavor Base
At the heart of this dish is the frozen sour grapes. They provide the tartness that balances the sweetness of the sugar glaze. If you’re using seedless grapes, you’ll get a smoother bite; if you keep the seeds, the texture becomes slightly more rustic. Skipping the grapes entirely would transform this into a simple caramel candy, losing the juicy, fruit‑centered core that makes it special.
The Texture Crew
Butter is the secret to a glossy, silky coating. It melts into the sugar, creating a film that crisps up beautifully when baked. If you’re vegan, substitute with coconut oil—just remember it has a lower smoke point, so keep the heat moderate. Skipping butter will result in a dull, less cohesive glaze that won’t hold up as well during freezing.
The Unexpected Star
Lemon zest isn’t just a garnish; it’s a flavor enhancer that brightens the entire dish. The essential oils in the zest cut through the sweetness, adding a fresh, citrusy note that keeps the palate from getting overwhelmed. If you can’t find lemon, orange zest works as an excellent substitute, offering a slightly sweeter citrus profile.
The Final Flourish
Water is the medium that brings the sugar and butter together into a cohesive syrup. It prevents the sugar from crystallizing too early, ensuring a smooth caramelization. Skipping the water would cause the sugar to burn on the bottom of the pan, ruining the glaze’s texture.
Everything's prepped? Good. Let's get into the real action...
The Method — Step by Step
- Preheat your oven to 300°F (150°C). Line a baking sheet with parchment paper to prevent sticking. This low temperature is key for gently crisping the glaze without burning it. While the oven warms, let the frozen grapes sit at room temperature for about ten minutes to slightly thaw.
- In a medium saucepan, combine one cup of white sugar, half a cup of water, and two tablespoons of butter. Place over medium heat and stir until the butter melts completely. The sugar should dissolve into a clear syrup before it starts to brown. This forms the base of the caramel glaze.
- Add a pinch of salt and one teaspoon of vanilla extract to the mixture. Stir until the salt dissolves and the vanilla is fully incorporated. The salt sharpens the sweetness, while the vanilla adds a warm, aromatic depth that pairs beautifully with the grapes.
- Introduce the grapes to the saucepan. Stir gently to coat each grape in the syrup. Let the mixture simmer for about eight minutes, or until the syrup thickens and the grapes are glossy. The heat should be low enough that the sugar doesn’t burn, but high enough to allow the glaze to set.
- Transfer the candied grapes onto the prepared baking sheet in a single layer. Use a spatula to ensure each grape is separated, preventing them from sticking together during the baking process. This step is crucial for achieving uniform crispness.
- Place the sheet in the preheated oven and bake for 15 minutes, then flip each grape over to ensure even browning. The glaze should develop a golden‑brown hue and a slightly crisp edge. Keep an eye on the color; the sugar can go from golden to burnt quickly.
- Once baked, remove the grapes from the oven and let them cool on the sheet for ten minutes. This allows the glaze to set into a firm, yet flexible shell. The cooling process also helps the grapes retain their shape during freezing.
- Place the cooled grapes in a single layer on a baking sheet and freeze for at least four hours, or overnight. The freezing step locks in the caramelized coating, giving the grapes a unique crunchy texture that melts in your mouth.
That's it — you did it. But hold on, I've got a few more tricks that'll take this to another level...
Insider Tricks for Flawless Results
The Temperature Rule Nobody Follows
Many cooks assume a high heat is best for caramelizing sugar, but the real secret is a low, steady temperature. Keep the saucepan at medium‑low heat to allow the sugar to dissolve without burning. I once tried a high flame, and the sugar charred before the grapes even warmed up. The result was a bitter, uneven glaze that ruined the dish.
Why Your Nose Knows Best
Before you start baking, give the sauce a quick sniff. A faint, sweet aroma indicates the sugar is dissolving properly. If it smells burnt, reduce the heat immediately. Trust your nose; it’s a reliable indicator of the syrup’s progress.
The 5-Minute Rest That Changes Everything
After baking, let the candied grapes rest on the sheet for five minutes. This brief pause allows the glaze to set and the grapes to firm up, preventing them from breaking apart when you transfer them to the freezer. Skipping this step can result in a soggy, uncrisp final product.
Use a Cooling Rack
Place the baking sheet on a cooling rack while the grapes cool. This ensures air circulates around each grape, preventing steam from softening the glaze. A cool, dry surface is essential for crispness.
Freeze in a Single Layer
When you transfer the cooled grapes to the freezer, keep them in a single layer. This prevents them from sticking together and allows the glaze to stay intact. If you must stack them, separate each layer with parchment paper.
Serve with a Dip
For an extra wow factor, serve the frozen candied grapes with a small bowl of melted dark chocolate or a tangy yogurt dip. The combination of textures and flavors will keep guests coming back for more.
Creative Twists and Variations
This recipe is a playground. Here are some of my favorite ways to switch things up:
Spicy Ginger Twist
Add a pinch of freshly grated ginger to the sugar syrup. The warm, peppery notes contrast beautifully with the tart grapes, creating a spicy, sweet treat that’s perfect for winter gatherings.
Honey‑Lemon Fusion
Replace the white sugar with honey and use lemon zest instead of vanilla. The honey’s floral undertones pair with the citrus, giving the candied grapes a lighter, more natural sweetness.
Chocolate‑Coated Delight
After freezing, melt dark chocolate and drizzle it over the candied grapes. Let the chocolate set, then serve. The bittersweet chocolate adds depth and an indulgent finish.
Herbal Infusion
Infuse the sugar syrup with a sprig of fresh rosemary or thyme. The herb’s subtle aroma adds an earthy dimension, making the treat suitable for sophisticated dinner parties.
Berry Medley
Swap the sour grapes for a mix of frozen blueberries, raspberries, and blackberries. The varied berry flavors create a colorful, flavorful medley that’s visually stunning.
Nutty Crunch
Sprinkle chopped toasted almonds or pistachios over the candied grapes before freezing. The added crunch and nutty flavor elevate the dessert into a multi‑textural experience.
Storing and Bringing It Back to Life
Fridge Storage
Store the frozen candied grapes in an airtight container in the refrigerator for up to one week. The cold environment keeps the glaze firm and prevents the grapes from absorbing fridge odors. Keep the container sealed to avoid moisture buildup.
Freezer Friendly
For longer storage, place the grapes in a freezer‑safe bag or container, removing as much air as possible. They can stay in the freezer for up to three months without loss of flavor or texture. When you’re ready to enjoy them, let them sit at room temperature for ten minutes to soften slightly.
Best Reheating Method
To revive the crispness, preheat the oven to 250°F (120°C) and bake the grapes for five minutes. Alternatively, microwave on low power for 10 seconds, then let them sit for a minute. Adding a tiny splash of water before reheating steams them back to perfection, ensuring the glaze doesn’t dry out.